

Frontend code changes frequently and, every so often, existing UIs break as a result. To combat breaking code changes, well-managed codebases contain a plethora of unit and integration tests. Testing libraries such as Enzyme and React Testing Library provide tools to check whether a DOM node is rendered with the correct properties, styles, and children.
However, these tests require high levels of maintenance especially when the frontend is rapidly evolving. Engineers may oftentimes forgo frontend tests due to the tiresome burden of upkeep. How can we minimize these upkeep costs while ensuring bug-free UI?
Spend less on test maintenance
Snapshot testing is the answer. Adding and maintaining tests involves manually writing and updating expected values, but with snapshots we avoid that by letting the test auto-generate the expected values.
Snapshots are instances of data produced by your code from a certain point in time, and snapshot tests work by comparing the current and previously saved reference snapshot using a diff algorithm. The test passes if the snapshots match, as no unexpected changes in output are found. If no saved reference snapshot is detected, the test passes and generates a snapshot to be used as the reference snapshot for any future test runs. Updating the reference snapshot can be done by running the test with a flag or replacing the snapshot file.
Serialized data vs. image snapshots
Before I go any further, however, I'd like to point out that there are two types of snapshots: serialized data snapshots and image snapshots. Both approaches involve using a diff algorithm to compare snapshots from two points in time, but there are many differences with pros and cons to each, which we'll be reviewing in this post. The short answer is that it all depends on your use case.
Serialized data snapshot testing
Serialized snapshot testing compares UI represented as serialized data, oftentimes in the form of JSON. It is very flexible due to the ease of generating serialized data snapshots, as it does not require rendering on a browser. This makes it fast to run by not having to wait on builds, spawning a browser, loading webpages, rendering UI components, and driving the UI to an expected state. Flakiness is reduced due to the removal of all the listed factors, and debugging is made easier by stepping into JSON or HTML instead of looking at a PNG file.
Example JSON snapshot:
module.exports = {
  'user input': {
    'successfully types into a text input field': {
      'after typing': {
        tagName: 'input',
        attributes: {
          value: 'kangaroo canyon',
        },
      },
    },
  },
}
Example HTML snapshot:
module.exports = {
  'login page': {
    'login button': {
      1: '<button type="button"  data-cy="login">Login</button>',
    },
  },
}
Image snapshot testing
Image snapshot testing, also known as visual regression testing, compares UI represented as pixels in webpage screenshots. Generating these webpage screenshots requires rendering components on a browser, which makes this form of testing more complicated yet comprehensive. Comparing serialized data snapshots is enough to determine whether a DOM node is rendered with the correct properties, styles, and children, but how do we ensure the visual aspect of our UI remains unchanged?
The question posed earlier is not so simple to answer, as a single webpage contains many moving parts in the form of components. Each component has a potential cascading effect on how the next will visually behave. Adding on to this, when taking the seemingly unpredictable nature of CSS and browser rendering engines into account, it is simply not enough to check if a component has the correct properties and values. Visual regression testing, which involves rendering a UI component on a browser, taking a screenshot, and comparing it to a stored reference screenshot, ensures that we have no unexpected visual changes.
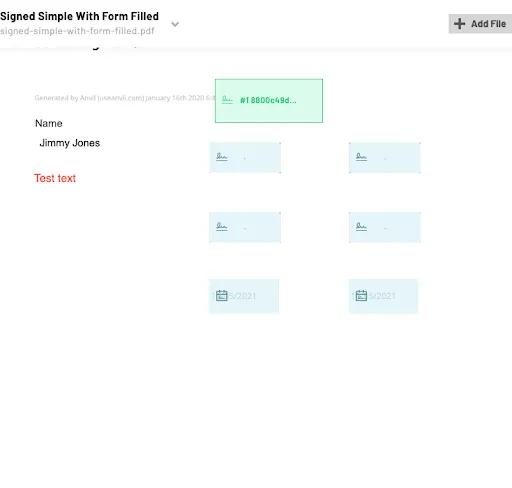
Example image snapshot:
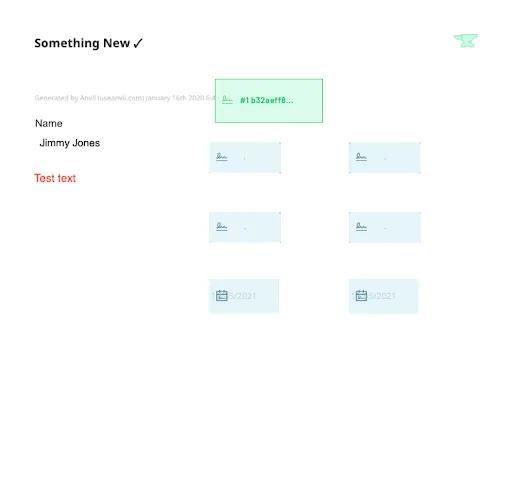
Example diff between snapshots:
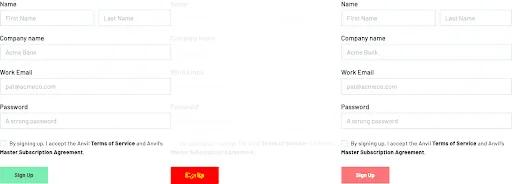 Result from cypress-image-snapshot
Implementation
Snapshot tests can be implemented on many testing frameworks, such as serialized data snapshots with Jest, or image snapshots with Selenium and Puppeteer. But in this blog post, we'll be focusing on the Cypress ecosystem.
We specialize in paperwork automation and PDFs here at Anvil, and image snapshot testing is our preferred way of identifying problems relating to PDFs immediately. We've spent a great deal of time configuring our image snapshot tests, and would like to share some tips and tricks we've learned along the way.
Focus image snapshots on specific elements
To reduce test flakiness, target your image snapshots at specific HTML elements instead of capturing the entire page. You wouldn't want factors like margins and paddings between elements to trigger a test failure. In our case, we're most concerned with a PDF being rendered properly, so let's solely target that and handle other HTML elements by creating separate tests.
The bad way - specfic elements
describe('workflow builder', () => {
  it('PDF section is displayed properly', () => {
    ...
    cy.get('#pdf-section-btn').click()
    cy.document().imageSnapshot()
  })
})
 Changing the margins between components may cause this snapshot test to fail
The better way - specfic elements
describe('workflow builder', () => {
  it('PDF and its fields are displayed properly', () => {
    ...
    cy.get('#pdf-section-btn').click()
    cy.get('#pdf-display').imageSnapshot()
  })

  it('PDF toolbar is displayed properly', () => {
    ...
    cy.get('#pdf-section-btn').click()
    cy.get('#pdf-toolbar').imageSnapshot()
  })

  it('workflow builder header is displayed properly', () => {
    ...
    cy.get('#pdf-section-btn').click()
    cy.get('#workflow-builder-header').imageSnapshot()
  })
})
 Snapshot #1 - PDF display
 Snapshot #2 - PDF toolbar
 Snapshot #3 - workflow builder header
Snapshot cropping is useful
To complement the previous point, make use of the cropping option to zone-in on the area you want to test. For example, you may only care about the header portion of the PDF you are displaying.
cy.get('#pdf-display').imageSnapshot({
  clip: {
    x: 0,
    y: 0,
    width: 800,
    height: 300, // crop off the bottom half of the snapshot
  },
})
Experiment with the error thresholds
Make sure you adjust the diff threshold that decides whether an image snapshot test passes or not. You can set the threshold value however you want depending on how rigorous you want your test to be, but make sure to define your own threshold instead of using the default.
The okay way - error thresholds
cy.get('#pdf-editor').imageSnapshot()
The better way - error thresholds
cy.get('#pdf-editor').imageSnapshot({
  threshold: '0.025',
  thresholdType: 'percent',
})
Utilize cy.scrollTo()
The cy.scrollTo() command is crazy useful for adjusting your viewport for the right image snapshot. For example, an affix component may be partially blocking a component you want to snapshot test. We can fix that by scrolling up or down.
The bad way - cy.scrollTo()
describe('etch template builder', () => {
  it('PDF and its fields are displayed properly', () => {
    ...
    cy.get('#pdf-display').imageSnapshot()
  })
})
 An affix component is blocking the top portion of our PDF display
The better way - cy.scrollTo()
describe('etch template builder', () => {
  it('PDF and its fields are displayed properly', () => {
    ...
    cy.get('#app-container').scrollTo('top')
    cy.get('#pdf-display').imageSnapshot()
  })
})
 We can see everything now. Much better.
Cypress snapshot packages
There are a handful of snapshot testing npm packages available for Cypress. Here's a complete list for you to decide which works best:
Serialized data snapshot testing packages
Data snapshot: @cypress/snapshot
The @cypress/snapshot module introduces the Cypress snapshot() command which serializes the selected UI component.
Data snapshot: cypress-plugin-snapshots
The cypress-plugin-snapshots module provides the toMatchSnapshot() Cypress command which serializes the element the command is chained off of.
Image snapshot testing packages
Image snapshot: cypress-plugin-snapshots
The cypress-plugin-snapshots module has already been mentioned earlier, but I'll mention it again as it provides image snapshot functionality as well. The toMatchImageSnapshot() command can take a screenshot of the entire web document or of a specific element.
Image snapshot: cypress-image-snapshot
The cypress-image-snapshot module introduces the matchImageSnapshot() Cypress command which can take a screenshot of the entire screen or of the chained element.
Image snapshot: cypress-visual-regression
The cypress-visual-regression module adds the compareSnapshot() Cypress command which takes a screenshot of the full screen or of a single HTML element.
Image snapshot: ypress-image-diff
The cypress-image-diff module provides the compareSnapshot() Cypress command which provides functionality similar to that of the above commands.
Summary
We've covered how useful snapshot testing can be and why it is preferred over other forms of testing. And we reviewed the different forms of snapshot tests, along with their pros and cons. We've also gone over some best practices for image snapshot tests. Lastly, some testing packages were listed to help you get started. Ultimately, it is up to you to decide how you wish to test your code, but hopefully this post has helped you in making your first step towards leveraging the strengths of snapshot testing.
We've applied these practices to our code at Anvil, and believe sharing our knowledge helps everyone in creating awesome products. If you have questions or are building something cool with paperwork automation or PDFs, let us know at developers@useanvil.com! We'd love to hear from you.