Webform translations help you easily and instantly localize your Webforms into multiple languages. In this article, we’ll explain how AI Webform Translations work and teach you how to set it up for your own Workflows.
Setting up Webform Translations
Webform translations need to be set up at the individual Webform level. If you have multiple Webforms within your Workflow, you’ll need to turn on translations for each Webform separately.
To turn on Webform translations:
- Navigate to your Workflow editor
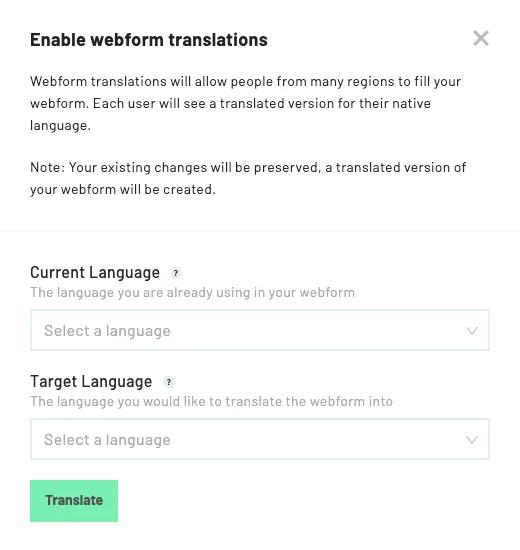
- Click on the Translate button to the top right of the Webform preview

- Select your Current Language and your Target Language

- Translate
Note: Once the current language of your Webform has been set, it cannot be changed
Adding a new language
If your Webform needs to be translated into multiple languages, you can add more languages via the translations menu.
To add a new target language:
- Navigate to your Workflow editor
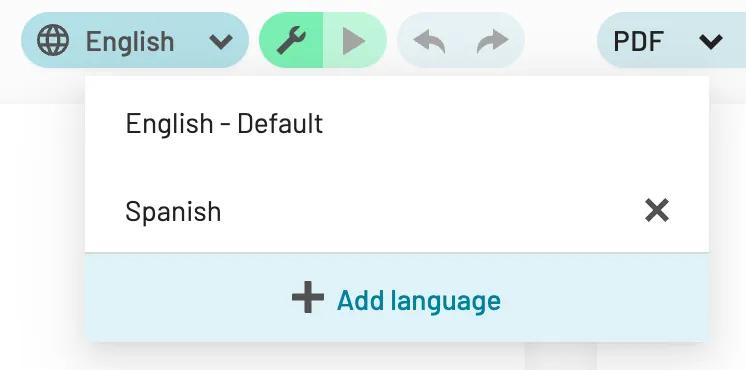
- Click on the language button to the top right of the Webform preview

- By default, your selected current language will be displayed
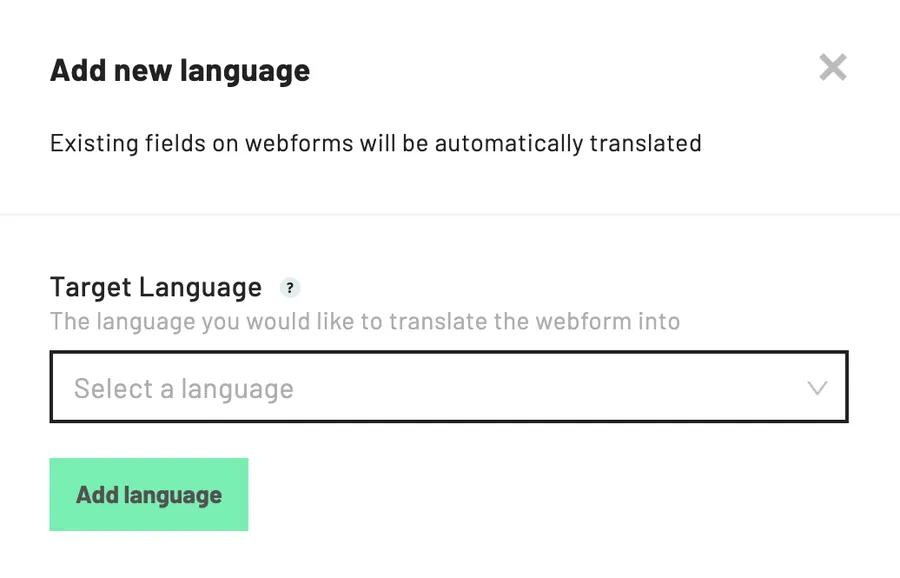
- Select + Add Language

- Select your new target language from the dropdown menu

- Add language
The translations menu also allows you to remove existing target languages. Once removed, the target language will not be available for users viewing your Webform with a browser in that language. By default, they will see your current language instead.
To remove a target language, follow steps 1-2 above. Then locate the language you wish to remove and select the x icon to the right of the language name.

Customizing translations
Webform translations are automatically generated through AI, but if you’d like to add your own customizations to any translation, you are able to do so.
To customize translations:
- Navigate to your Workflow editor
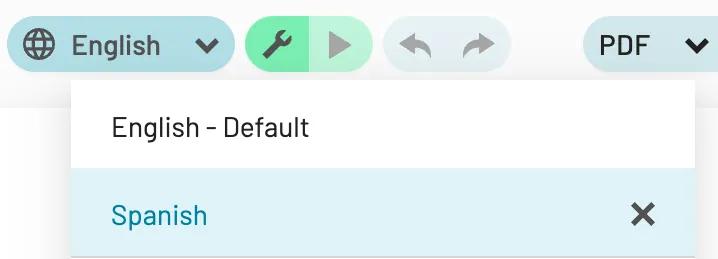
- Click on the language button to the top right of the Webform preview
- By default, your selected current language will be displayed
- Select the target language you want to customize
- Select the specific Webform field you wish to customize
- Make your changes in the field editor panel to the left
Note: Fields with customized translations will include a translation icon next to the field.
To revert your custom translations back to the original AI-generated translation:
- Follow steps 1-4 above
- Click on the translation icon
- Select OK to confirm
Additional notes
Webform translations rely on two components- your Current Language and your Target Language(s).
Current language: The language your Webform is currently in. This serves as the default language for all translations.- All other languages will be translated from your default language. Any text not in your current language will not be translated.
- Any changes you make to your Webform in your default language will automatically be translated into all target languages.
Target language: The language(s) you want your Webform translated into.- Once selected, your Webform will be automatically translated into your target language(s).
- You can customize all translations to better suit your needs.