
Map to a table:
For standard tables where each list item maps to a row and each subfield in the list item corresponds to a column in the table, it is easiest to connect the PDF fields into an array that will automatically assign an index number (e.g. item 0, 1, 2, 3, etc.) that corresponds to the index of the item in the webform list.
How to navigate to the PDF editor
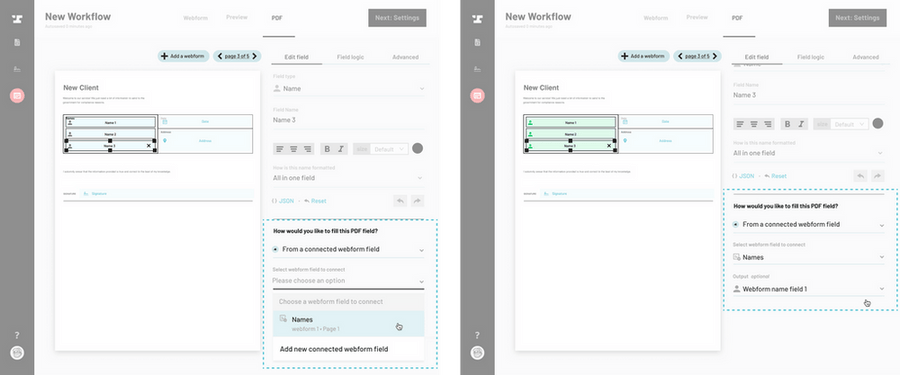
Click on the PDF field that you want to assign to a subfield of the first item in the webform list.
Click the Advanced tab in the field editor panel.
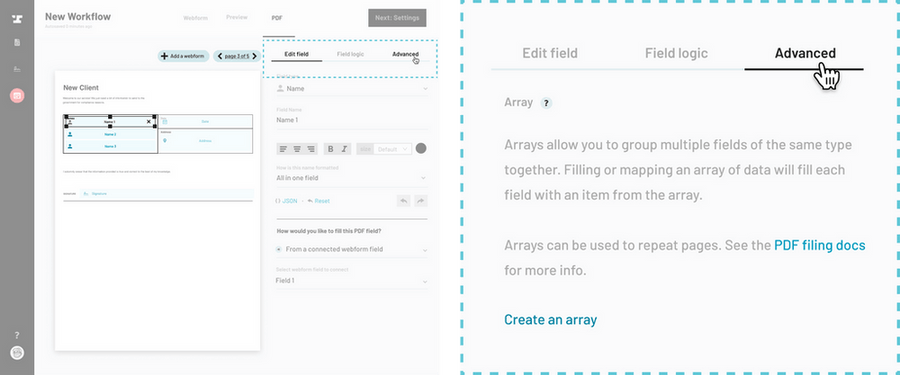
Click Create an array. This will assign this PDF field to the first item’s subfield.
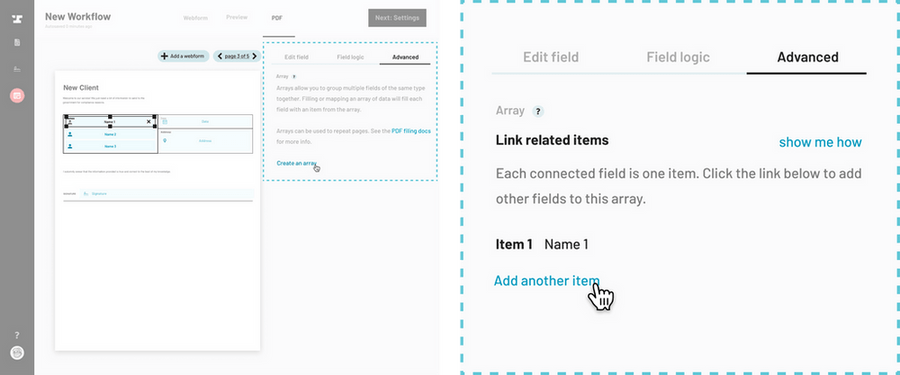
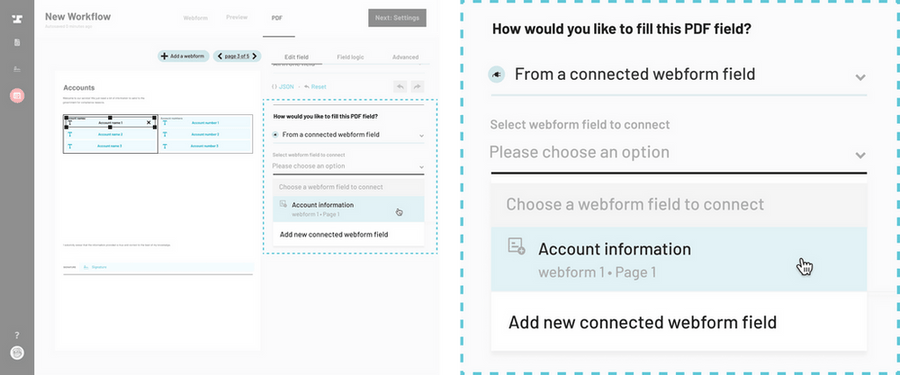
Connect the rest of the subfields of the same type (e.g. account name) in the order you want them filled in.
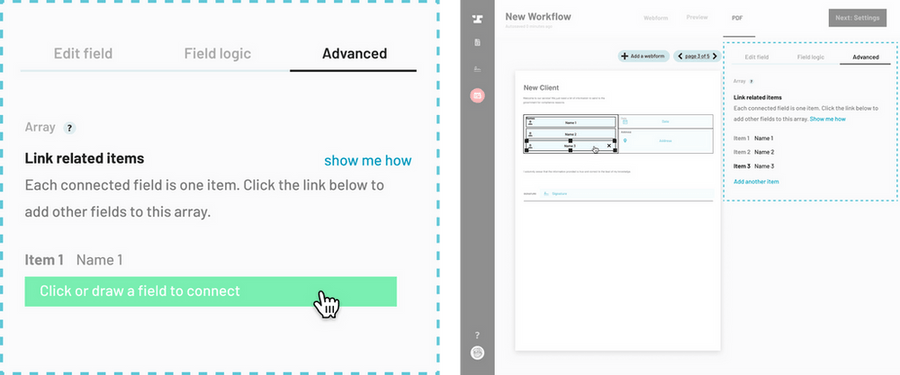
When you have completed connecting all the array items for one subfield, repeat steps for any remaining subfields.
With any of the array fields selected, return to the Edit field tab of the field editor panel.
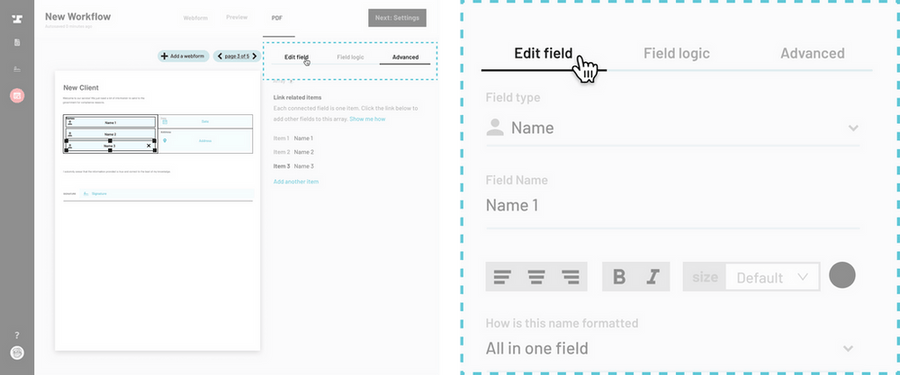
At the bottom of the Edit field tab, select the webform array field you would like to fill the PDF array from. Each field will be automatically assigned the item number in the order you connected the subfields into the array.
Learn more about connecting PDF fields to webform fields
Map across PDF pages:
For assigning list subfields to different areas or pages of a PDF, you can manually assign the index number of the webform list item to an individual PDF field, without creating a PDF array.
How to create a webform list field
How to navigate to the PDF editor
Click on the PDF field that you want to assign to a subfield of the first item in the webform list.
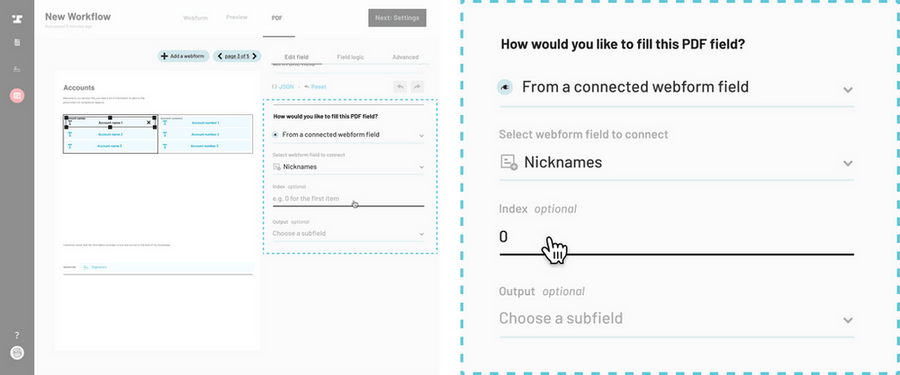
Scroll down to the How would you like to fill this PDF field? section on the Field options panel. Choose From a connected webform field from the dropdown. Then select the previously added webform list field as the field to connect.
Assign an index number to indicate the order of items to map from the webform list. 0 is the first item, 1 is the second, and so on.
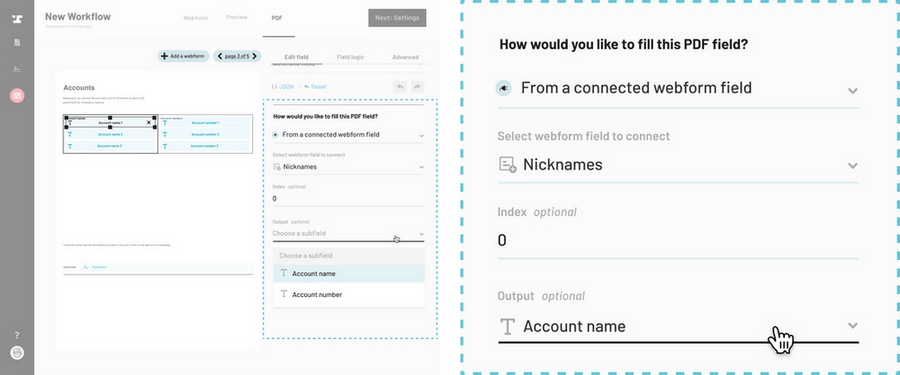
Assign the subfield from the webform list to the selected PDF field.
Repeat for the remaining PDF fields that correspond to the webform list.


