From the Signer editor:
Navigate to the Signer editor.
How to navigate through the Signer editor
Click 'Add a signer'.
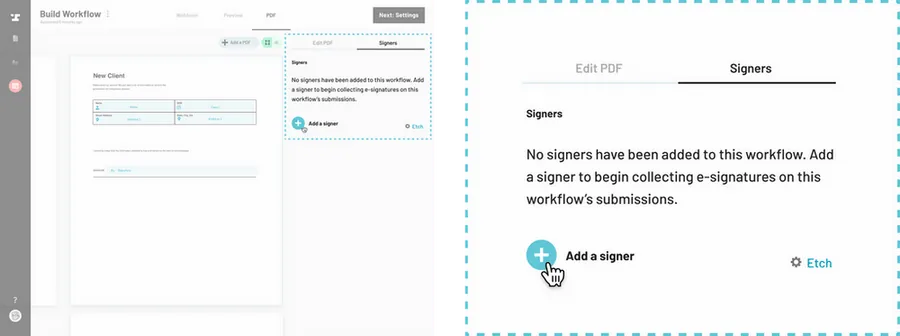
Complete the 'Create signer' form.
1. Signer nickname: The signer nickname only appears in the Workflow editor to help you quickly distinguish your signers i.e. New Client, Cosigner, or Broker. This will default numerically based on how many signers have been added.
2. Signer name: Manually add a signer name or fill from a webform field. By default, the first available webform name field will be selected. If there are no name type fields on the webform, you can add one from the dropdown and choose where it should be added.
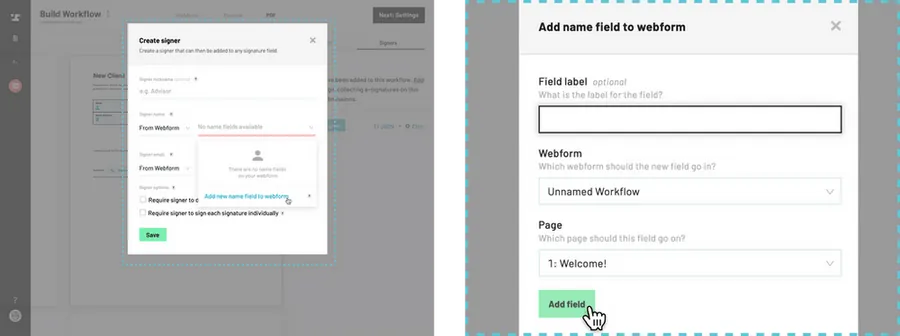
3. Signer email: Manually add a signer name or fill from a webform field. By default, the first available webform email field will be selected. If there are no email type fields on the webform, you can add one from the dropdown and choose where it should be added. See above.
4. Signer requirements: Determine how you would like your e-signature to be collected.
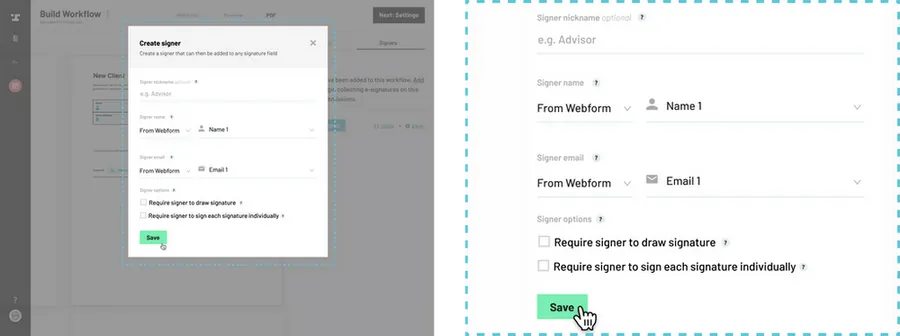
Click Save.
Mark fields to be signed.
Now that you have added a signer, you must mark which PDF fields this signer needs to sign. Note that no signatures will be requested from this Workflow unless signers are connected to individual fields. Learn how to mark fields to be signed.
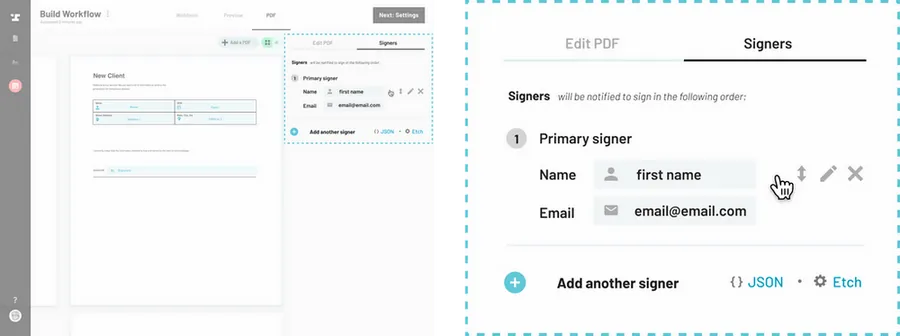
From a signature field:
Navigate to the Workflow editor.
How to navigate to the Signer editor
Select a signature field.
Draw a new or select an existing signature field on any PDF to open the field editor in the right side panel.
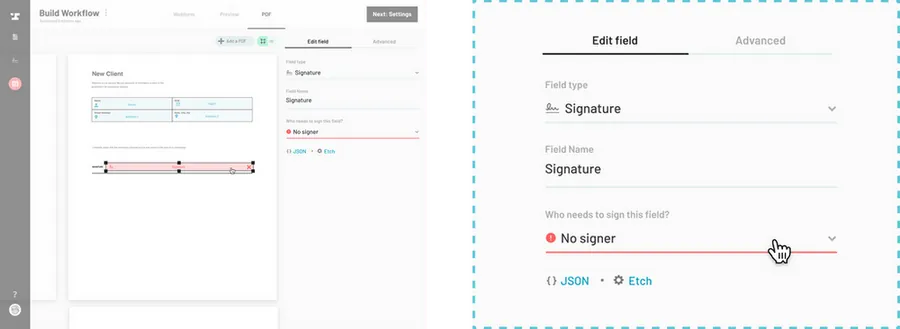
Select signer.
Click the Who needs to sign this field? dropdown.
Select 'Add a signer' from the dropdown.
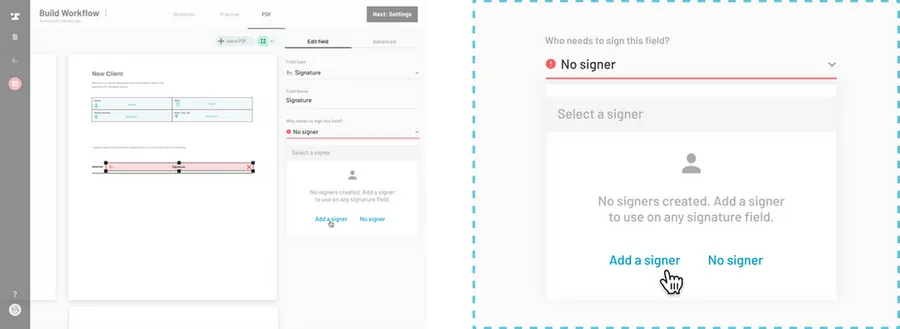
Complete the form.
1. Signer nickname: The signer nickname only appears in the Workflow editor to help you quickly distinguish your signers i.e. New Client, Cosigner, or Broker. This will default numerically based on how many signers have been added.
2. Signer name: Manually add a signer name or fill from a webform field. By default, the first available webform name field will be selected. If there are no name type fields on the webform, you can add one from the dropdown and choose where it should be added.

3. Signer email: Manually add a signer name or fill from a webform field. By default, the first available webform email field will be selected. If there are no email type fields on the webform, you can add one from the dropdown and choose where it should be added. See above.
4. Signer requirements: Determine how you would like your e-signature to be collected.
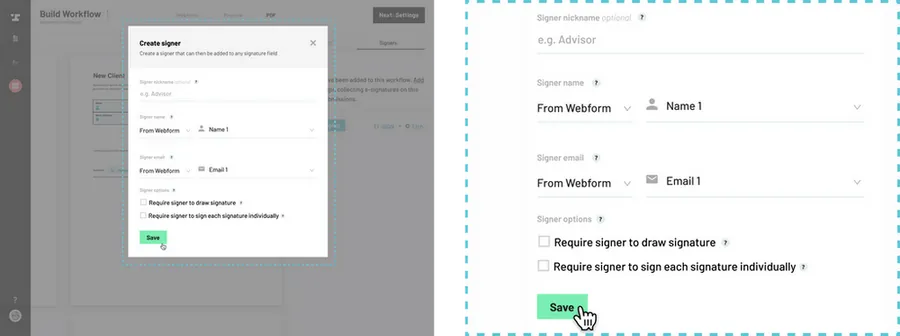
Click Save.
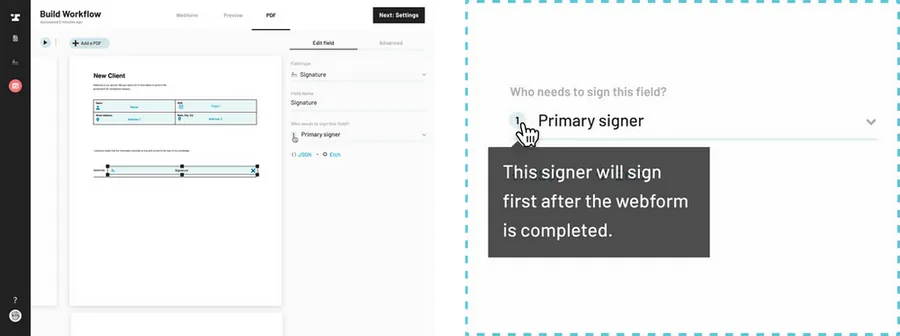
Click Save to complete adding the signer to the Workflow. Since you added this signer from a signature field, they will automatically be assigned to sign this field.
Mark fields to be signed.
Now that you have added a signer, you must mark which PDF fields this signer needs to sign. Note that no signatures will be requested from this Workflow unless signers are connected to individual fields. Learn how to mark fields to be signed.
Why does my signer need an email?
Emails help Anvil identify and verify individual signers. We also use email addresses in order to send e-signature requests to signers once a Workflow submission has been completed, as well as sending all signers a copy of their signed documents once the signing is completed. Even if your PDF does not have an email field to be filled, you can add an unconnected field to your webform that will collect your user’s email address for e-signature and notification purposes without being present on any resulting PDF documents.