Etch e-sign
Before you get into Etch e-sign, make sure you check out our getting started guide.
The Anvil Etch E-sign API allows you to:
- Request e-signatures and initials
- Collect user provided information, with or without signatures
- Request acknowledgement of documents, with or without signatures
These actions and experiences can be embedded directly within your app. Send a signature packet including multiple PDFs, images, and other uploads to one or more signers. Templatize your common PDFs then fill them with your user's information before sending out the signature packet. Customize the signature page's text and colors, or even style the page with a custom CSS stylsheet.
Anvil can handle the orchestration of notifying signers via email, or you can have full control to notify signers and generate your own signature links via embedded signing. Completions can be tracked with webhooks, email notifications, and events from an iframe.
Quick start
To generate and send an etch packet, obtain your API key from your organization settings and replace the apiKey variable in the script below. For more information, check out our guide.
Run the script with your apiKey and email to create and send an Etch packet.
// node scripts/demo-api-create-etch-packet.js
const Anvil = require('@anvilco/anvil')

const apiKey = 'yourApiKey' // your production API key
const name = 'Your name'
const email = 'youremail@example.com'
const pdfTemplateId = '05xXsZko33JIO6aq5Pnr' // Demo PDF template ID

async function main() {
  const anvilClient = new Anvil({ apiKey })

  // Generate the etch packet
  const variables = getPacketVariables() // Get the variables for the packet
  const response = await anvilClient.createEtchPacket({ variables }) // create the packet
  console.log(response.errors)
  const etchPacket = getResponseData(response, 'createEtchPacket') // get the etchPacket data
  console.log('Created packet', JSON.stringify(etchPacket, null, 2))
}

function getPacketVariables() {
  return {
    name: 'Test Etch Packet',
    isDraft: false,
    isTest: true,
    // The `files` array is where you specify the PDF templates you want to use
    files: [
      {
        // Our ID we will use to reference and fill it with data.
        // It can be any string you want!
        id: 'sampleTemplate',

        // The id to the ready-made sample template. Fields and their ids are
        // specified when building out the template in the UI.
        castEid: pdfTemplateId,
      },
    ],

    data: {
      // This data will fill the PDF before it's sent to any signers.
      // IDs here were set up on each field while templatizing the PDF.
      payloads: {
        sampleTemplate: {
          data: {
            shortText: 'Test Short Text',
          },
        },
      },
    },

    // The `signers` array is where you specify the signers and its associated signature fields
    signers: [
      {
        // `employee` is the first signer
        id: 'employee',
        name,
        email,
        signerType: 'email',
        fields: [
          {
            fileId: 'sampleTemplate', // File IDs are specified in the `files` id property above
            fieldId: 'signature', // Field IDs are specified in the template under Field Alias
          },
        ],
      },
    ],
  }
}

function getResponseData(response, queryName) {
  return response.data?.data?.[queryName]
}

function run(fn) {
  fn()
    .then(() => {
      process.exit(0)
    })
    .catch((err) => {
      console.log(err.stack || err.message)
      process.exit(1)
    })
}

run(main)
Embedding an Etch Packet into your app
To generate an embedded Etch packet URL change the signerType to embedded and update the main function:
// Create a signature URL
const { url } = await anvilClient.generateEtchSignUrl({
  variables: {
    signerEid: etchPacket.documentGroup.signers[0].eid,
    clientUserId: '123',
  },
})
console.log('Created Signature URL', url)

// open in the browser
require('child_process').exec(`open ${url}`)
To embed an Etch packet into your app:
- Whitelist your domain: Enable iframe embedding in your API settings and whitelist your domain. (e.g., http://localhost:3000).
- Add AnvilEmbedFrame to your project: Install the AnvilEmbedFrame component and add it to your project.
For additional resources please check out some of our blog posts below:
Code examples & live demo
See the live demo to try out Etch signatures.
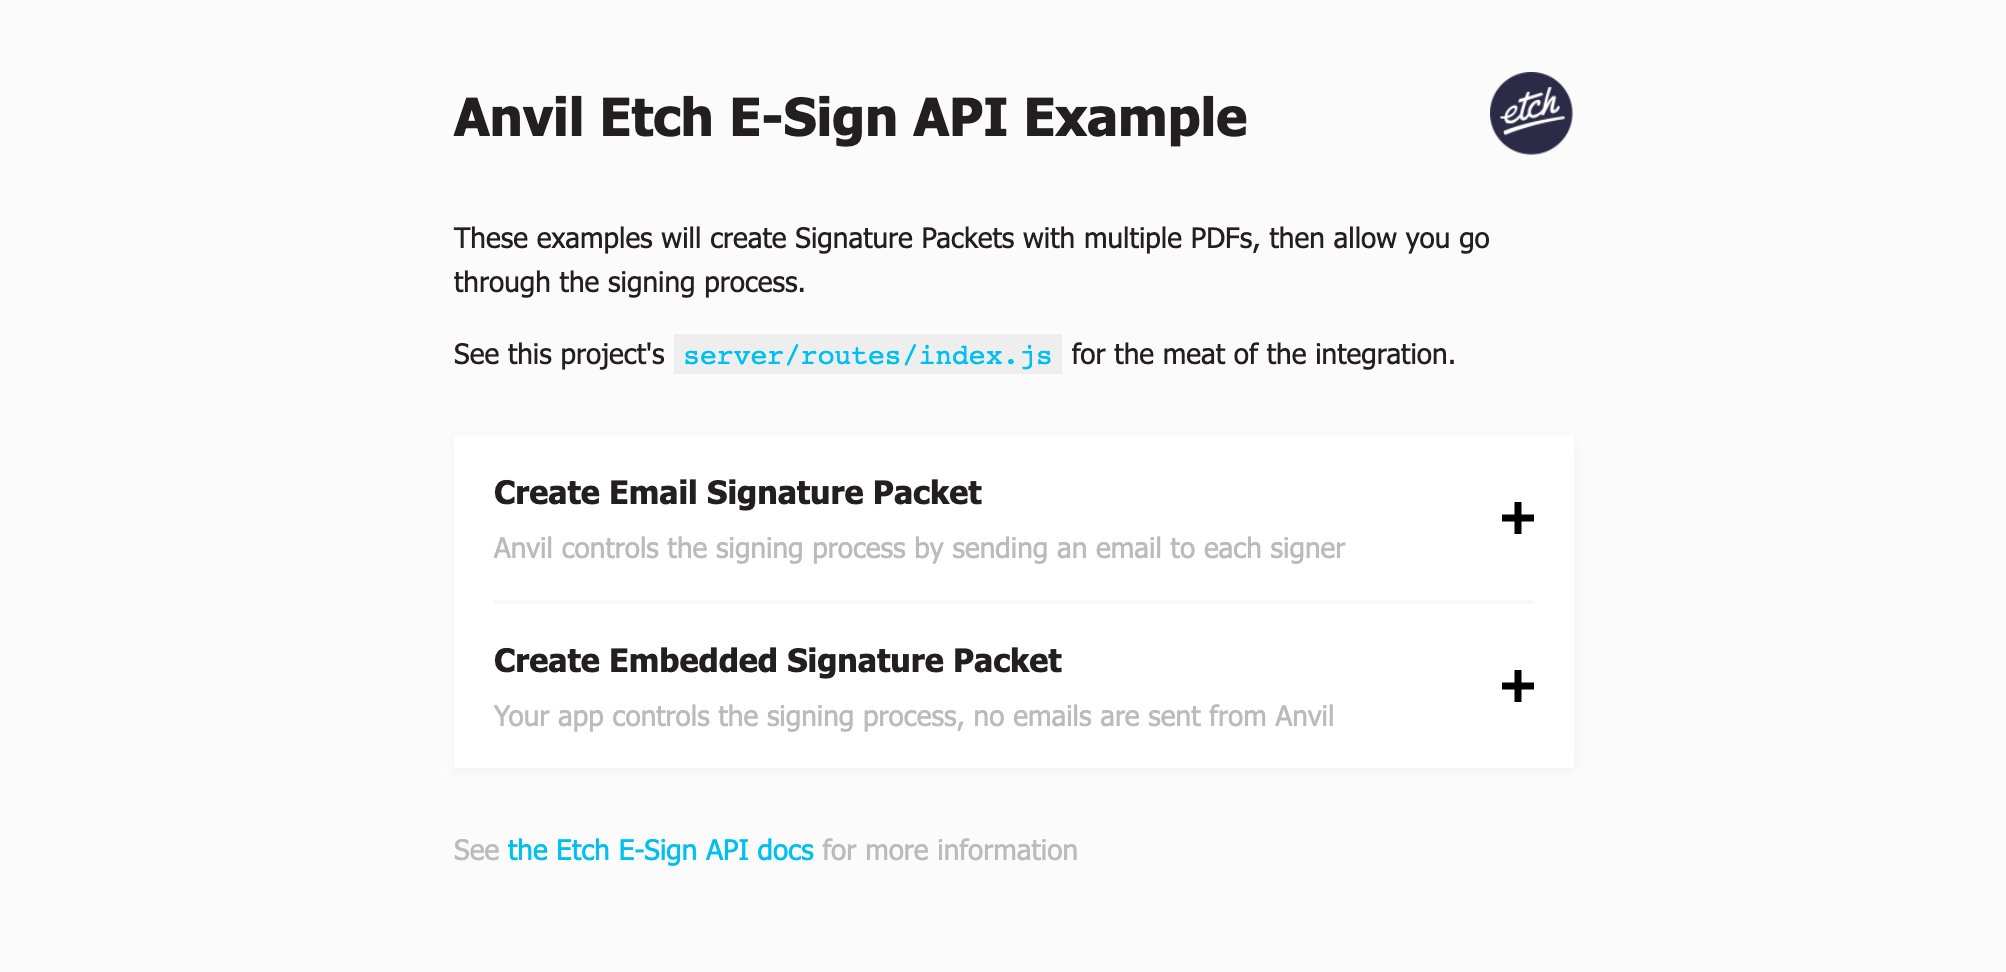
Clone the example app repo to get a feel for using the E-signature API in your own Anvil account.
Check out our example scripts for runnable scripts in the language of your choice.
Authentication
First you will need an API key. You can find your API key on the Organization Settings -> API Settings page. We provide language-specific API clients that wrap authentication and make using our API easier.
For more information on generating an API key and handling API authentication, check out the API getting started article.
Postman collection
Quickly see the Etch e-sign APIs in action with our E-sign Postman collection:

For more information on using the Postman workspace, see our Postman workspace guide.
Creating a signature packet
The createEtchPacket GraphQL mutation allows you to create and send a signature packet in a single API call. This is the most common, and often the only, signature-related API mutation you will need.
Signature requests can orchestrated via email notifications (the default), or optionally via an "embedded" page which you can send them to directly.
The most minimal way to set up an e-sign packet is to specify files to sign and signers to sign the files via createEtchPacket, so we'll start there.
Adding PDFs to your packet
In order to request signatures, you will need to provide a list of documents
that need to be signed. These documents should be provided in an array under
the files key in the mutation variables. These objects can be:
- References to existing PDF Templates that you have already set up.
- Completely new documents that you can upload + configure in the mutation call.
- A mixture of the above.
Referencing an existing PDF template
If you'd like to include an existing PDF Template in your signature packet, you'll need the PDF templated EID and then can use the CastReference structure. You should have already configured this PDF Template with all signature-related and other fields. For more information about setting up a PDF template please see this article. An example:
{
  ...
  files: [{
    id: 'anExistingPDFTemplate', // An ID of your choosing for referencing this file elsewhere in the API
    castEid: 'abcd1234', // Your PDF Template EID
    filename: 'custom-file-name.pdf', // The file generated will have this name. If provided, this filename will override the default PDF template filename.
    title: 'My custom document name' // The title encoded into the PDF file.
  }]
}
Uploading a new PDF
You can also upload a new PDF to your signature packet. At a minimum, the file and fields properties must be supplied.
Note: you can upload both PDFs and Word doc (docx) files. docx files will be converted to PDF on upload so they can be filled and signed.
We support 3 flavors of new document uploading which will be provided in the file property of each upload:
- A Multipart Upload that allows you to send a binary file. Consider using one of our Anvil API clients to simplify interacting with our API when binary uploads are involved.
- A Base64 Upload that allows you to send a file that you have in a
base64-encoded string format. - A URL Upload that allows you to reference a file via a publicly accessible URL.
See the Upload GraphQL type for more info.
When uploading a new PDF that will be used for signatures in your packet, you should also provide a fields array. This is where you specify the signature-related and other fields that are present in the PDF and give them each IDs that can be used to refer to them elsewhere in the Signature process. At the very least, each field object will need id, type, pageNum and rect properties. See the CastField reference for more details on these.
Here's a simple example of how an object in your files array might look:
{
  ...
  files: [{
    id: 'aNewFile',
    file: <Upload>,
    fields: [{
      id: 'signatureOne',         // required, unique within the PDF
      type: 'signature',          // required, e.g. 'signature' | 'initial' | 'signatureDate' | 'fullName' | 'email'
      pageNum: 0,                 // required, 0-based page index
      rect: {                     // required, position and size of the field on the page
        x: 253.12,                // distance from left edge of page, >= 0
        y: 121.12,                // distance from top of page, >= 0
        width: 33.22,             // width of the field, >= 0
        height: 27.22,            // height of the field, >= 0
      },
      format: 'DD',               // optional special format for the field
      name: 'Signature',          // human-friendly label shown in the UI
      fontFamily: 'Noto Sans',    // default: 'Noto Sans' | 'Courier' | 'Helvetica' | 'Times New Roman' | any Google Font name
      fontSize: 12,               // no default, integer, 5–30
      fontWeight: 'normal',       // default: 'normal' | 'bold' | 'italic' | 'boldItalic'
      textColor: '#000000',       // no default, 6-digit hex color e.g. '#abc123'
      alignment: 'left',          // default: 'left' | 'center' | 'right'
    }]
    ...
  }]
}
A full list of properties can be found in the EtchUpload reference. For the field object, a full list of properties can be found in the CastField reference.
Generating a PDF from HTML and CSS
Anvil can generate PDFs from HTML and CSS to include in your signature packet.
You must provide a title string, filename, and a markup object containing your HTML and CSS. The title will be encoded into the PDF document and serve as the page header. Signature fields can also be specified under fields, which accepts an array of CastFields.
{
  ...
  files: [
    {
      id: 'htmlToPDF1',
      filename: 'html-to-pdf.pdf',
      title: 'Test HTML to PDF',
      markup: {
        html: '<h1>Hello World</h1>',
        css: 'h1 { color: red; }',
      },
      fields: [
        // You can also add signature fields to the PDF generated from HTML
        {
          id: 'signatureField',         // required, unique within the PDF
          type: 'signature',            // required, e.g. 'signature' | 'initial' | 'signatureDate' | 'fullName' | 'email'
          pageNum: 0,                   // required, 0-based page index
          rect: {                       // required, position and size of the field on the page
            x: 300,                     // distance from left edge of page, >= 0
            y: 300,                     // distance from top of page, >= 0
            width: 200,                 // width of the field, >= 0
            height: 30,                 // height of the field, >= 0
          },
          format: 'date',               // optional special format for the field
          name: 'Signature',            // human-friendly label shown in the UI
          fontFamily: 'Noto Sans',      // default: 'Noto Sans' | 'Courier' | 'Helvetica' | 'Times New Roman' | any Google Font name
          fontSize: 12,                 // no default, integer, 5–30
          fontWeight: 'normal',         // default: 'normal' | 'bold' | 'italic' | 'boldItalic'
          textColor: '#000000',         // no default, 6-digit hex color e.g. '#abc123'
          alignment: 'left',            // default: 'left' | 'center' | 'right'
        }
      ],
    },
  ]
  ...
}
A full list of properties can be found in the EtchFileGenerate reference.
Generating a PDF from markdown
Similar to generating PDFs from HTML and CSS, you can generate a PDF from markdown fields when creating a signature packet.
You must provide a title string, filename, and a fields array. The title will be encoded into the PDF document and serve as the page header. PDF content, fill fields, and signature fields will be specified under fields, which accepts an array of CastFields and ContentBlocks.
The file object is structured similarly to when you use the PDF generation API.
{
  ...
  files: [
    {
      id: 'generatedInvoice1',
      filename: 'pet-food-invoice.pdf',
      title: 'Pet Food Expenses',
      fontSize: 12,
      textColor: '#222222',
      fields: [
        // ContentBlock: content embedded directly onto the PDF
        {
          label: 'Invoice Date',          // bolded label for the content section
          heading: 'Pet Food Expenses',   // larger bolded heading to break up sections
          content: 'March 4th, 2024',     // text content, supports markdown formatting
          table: undefined,               // a Table object representing a table
          fontFamily: 'Noto Sans',        // default: 'Noto Sans' | 'Courier' | 'Helvetica' | 'Times New Roman' | any Google Font name
          fontSize: 10,                   // no default, integer, 5–30
          fontWeight: 'normal',           // default: 'normal' | 'bold' | 'italic' | 'boldItalic'
          textColor: '#616161',         // no default, 6-digit hex color e.g. '#abc123'
          alignment: 'left',              // default: 'left' | 'center' | 'right'
        },
        // CastField: a signature or fill field placed at a specific position on the PDF
        {
          id: 'generatedInvoice1_signatureField', // required, unique within the PDF
          type: 'signature',                      // required, e.g. 'signature' | 'initial' | 'signatureDate' | 'fullName' | 'email'
          pageNum: 0,                             // required, 0-based page index
          rect: {                                 // required, position and size of the field on the page
            x: 300,                               // distance from left edge of page, >= 0
            y: 300,                               // distance from top of page, >= 0
            width: 200,                           // width of the field, >= 0
            height: 30,                           // height of the field, >= 0
          },
          format: undefined,                      // optional special format for the field
          name: undefined,                        // human-friendly label shown in the UI
          fontFamily: 'Noto Sans',                // default: 'Noto Sans' | 'Courier' | 'Helvetica' | 'Times New Roman' | any Google Font name
          fontSize: 12,                           // no default, integer, 5–30
          fontWeight: 'normal',                   // default: 'normal' | 'bold' | 'italic' | 'boldItalic'
          textColor: '#000000',                 // no default, 6-digit hex color e.g. '#abc123'
          alignment: 'left',                      // default: 'left' | 'center' | 'right'
        },
      ],
    },
  ]
  ...
}
A full list of properties can be found in the EtchFileGenerate reference.
Adding signers
Now that you have determined the documents and fields within those documents that require signing, it's time to specify who you would like to actually sign them. This is done by providing an array of Signer objects to the signers key in the mutation variables.
{
  ...
  files: [{
    id: 'templatePDF',
    castEid: 'JNa1Ldpk0g5NMuI8WjJM'
  }],
  signers: [{
    id: 'signer1',
    name: 'Sally Signer',
    email: 'sally@signer-one.com',
    signerType: 'email',

    fields: [{
      fileId: 'templatePDF',
      fieldId: 'signatureOne',
    }]
  }]
}
id
Each of these Signer objects must contain an id that uniquely identifies it for referencing by other parts of the E-signature process. This can be any string of your choosing unique within this document.
name
The first and last name of the signer e.g. 'Sally Jones'.
email
The email address of the signer e.g. 'sally@jones.com'. Even embedded signers require a valid email address.
signerType
By default, we will solicit signatures from signers via email with signerType: "email". Your signer will get an email from Anvil with a link to complete their part of the signature process.
You can embed the signature process into your app or website with signerType: "embedded". By setting the signerType to "embedded", you will have full control over the sign link. The signer will not be sent an email and it will be up to you to get the signer to complete their signatures via our embedded page. See the embedded signing section of this guide for more info.
Anvil also supports signerType: "in-person" for signers you know will be signing in person. Please contact
sales for more information on in-person signing.
signatureMode
You can choose draw or text signatures. In draw mode, a signer will need to draw their signature and initials. In text mode, they will be prompted to accept their signature. The default signatureMode is draw.
routingOrder
The routingOrder property allows you to control the order in which signers are allowed to sign.
Anvil allows you to collect signatures in two different ways:
- Ordered - Each signer will be allowed to sign only after the previous signer has finished signing. The packet will be completed when the last signer has signed.
- Unordered - Signers can sign in any order. The packet will be completed when all signers have signed their part of the packet. Unordered signing is available with the Product pack or Enterprise plan.
A combination of ordered and unordered signing is also supported within a single packet — everything is controlled by routingOrder.
By default, signers are ordered; routingOrder will mirror the signers' order in the signers array. For example, Signer One below will be sent an email to sign first, then when Signer One has completed signing, Signer Two will receive an email to sign.
{
  ...
  signers: [{
    // Implicit routingOrder of 1
    id: 'one',
    name: 'Signer One',
    email: 'one@one.com',
  }, {
    // Implicit routingOrder of 2
    id: 'two',
    name: 'Signer Two',
    email: 'two@two.com',
  }],
}
To allow your signers to sign in unordered, you can give them the same routingOrder value. routingOrder is a 1-based order, so we'll give these signers a routingOrder of 1:
{
  ...
  signers: [{
    id: 'one',
    name: 'Signer One',
    email: 'one@one.com',

    routingOrder: 1,
  }, {
    id: 'two',
    name: 'Signer Two',
    email: 'two@two.com',

    routingOrder: 1,
  }],
}
Mixing ordered and unordered signing is simple:
- Signers with the same
routingOrderwill be allowed to sign in any order among signers with thatroutingOrder. - Signers with different
routingOrdervalues will need to wait until all signers in the previous routing order have completed signing.
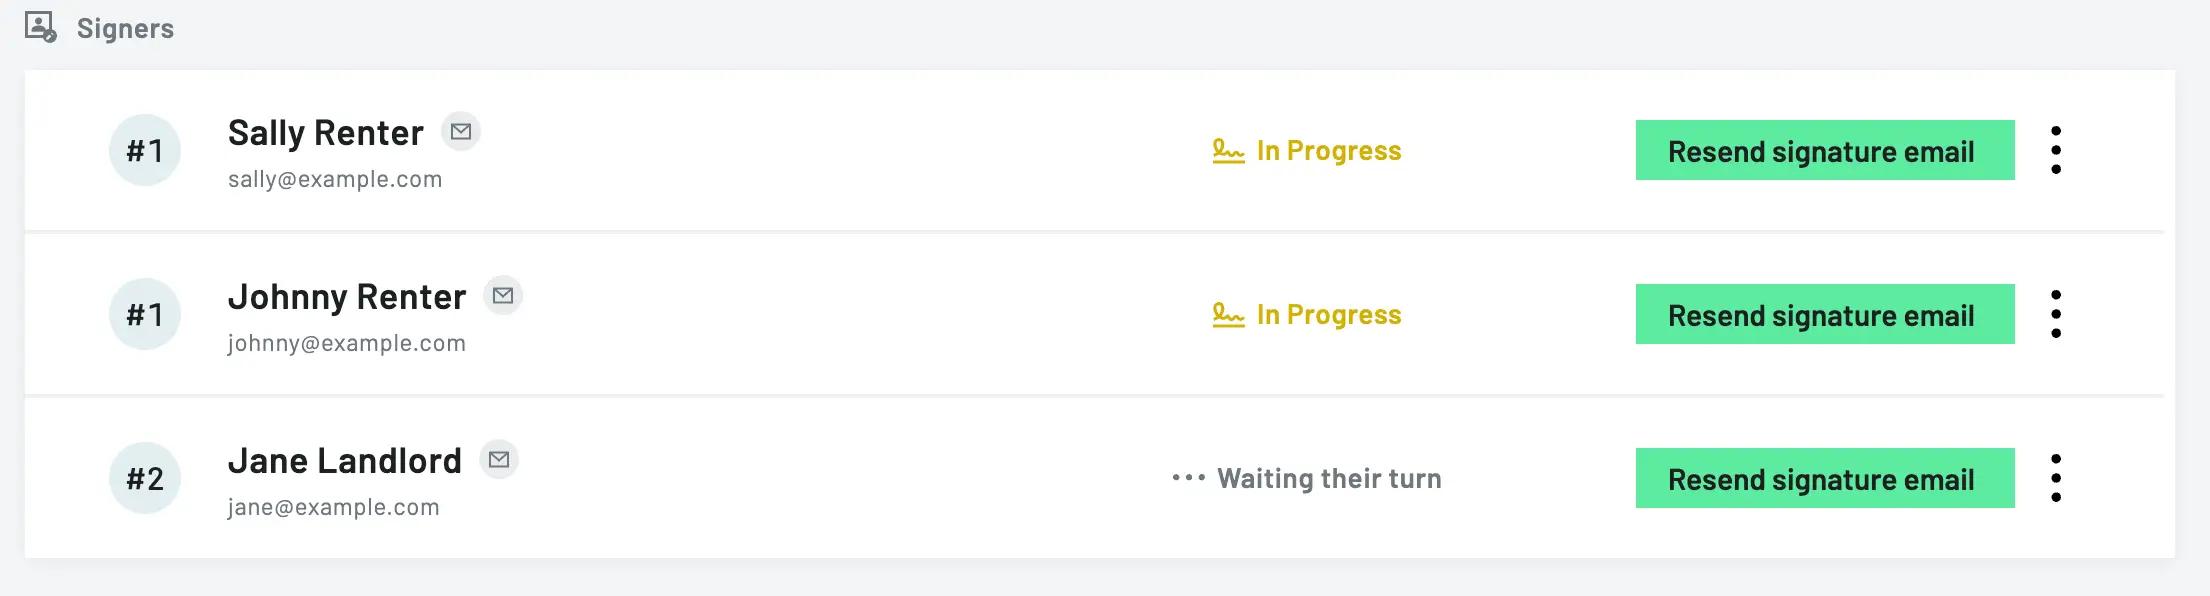
For example, say you have two renters and one landlord signing a rental agreement. You may want the two renters to sign in any order, then the landlord to countersign after both renters have signed. You can achieve this by assigning routingOrder: 1 to both renters, then routingOrder: 2 to the landlord.
{
  ...
  signers: [{
    id: 'renter1',
    name: 'Sally Renter',
    email: 'sally@renter.com',

    // Both renters have `routingOrder: 1`
    routingOrder: 1,
  }, {
    id: 'renter2',
    name: 'Johnny Renter',
    email: 'johnny@renter.com',

    routingOrder: 1,
  }, {
    id: 'landlord',
    name: 'Jane Landlord',
    email: 'jane@landlord.com',

    // `routingOrder: 2` indicates that this signer will
    // sign after all `routingOrder: 1` signers have signed.
    routingOrder: 2,
  }],
}
The renters will be able to sign in any order, and the landlord will sign after both renders have signed. This concept can be applied to any number of signers and unordered signing groups!
acceptEachField
When set to true, the signer will be shown all of the packet's PDFs on the signing page. They will be required to click through each signature or initials box. When set to false, the signer will be shown a list of documents they will be signing with an option to open any documents in the packet. The default is true.
showFinishSigningButton
When set to true and acceptEachField is also set to true, the signer will be shown a final "Finish signing" button after they have clicked through each signature. This gives the user a chance to review all of their signatures before completing the signature process.

{
  ...
  signers: [{
    id: 'signerOne',
    name: 'Stevie Signer',
    signerType: 'embedded',

    showFinishSigningButton: true,
  }]
}
Without showFinishSigningButton, the signer will complete signing when the last signature is clicked.
enableEmails
You can indicate which emails you would like the user to receive from anvil. You may want to turn them all off to control the process yourself. Or leave them on to save yourself some work!
{
  ...
  signers: [{
    id: 'signerOne',
    name: 'Stevie Signer',
    signerType: 'embedded',

    // `enableEmails: true | undefined` (default) enables all emails
    // `enableEmails: false | []` disables all emails
    // `enableEmails: ['...', '...']` enables specified emails
    enableEmails: ['etchComplete']
    ...
  }]
}
Supported emails
'etchComplete'- signer will receive an email after everyone has completed signing with a link to download the documents.
redirectURL
If provided, the signer will be redirected to this URL (by the browser; localhost is allowed for development) in a few scenarios:
- When the signer has completed their signatures.
- When the user clicks the download link from a completed email.
- If the signer tries to sign with an expired URL.
- If there are general errors signing.
If not provided, the signer will be redirected to an Anvil page indicating state of the packet, e.g. "Waiting on other people to sign", "Everyone has signed", "Error!", "Download completed documents" etc.
Here's an example of an embedded signer scenario:
{
  ...
  signers: [{
    id: 'signerOne',
    name: 'Stevie Signer',
    signerType: 'embedded',
    redirectURL: 'https://yoursite.com/signer-complete',
    ...
  }]
}
When the signer is finished signing, redirectURL will receive several query params to help you display a relevant page to the user or update state in your system. e.g.
GET https://yoursite.com/signer-complete
  ?action=signerComplete
  &signerStatus=completed
  &signerEid=SI8xMh51WBR9dyGILDoL
  &nextSignerEid=s1AFrmQeuj3qMchKmhL2
  &documentGroupStatus=completed // completed || partial || sent
  &documentGroupEid=GqqU9OKLhmnGBeCusRRa
  &etchPacketEid=rmmhL2s1AQeuj3qhKFMc
If there is an error while signing or navigating to the signing page, redirectURL will receive error params in addition to the query params above. For example, if the user clicks a link with an expired token, your URL will be called with error-specific parameters:
GET https://yoursite.com/signer-complete
  ?action=signerError
  &errorType=tokenExpired // tokenExpired || tokenInvalid || notFound || unknown
  &error=Token+Expired
  &message=Error+specific+message
  &signerStatus=sent
  &signerEid=SI8xMh51WBR9dyGILDoL
  &documentGroupStatus=sent
  &documentGroupEid=GqqU9OKLhmnGBeCusRRa
  &etchPacketEid=rmmhL2s1AQeuj3qhKFMc
For errors including an invalid token or non-existent signer, query parameters will only contain error information and the signerEid.
GET https://yoursite.com/signer-complete
  ?action=signerError
  &errorType=tokenInvalid
  &error=Invalid+Token
  &message=Error+specific+message
  &signerEid=SI8xMh51WBR9dyGILDoL
fields
The signer's fields key attaches fields to signers; it defines which fields a signer is responsible for signing.
fields is an array of SignerField objects specifying which fileId + fieldId combinations. Each fieldId comes from either a field defined in the files key, or from field aliases defined in the PDF Template builder.
See creating a PDF template for more information on getting field IDs for templates.
Signers can be attached to signature field types and to name and email fields. A list of all fields that can be attached to a signer in the fields array:
- Signature (
signaturewhen defined in thefilesarray) - Signature Initial (
initialwhen defined in thefilesarray) - Signature Date (
signatureDatewhen defined in thefilesarray) - Name (
fullNamewhen defined in thefilesarray) - Email (
emailwhen defined in thefilesarray)
It is useful to attach name and email fields to signers if you plan to update a signer's name and email after a packet has been sent. When you update the signer's name and email, all attached name and email fields will be updated on all PDF documents, even if there are previous signatures.
{
  files: [{
    id: 'uploadedFile',
    file: {stream object for file to upload},
    fields: [{
      id: 'signatureOne',
      type: 'signature',
      ...
    }]
  }, {
    id: 'templatePDF',
    castEid: '5GshL2s1AQeuj3qhKFMc'
    // In a template PDF, the fields are set up in the UI.
    // You can define field aliases in the template builder,
    // then use the field aliases in the signer's fields below
  }],
  signers: [{
    id: 'signerOne',
    name: 'Stevie Signer',
    email: 'steve.signer@example.com',
    routingOrder: 1,
    fields: [{
      fileId: 'uploadedFile', // The file `id` from above
      fieldId: 'signatureOne', // The field `id` specified above
    }, {
      fileId: 'templatePDF', // The file `id` from above
      fieldId: 'signatureOne', // The field `id` in the PDF template available in the UI
    }, {
      fileId: 'templatePDF',
      fieldId: 'signerName', // A Name field defined in the PDF template builder
    }]
  }],
  ...
}
See using text tags as an alternative to manually attaching fields. Text tags can automatically attach signature fields to signers via text embedded in the doc.
tokenValidForMinutes
When a signer visits a URL to sign, the URL will contain an expiring SignerToken. You can control the duration of this token on a per-signer basis with tokenValidForMinutes. When the signing URL is generated, it will add tokenValidForMinutes to the current time to determine the token expiration date.
Regenerating the signing URL will restart the token duration. e.g. If you set tokenValidForMinutes to 60 * 24 * 3 (3 days), then after 1 day, you resend the email asking a user to sign, the new email will have a link with a 3 day token duration.
Default token durations are different depending how the signer is set up:
signerType: 'email'- Default duration is 14 days.signerType: 'embedded'- Default duration is 2 hours. It is recommended you keep this short. URLs for embedded signers are intended to be generated at the time the user is ready to sign. i.e. You should not be emailing an Anvil signing link to your users. See the recommended flow section of this document for more information.
The maximum value for tokenValidForMinutes is 60 days (86400 minutes), but is not recommended to go higher than the defaults.
You can control what happens when the user experiences a token expiration.
{
  ...
  signers: [{
    id: 'signerOne',
    name: 'Sally Signer',
    signerType: 'email',
    tokenValidForMinutes: 60 * 24 * 3 // 3 days
    ...
  }]
}
Using text tags
All documents support text tags, including uploaded documents, PDF templates, and generated documents. Text tags are pieces of text embedded in a document that you can use like variables to specify where to place signatures, names, etc. e.g. You would write {{signature}} or {{initial:::signer1}} into your document, and Anvil will pick them up as fields.
Text tags allow you to automatically assign signature fields to signers when creating a signature packet.
The previous signers section outlined a fields property to attach fields to signers. With text tags that specify the signerID argument, you do not need to attach fields to signers in the signer.fields property.
As an example, consider this NDA. Note the signer1 and signer2 at the end of the each tag. Those strings will help anvil auto-assign the fields to signers with the same ids.
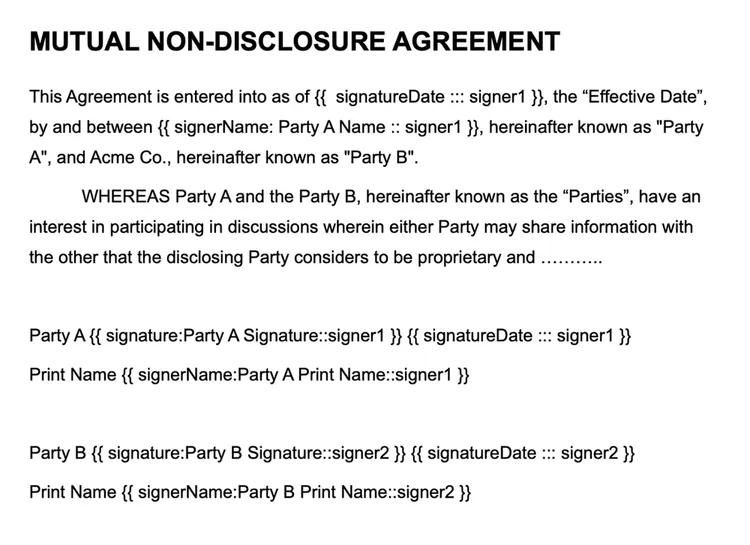
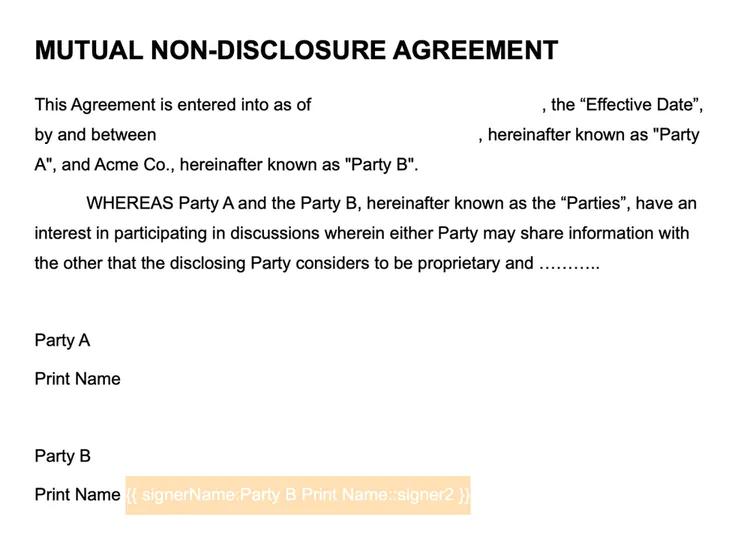
We'll make the text tags have a white font color, so Anvil can find them, but your users do not see them.
Then we can use the file in our script
const employeeEmail = 'employee@example.com'
const employerEmail = 'employer@example.com'

const employeeName = 'Sally Employee'
const employerName = 'Jane AcmeManager'

// You can upload a PDF or docx file with text tags
const tagsPDFFile = Anvil.prepareGraphQLFile('path/to/text-tags-nda.pdf')

const createEtchPacketVariables = {
  files: [
    {
      // This is a file we will upload and specify the fields ourselves
      id: 'fileUploadTextTags',
      title: 'Demo Text Tags NDA',
      file: tagsPDFFile,
      fields: [], // fields will be populated by text tags
    },
    {
      // You can upload a template with text tags that contain signer ids.
      // The signer ids will be retained in the template and automatically
      // assigned to the new packet's signers that have a matching id.
      id: 'templateTextTags',
      title: 'Text Tags Template',
      castEid: 'nA1clF5gMu7wjtDHcpCM',
    },
    {
      // Text tags work in generated files as well
      id: 'generatedTextTags',
      filename: 'gen-invoice.pdf',
      title: 'Generated text tags',
      fontSize: 12,
      textColor: '#222222',
      fields: [
        {
          label: 'Hello',
          content: 'hi',
        },
        {
          label: 'First Signer',
        },
        {
          textColor: '#FFFFFF',
          content:
            '{{ signature:::signer1 }} {{ initial:::signer1 }} {{ signatureDate:::signer1 }}',
        },
        {
          label: 'Second Signer',
        },
        {
          textColor: '#FFFFFF',
          content:
            '{{ signature:::signer2 }} {{ initial:::signer2 }} {{ signatureDate:::signer2 }}',
        },
      ],
    },
  ],

  data: {
    // You can fill text tags with data by using their field alias
    // e.g. your doc has `{{shortText :: myField}}`
    // then you specify
    payloads: {
      fileUploadTextTags: {
        // file id with the text tag
        data: {
          myField: 'My Text', // fieldAlias: 'fill data'
        },
      },
    },
  },

  signers: [
    // Signer signature fields will be assigned by textTags
    {
      id: 'signer1',
      name: employeeName,
      email: employeeEmail,

      // `fields` will be populated by textTags!
    },
    {
      id: 'signer2',
      name: employerName,
      email: employerEmail,

      // `fields` will be populated by textTags!
    },
  ],
}
See the text tags help article for full details on text tags formatting.
Filling your PDFs with data
You may need to fill out non-signature fields in the PDFs in your Packet. We support this via a payloads object nested in the data key (EtchFillData shape). For each PDF you'd like to fill, provide a fill payload object (PDFFill shape) in the data.payloads object under a key that is the id for the PDF from the Template files configuration:
{
  ...
  files: [{
    id: 'somePdf',
    castEid: 'ABC123'
    filename: 'filename-override.pdf',
  }],
  data: { // EtchFillData shape
    payloads: {
      // This key comes from the `id` in the `files` array above
      somePdf: { // PDFFill shape
        data: {
          // Fill payload here
          email: 'pat@jones.com'
        }
      }
    }
  }
}
See creating a PDF template for more information on creating templates and fetching their field IDs.
Encrypting data payloads
If you are working with sensitive data, you can encrypt the data that fills your PDFs. Set up an RSA keypair, then encrypt the data key's JSON string with your public key. You can use our node encryption library.
{
  ...
  data: 'an encrypted string'
  files: [{
    id: 'somePdf',
    castEid: 'ABC123'
  }],
}
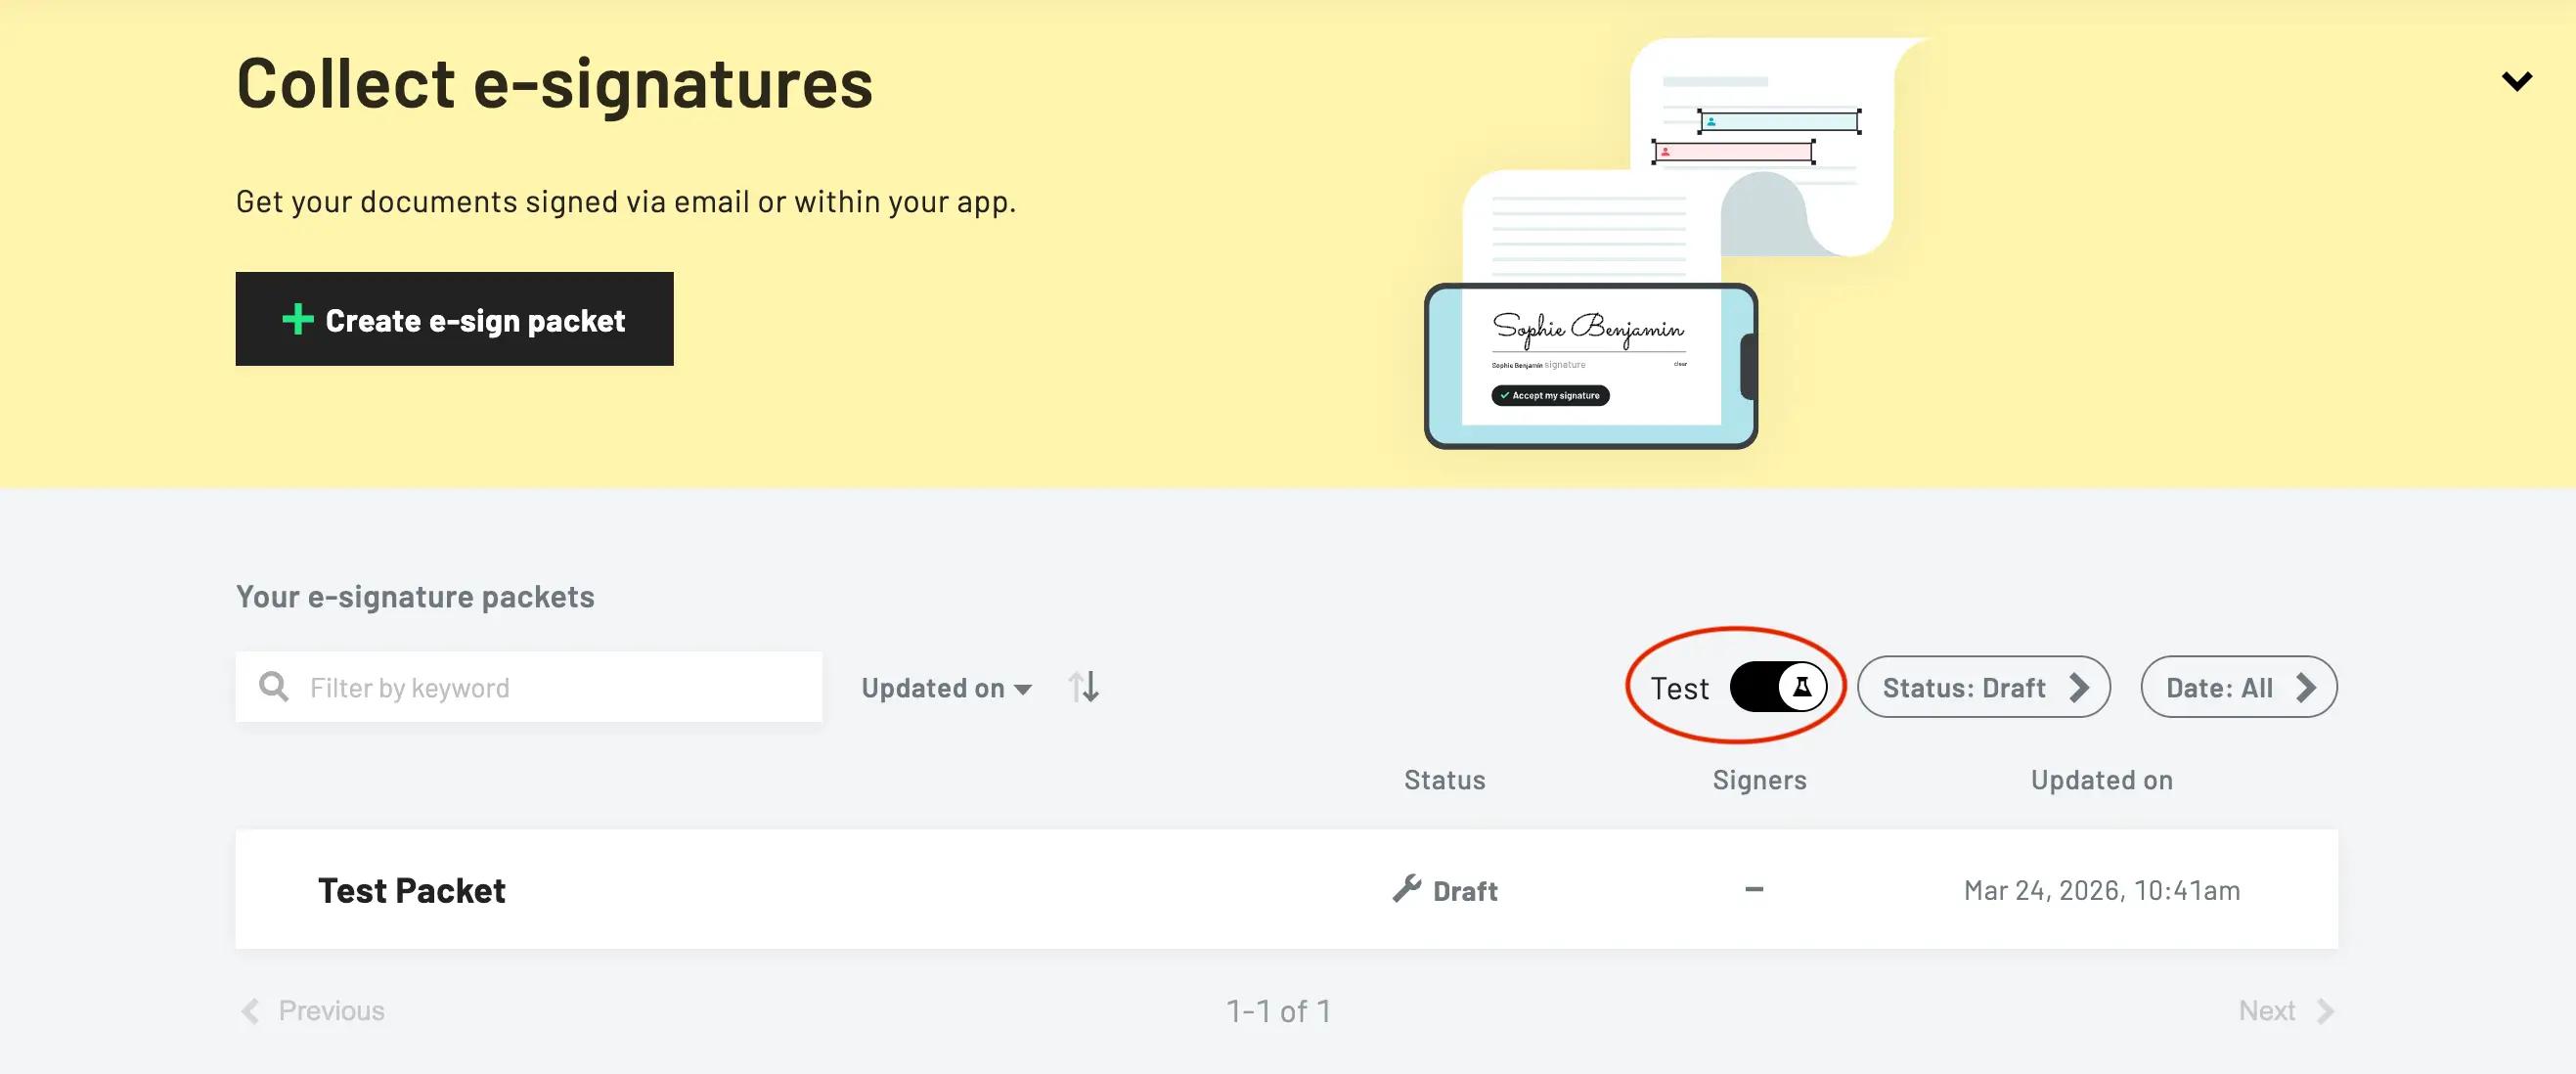
Testing your packet configuration
If you would like to test that your API calls are properly configured and that your signer fields will all be filled out properly, you can do so by adding isTest: true to your mutation variables. When your Packet is a test, everything in our system will behave normally except that:
- Documents will be watermarked with a demo indicator.
- Signatures will be in red.
- This Packet will not count against your plan's e-signature quota.
You can view the results of Test Packet completions by filtering for Test in the Etch e-sign area:
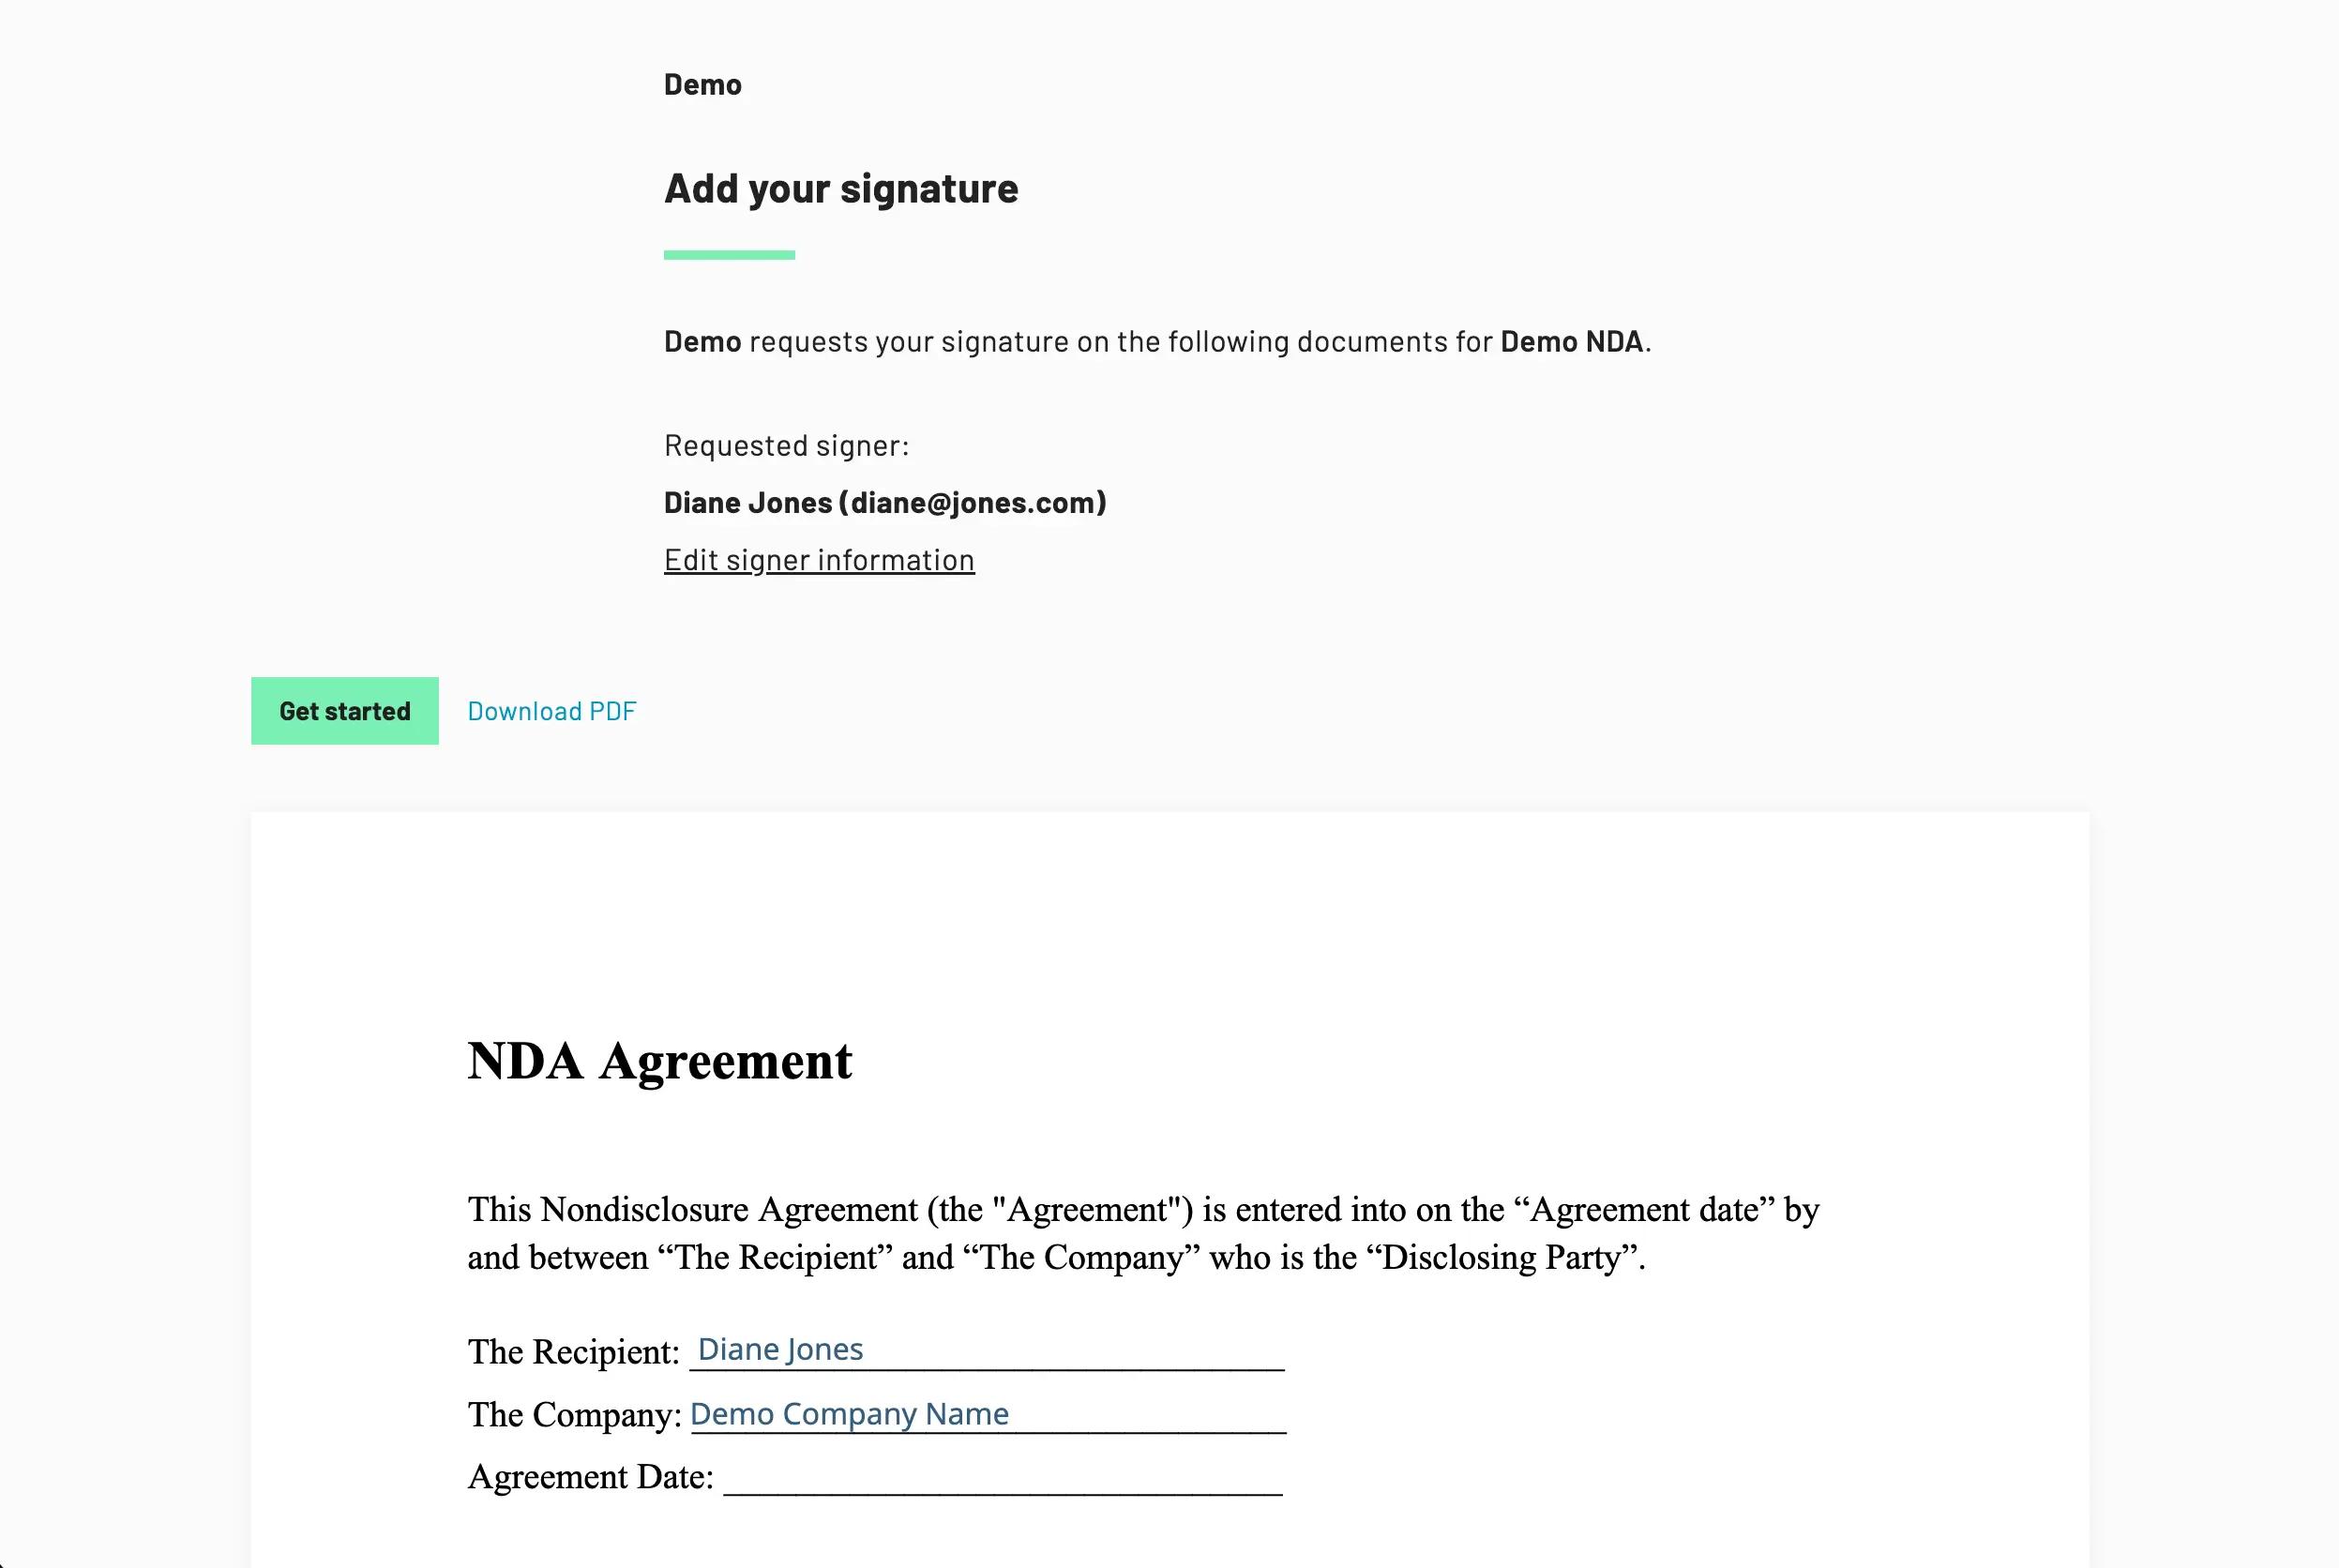
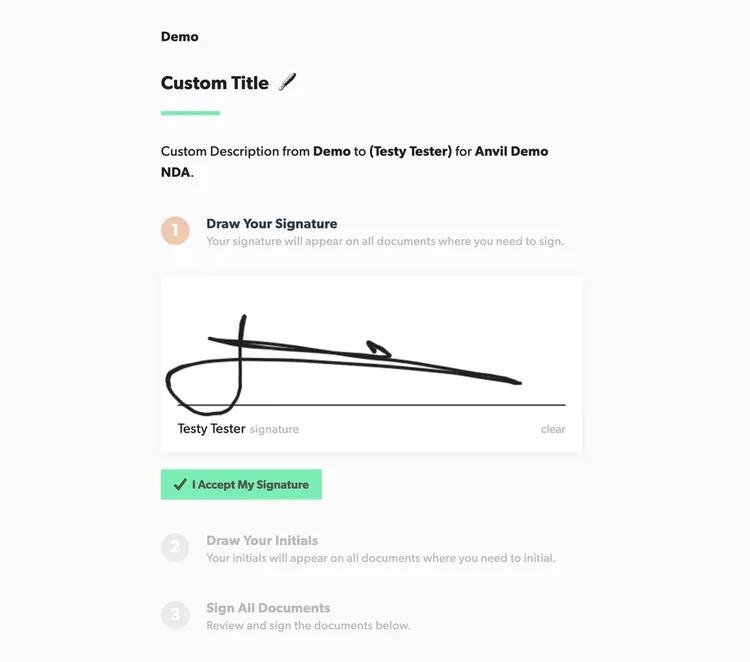
Customizing the signature page
Strings and colors on the signature page are configurable via the signaturePageOptions variable on createEtchPacket.
A page with only custom strings specified:
A page with custom colors specified:
All the options and their defaults:
// Template replacements are supported by all strings.
// Available template replacements:
// {
// organization: { name },
// packet: { name },
// signer: { name },
// currentUser: { name },
// }
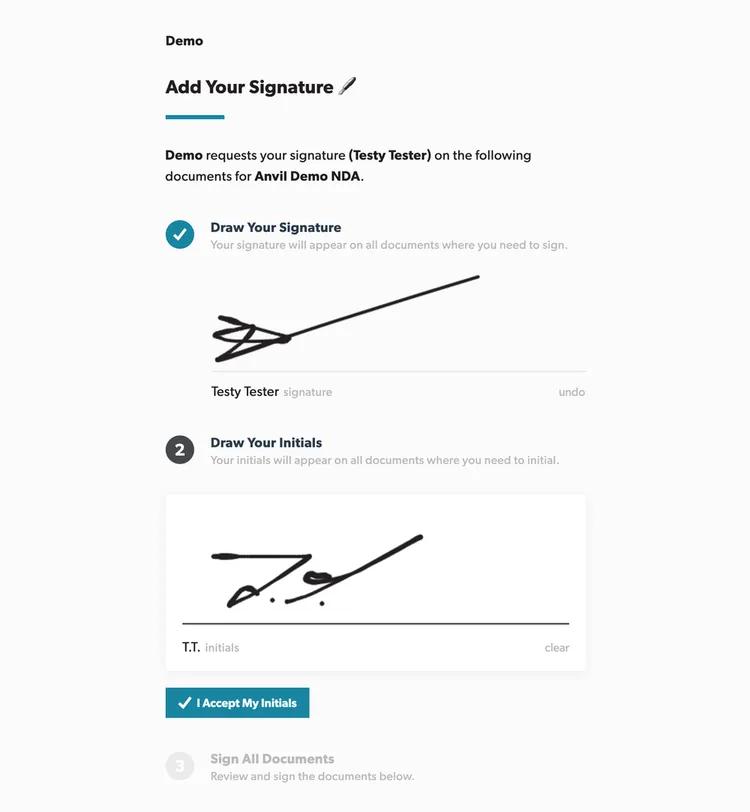
signaturePageOptions: {
title: 'Add Your Signature',
// Description supports markdown
description: '__{{organization.name}}__ requests your signature __({{signer.name}})__ on the following documents for __{{packet.name}}__.',
signatureLabel: 'signature',
initialLabel: 'initials',
acceptTitle: 'Accept Your Signature',
acceptDescription: 'Below is how your signature and initials will appear everywhere you need to sign on all documents.',
acceptButtonText: 'I Accept My Signature And Initials',
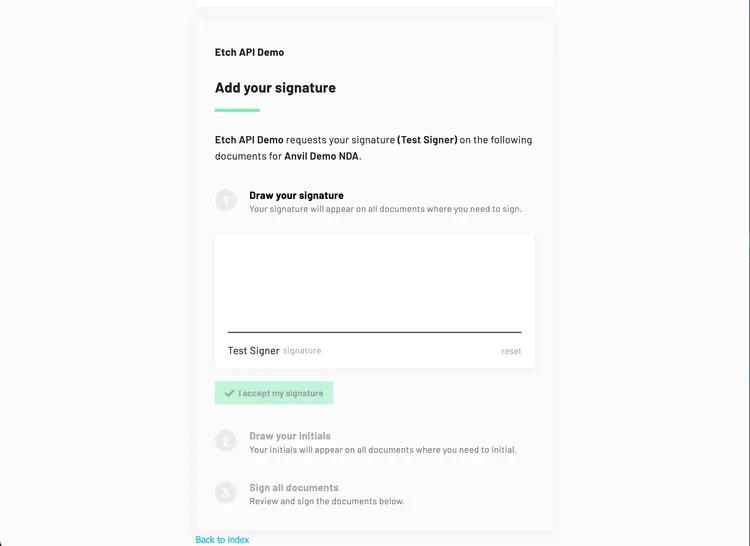
drawSignatureTitle: 'Draw Your Signature',
drawSignatureDescription: 'Your signature will appear on all documents where you need to sign.',
drawSignatureButtonText: 'I Accept My Signature',
drawInitialsTitle: 'Draw Your Initials',
drawInitialsDescription: 'Your initials will appear on all documents where you need to initial.',
drawInitialsButtonText: 'I Accept My Initials',
signTitle: 'Sign All Documents',
signDescription: 'Click below to sign and date on all documents.',
signDescriptionCompleted: 'Documents have been completed and signed.',
signConsentText: 'I have reviewed the documents and I consent to using electronic signatures.',
signButtonText: `Sign {{packet.name}} Documents`,
completedButtonText: 'Go To Download Page',
error: 'Oops there was an error:',
// Page color customization. We will programmatically generate related colors
// like text and hover colors based on the colors you choose.
style: {
primaryColor: '#1985a1', // Buttons, title underline, loading spinner
successColor: '#1985a1', // Completed actions
infoColor: '#46494c', // Info actions, uncompleted items
linkColor: '#1985a1', // Links
// See the section below for more white labeling options
},
}
White labeling with a custom stylesheet
You can specify a custom stylesheet injected into the signature page for all signers. This stylesheet can be served from your website giving you full control over the custom styles.
White labeling with custom stylesheets is a feature available with the Product pack or Enterprise plan. To learn more, please visit the pricing page.
signaturePageOptions: {
  style: {
    // Specify a custom stylesheet served from your website that will be
    // injected into the signature page for all signers.
    stylesheetURL: 'https://example.com/anvil-styles.css'
  },
}
For more information on how to set up and write a custom stylesheet, see the white labeling guide.
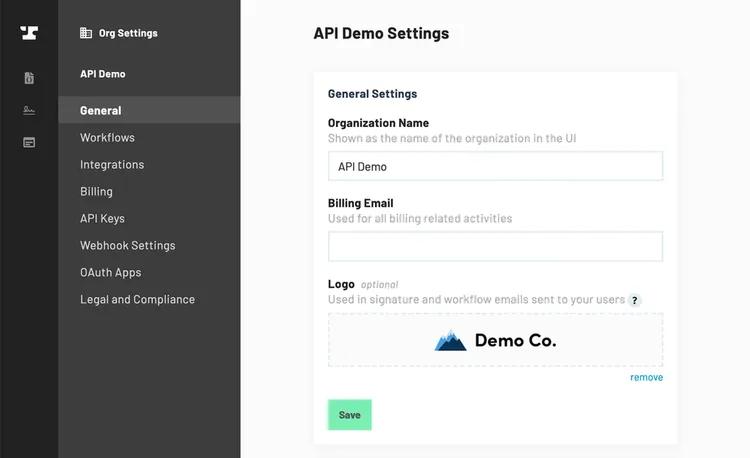
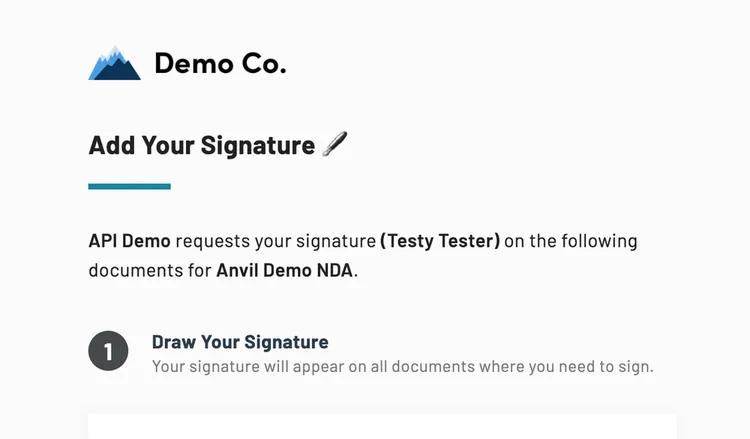
Customizing your logo
You can specify a custom logo that will be shown
- At the top of the signature page
- In emails sent to the signers
Your logo will be shown at a maximum of 30px high and 100% wide.
All you need to do is upload a logo on your organization settings. Make sure you save the settings after uploading your logo:
When you send a packet, it will automatically use your logo at the top
Customizing signer emails
You can customize email subject, body content and the reply-to email header with these options:
signatureEmailSubject
Customizes the email subject shown to signers. By default, this will be the name of your signature packet.
signatureEmailBody
Customizes the email body shown to signers. By default, the email will contain instructions on how to sign. When this is used, signatureEmailBody will be placed alongside signing instructions. It will not replace the signing link and instructions.
replyToName
Customizes the reply-to name shown when a user attempts to reply to the signing email. By default this will be your organization's name.
replyToEmail
Customizes the reply-to email shown when a user attempts to reply to the signing email. By default this will be the support email listed in your organization settings.
Merging files
You can merge all the PDFs in your packet into a single PDF with the mergePDFs option. The PDFs will be merged prior to signatures, your signers will sign the merged PDF.
{
  ...
  // merges all files into a single PDF
  mergePDFs: true,

  files: [{
    id: 'somePdf',
    castEid: 'nA1clF5gMu7wjtDHcpCM'
  }, {
    id: 'anotherPDF',
    castEid: 'db2jH49FVUWrrE60hMbi'
  }],
}
Duplicating PDF templates
By default, PDF templates used when creating a packet will be used "by reference" in your new signature packet. That means if you create a signature packet, then edit the PDF file later from the UI, you will be editing the template. If you plan to edit PDFs in your packets, you can duplicate all templates by setting the duplicateCasts option to true.
{
  ...
  // All PDFs referenced in `files` will be duplicated
  // when `duplicateCasts` is `true`
  duplicateCasts: true,

  files: [{
    id: 'somePdf',
    castEid: 'nA1clF5gMu7wjtDHcpCM'
  }, {
    id: 'anotherPDF',
    castEid: 'db2jH49FVUWrrE60hMbi'
  }],
}
Tying it all together
Here's an example mutation that touches on everything discussed above:
createEtchPacket({
  name: 'A New Etch Packet',

  isDraft: false,
  isTest: true,
  mergePDFs: false,

  signers: [
    {
      id: 'clientSigner',
      routingOrder: 1,
      signerType: 'embedded',
      redirectURL: 'https://mysite.com/signup-complete',
      name: 'Sally Client',
      email: 'sally@example.com',
      fields: [
        { fileId: 'existingPdf', fieldId: 'signatureOne' },
        { fileId: 'newPdf', fieldId: 'signatureThree' }
      ]
    },
    {
      id: 'complianceSigner',
      routingOrder: 2,
      name: 'Larry Lawyer',
      email: 'legal@example.com'
      fields: [
        { fileId: 'existingPdf', fieldId: 'signatureTwo' },
        { fileId: 'newPdf', fieldId: 'signatureFour' }
      ]
    }
  ],
  files: [
    {
      id: 'existingPdf',
      castEid: existingPdf.eid,
    },
    {
      id: 'newPdf',
      file: <Upload>, // See Upload reference for more details
      fields: [
        {
          id: 'someNonSignatureField',
          type: 'text',
          pageNum: 1,
          rect: { x: 253.12, y: 121.12, width: 33.22, height: 27.22 }
        },
        {
          id: 'signatureThree',
          type: 'signature',
          pageNum: 1,
          rect: { x: 203.11, y: 171.11, width: 33.11, height: 27.11 }
        },
        {
          id: 'signatureFour',
          type: 'signature',
          pageNum: 2,
          rect: { x: 253.12, y: 121.12, width: 33.22, height: 27.22 }
        }
      ]
    },
  ],
  data: {
    payloads: {
      newPdf: {
        data: {
          someNonSignatureField: 'Some non-signature Value'
        }
      },
      existingPdf: {
        filename: 'custom-filename.pdf',
        data: {
          anotherNonSignatureField: 'Another non-signature Value'
        }
      }
    }
  },
  signaturePageOptions: {
    // String overrides for the UI
  },

  // Customize your email
  signatureEmailSubject: 'Please fill out this form',
  signatureEmailBody: 'You will need your drivers license to fill out this form. Please have that available.',

  // With these options, for example, the reply-to email header will look like "Jane Doe <jdoe@example.com>"
  replyToName: 'Jane Doe',
  replyToEmail: 'jdoe@example.com'
}) : EtchPacket
The mutation will return an EtchPacket. You can see more details on the full mutation schema here. For details on the Upload type used for new file uploads, see the Upload reference.
Want to see the code in action? Create your first signature packet by running our ready-to-go example on Postman.
Sending a signature packet
Sending the packet must be done before you can gather signatures, even if your signers are embedded signers. Before sending an EtchPacket, the packet will be in draft mode.
If you want to send the packet immediately on creation, use isDraft: false in the createEtchPacket mutation call.
Setting isDraft to true will put your packet in draft mode. Your signers will not receive requests to sign until you send the packet. If your packet is a draft (created but not yet sent), you can use the sendEtchPacket mutation to send it. Alternatively, you can send draft packets from the UI.
- For packets in draft mode (for example
isDraftset totruein thecreateEtchPacketmutation),sendEtchPacketwill kick off the signature collection process by sending an email to the first signer. - Calling
sendEtchPacketon a packet that has been sent (statussentorpartial) will 'resend' an email to the current signer in the routing order.
Simply call the following mutation with the eid of the EtchPacket you have already created:
sendEtchPacket({
  eid: yourExistingPacket.eid,
})
Note that Anvil will only send emails requesting signatures to signers with signerType: "email". Sending a packet is required for embedded signers as well. See the next section for more info on embedded signers.
To get a better idea, check out our sendEtchPacket example on Postman.
Controlling the signature process with embedded signers
By default, we will solicit all signatures via email. By using embedded signers, you can generate signing links which can be embedded into your app or website.
To set up an embedded signer, set the signerType of any signer in your packet to "embedded". That signer will not be sent an email when it's time to sign. It will be up to you to get the signer to complete their signatures via a sign URL generated by the generateEtchSignURL mutation.
generateEtchSignURL (
  # The eid from the Signer in question
  signerEid: String!,

  # The signer's user id in your system
  #
  # NOTE: It's important that you set `clientUserId`
  # to the user ID in your system. It provides
  # traceability. E-signatures are only valid if the
  # person signing can be verified with some level
  # of confidence that they are who they say they are.
  # The `clientUserId` provides that traceability as
  # presumably your app has verified the signer's
  # email address.
  clientUserId: String!
): String # The URL
The signing URL from generateEtchSignURL will include a token with a 2 hour expiration timestamp from when it was generated. The token duration is configurable via tokenValidForMinutes.
Redirect the user to the resulting URL, or embed the URL in an iframe. If you have set up the signer's redirectURL, they will be redirected back to your app when they are finished signing or are ready to download their documents.
Recommended flow
The default token expiration on the signing URL is short by design. It is intended to be generated at the moment the user is ready to sign their documents. When it is time for your user to sign documents, it is recommended the user visits a URL in your system. That route should verify the user is who they say they are, call generateEtchSignURL, then immediately redirect them to (or embed) the fresh signing URL.
For example, say you want a user to sign from an email you have sent from your system:
- You send Sally Jones an email with a
Sign nowbutton. - The
Sign nowbutton should point to a URL in your system, e.g.https://yourco.com/sign/sally-jones. - Your
/sign/sally-jonesroute handler verifies Sally is actually Sally (e.g. she can log in). - Your system calls
generateEtchSignURLto generate the signing URL. - Your system redirects Sally to (or embeds) the URL from
generateEtchSignURL. - If Sally does not sign during that session, you can call
generateEtchSignURLagain to regenerate the signing URL when she is ready to sign.- Old tokens will continue to work as long as they are not beyond the expiry date.
- If you would like to ensure that only the newest token is valid for signing, you will need to explicitly expire old tokens by calling
expireSignerTokensbefore callinggenerateEtchSignURL.
Signer information
The signerEids for your Packet can be found in the response of your createEtchPacket mutation call via a response query like the following:
createEtchPacket({
  ...,
  signers: [{
    id: 'signerOne',
    routingOrder: 1,
    ...
  }]
}) {
  # Response query. Top level item is an EtchPacket
  eid
  name
  documentGroup {
    eid
    signers {
      eid
      aliasId # From the 'id' you gave each signer. E.g. 'signerOne'
      routingOrder # From the `routingOrder` you specified, or location in the signers array
    }
  }
}
You can use either the aliasId or the routingOrder to correlate a response signer with the signers you provided in your mutation variables, and from there you can pluck out the eid to be used as the signerEid variable in your generateEtchSignURL mutation call.
Already created a signature packet? Try running our example on Postman to generate your signature link.
Embedding the signing UI in an iframe
Make sure you read about controlling the signing process with embedded signers above. In order to embed the signing process in your app, you will need to use signerType: "embedded" signers. That means:
- Set the signer's
signerTypeto"embedded"when creating your packet. Each signer who will be shown the signing UI in an iframe needs to besignerType: 'embedded'. - Use the
generateEtchSignURLmutation to generate a signing URL for your signer. Only signing URLs generated bygenerateEtchSignURLcan be embedded in aniframe.
When it is time for your user to sign, generate a URL from via the generateEtchSignURL mutation, then use the URL from the response in the src attribute of the iframe.
const signingURL = generateEtchSignURL({
  variables: { signerEid, clientUserId },
})
const urlToFrame = newURL
Then use it in the src attribute of your iframe.
<iframe src="{urlToFrame}"></iframe>
React components
If you use React, the easiest way to embed the signing UI is to use our AnvilEmbedFrame or AnvilSignatureModal React components found in our React-UI library. These components will handle lifecycle callbacks for you.
import AnvilEmbedFrame from '@anvilco/anvil-embed-frame'
;<AnvilEmbedFrame
  iframeURL={signingURL}
  onEvent={(eventObject) => console.log('Event object:', eventObject)}
/>
Events from the iframe
When finished signing or when the signer experiences an error, Anvil will communicate with the parent window using the Window.postMessage() API. To receive the message, you can add an event listener to your app. When using a plain iframe HTML element, you can do the following
window.addEventListener('message', ({ origin, data: eventObject }) => {
  if (origin !== 'https://app.useanvil.com') return
  if (eventObject && typeof eventObject === 'object') {
    if (eventObject.action === 'signerLoad') {
      // The signing UI has fully loaded
    } else if (eventObject.action === 'signerComplete') {
      // A signer has finished signing
    } else if (eventObject.action === 'signerError') {
      // A signer has experienced an error
    }
  }
})
When using one of our React components like AnvilEmbedFrame, these same events are emitted in the onEvent callback:
<AnvilEmbedFrame
  iframeURL={signingURL}
  onEvent={(eventObject) => {
    if (eventObject.action === 'signerComplete') {
      // A signer has finished signing
    } else if (eventObject.action === 'signerError') {
      // A signer has experienced an error
    }
  }}
/>
The properties on the object passed to your event handler will be the same as the query params passed to the signer's redirectURL attribute. For full details on the redirectURL query params, see the redirectURL section above.
If you have a redirectURL set up on your signer, the iframe will be redirected to your redirectURL when finished signing or on error. It is not required to wait for the redirect to finish loading. It is fine to remove the iframe from the page when you have received the postMessage event.
Iframe event details
IFrame event objects will be in one of the following shapes:
As a user makes their way through the signing process, a few of events will be emitted from the iframe to your parent frame. This guide will cover all events within the signature step. If you are using e-signatures with Workflows and Webforms, see the Workflows guide for Webform and Workflow event details. Here are all supported signature-related events; they will happen roughly in the following order:
signerLoad- The e-signature page has fully loaded.signerSign- The signer has clicked through all signatures on all documents.signerComplete- The signer has finished signing.signerError- The signer has experienced an error.
signerLoad
signerLoad is triggered when the signing page has fully loaded and is ready for the signer to begin signing.
{
  action: 'signerLoad',
  signerStatus: 'viewed',
  signerEid: 'Jc1ZJisPnpF5lHyfyqBW',
  nextSignerEid: 'WBqyfyHl5FpnPsiJZ1cJ',
  documentGroupStatus: 'sent',
  documentGroupEid: 'nEKq2eGim0ijSqKd98nG',
  etchPacketEid: 'XzfmVPfGUEyBc1XyylFo',
}
signerSign
signerSign is triggered when the user has clicked "Sign all" or through all signature fields on the documents.
{
  action: 'signerSign',
  signerStatus: 'viewed',
  signerEid: 'Jc1ZJisPnpF5lHyfyqBW',
  nextSignerEid: 'WBqyfyHl5FpnPsiJZ1cJ',
  documentGroupStatus: 'sent',
  documentGroupEid: 'nEKq2eGim0ijSqKd98nG',
  etchPacketEid: 'XzfmVPfGUEyBc1XyylFo',
}
signerComplete
signerComplete is triggered when the signer has completed signing. At this point, all documents will be digitally signed with the signer's signature.
{
  action: 'signerComplete',
  signerStatus: 'completed',
  signerEid: 'Jc1ZJisPnpF5lHyfyqBW',
  nextSignerEid: 'WBqyfyHl5FpnPsiJZ1cJ',
  documentGroupStatus: 'partial',
  documentGroupEid: 'nEKq2eGim0ijSqKd98nG',
  etchPacketEid: 'XzfmVPfGUEyBc1XyylFo',
}
signerError
signerError is triggered when a signer has experienced an error. See the handling signing errors section for full details on signer errors.
{
  action: 'signerError',
  signerEid: 'Jc1ZJisPnpF5lHyfyqBW',
  errorType: 'tokenExpired',
  error: 'Token expired',
  message: 'The token has expired',
}
Embedded Workflow & Webform events
If you are embedding e-signatures along side a Webform, your iframe will capture events from the Webform as well. See the embedding section of the Workflow API guide for details on handling Webform events from the iframe.
Enabling iframe embedding
Out of the box, the following can be embedded for testing purposes in any URL (including localhost):
EtchPackets created with your dev API keyEtchPackets created with your production key andisTest: true
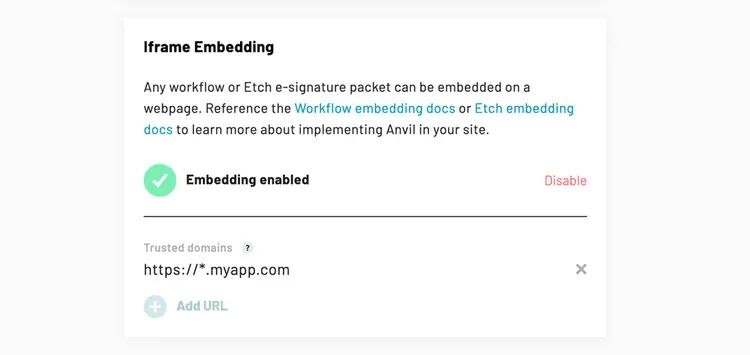
You can enable embedding of production packets from the API tab in your organization's settings.
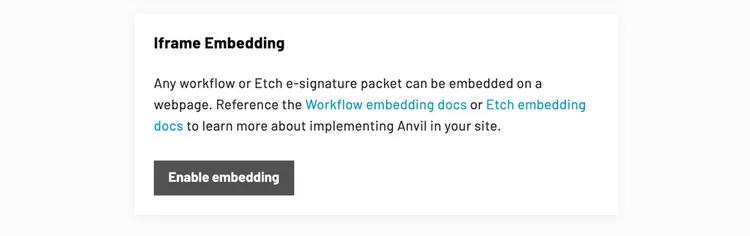
Once you enable embedding, you will be asked to add your domains to a whitelist:
External hardware signature pad integration
When embedding the Anvil signing page in an iframe, you can integrate external hardware signature pads by sending signature and initials images via the postMessage API. This allows signers to use connected hardware devices to capture signatures and initials, which are then sent into Anvil's e-signature signing page.
Prerequisites
Before using this feature, ensure the following:
- Access to the feature: This is an enterprise feature. Contact Anvil support to enable.
- Trusted domains: Your organization must configure
trustedIframeDomainswith the domains that will embed the signing page. This can be configured in your organization settings. - Iframe embedding: The signing page must be loaded inside an iframe (see Embedded Signers).
- Signature mode: The signer must be configured with
signatureMode: 'draw'.
PostMessage API
All communication between the parent window and the signing page iframe uses window.postMessage(). Each message is an object containing an action field.
Send messages to the iframe:
const signingIframe = document.getElementById('anvil-signing-iframe')
signingIframe.contentWindow.postMessage({ action: 'connectSignaturePad' }, '*')
Listen for responses from the iframe:
window.addEventListener('message', (event) => {
  // Validate the origin
  if (event.origin !== 'https://app.useanvil.com') return
  const { action } = event.data || {}
  // Handle the action...
})
Incoming events (parent → signing page)
These are the messages you send from your parent page to the Anvil signing page iframe.
| Action | Payload | Description |
|---|---|---|
connectSignaturePad | { action } | Must be sent first to indicate a hardware signature pad is connected. Required before sending any images. |
disconnectSignaturePad | { action } | Indicates the signature pad has been disconnected. |
setSignatureImage | { action, image } | Sets the signature image. The image field is a base64-encoded PNG or JPEG string. The pad must be connected first. |
setInitialsImage | { action, image } | Sets the initials image. The image field is a base64-encoded PNG or JPEG string. The pad must be connected first. |
clearSignatureImage | { action } | Clears a previously set signature image. |
clearInitialsImage | { action } | Clears a previously set initials image. |
Outgoing events (signing page → parent)
These are the response messages sent from the Anvil signing page back to your parent window.
| Action | Description |
|---|---|
signaturePadConnected | Confirms the pad connection was accepted. |
signaturePadDisconnected | Confirms the pad disconnection was accepted. |
signatureImageSet | The signature image was accepted successfully. |
initialsImageSet | The initials image was accepted successfully. |
signatureImageCleared | The signature image was cleared. |
initialsImageCleared | The initials image was cleared. |
signatureImageError | Error setting the signature image. Includes error (message string) and errorType fields. |
initialsImageError | Error setting the initials image. Includes error (message string) and errorType fields. |
externalSignatureDisabled | The feature is disabled or the origin is untrusted. Includes error and errorType fields. |
Image requirements
| Requirement | Value |
|---|---|
| Supported formats | PNG, JPEG |
| Maximum file size | 1MB |
| Minimum dimensions | 50×20 pixels |
| Maximum dimensions | 2000×1000 pixels |
The image field accepts base64-encoded data in either of these formats:
- Raw base64 string:
iVBORw0KGgoAAAANSU... - Data URL:
data:image/png;base64,iVBORw0KGgoAAAANSU...
Error types
| Error Type | Description |
|---|---|
invalidBase64 | The base64 data is missing or invalid. |
unsupportedFormat | The image format is not PNG or JPEG. |
fileTooLarge | The image exceeds the 1MB size limit. |
invalidDimensions | Could not read image dimensions. |
dimensionsTooSmall | Image dimensions are below the 100×40 pixel minimum. |
dimensionsTooBig | Image dimensions exceed the 2000×1000 pixel maximum. |
processingError | A general image processing failure occurred. |
hardwareNotConnected | A setSignatureImage or setInitialsImage was sent before connectSignaturePad. |
signatureAlreadySet | A signature image is already set. Clear it first before setting a new one. |
initialsAlreadySet | An initials image is already set. Clear it first before setting a new one. |
signatureModeNotDraw | The signer's signature mode is not set to "draw". |
organizationNotConfigured | The organization does not have this feature enabled. |
untrustedOrigin | The message origin is not in the organization's trustedIframeDomains. |
Typical integration flow
- Embed the Anvil signing URL in an iframe.
- Send
connectSignaturePadto indicate the hardware pad is ready. - Wait for the
signaturePadConnectedconfirmation. - When the user signs on the hardware pad, capture the image as base64 PNG or JPEG.
- Send
setSignatureImagewith theimagefield. - Listen for
signatureImageSet(success) orsignatureImageError(failure). - Repeat for initials using
setInitialsImage/initialsImageSet/initialsImageError. - To replace an image, send
clearSignatureImagefirst, then sendsetSignatureImagewith the new image. - When done, send
disconnectSignaturePad.
Example integration
const ANVIL_ORIGIN = 'https://app.useanvil.com'
const iframe = document.getElementById('anvil-signing-iframe')

// Step 1: Notify Anvil that a hardware signature pad is connected
iframe.contentWindow.postMessage({ action: 'connectSignaturePad' }, '*')

// Step 2: Listen for all responses from the signing page
window.addEventListener('message', (event) => {
  // Always validate the message origin
  if (event.origin !== ANVIL_ORIGIN) return

  const { action, error, errorType } = event.data || {}

  switch (action) {
    case 'signaturePadConnected':
      console.log('Pad connected — ready to send images')
      break
    case 'signaturePadDisconnected':
      console.log('Pad disconnected')
      break
    case 'signatureImageSet':
      console.log('Signature accepted')
      break
    case 'initialsImageSet':
      console.log('Initials accepted')
      break
    case 'signatureImageCleared':
      console.log('Signature cleared')
      break
    case 'initialsImageCleared':
      console.log('Initials cleared')
      break
    case 'signatureImageError':
      console.error(`Signature error: ${error} (${errorType})`)
      break
    case 'initialsImageError':
      console.error(`Initials error: ${error} (${errorType})`)
      break
    case 'externalSignatureDisabled':
      console.error(`Feature disabled: ${error} (${errorType})`)
      break
  }
})

// Step 3: When signature is captured from the hardware pad
function onSignatureCaptured(base64Image) {
  iframe.contentWindow.postMessage({
    action: 'setSignatureImage',
    image: base64Image, // base64 PNG or JPEG
  }, '*')
}

// Step 4: When initials are captured from the hardware pad
function onInitialsCaptured(base64Image) {
  iframe.contentWindow.postMessage({
    action: 'setInitialsImage',
    image: base64Image,
  }, '*')
}

// Step 5: To replace a signature, clear it first then set the new one
function replaceSignature(newBase64Image) {
  iframe.contentWindow.postMessage({ action: 'clearSignatureImage' }, '*')
  // After receiving 'signatureImageCleared', send the new image
  iframe.contentWindow.postMessage({
    action: 'setSignatureImage',
    image: newBase64Image,
  }, '*')
}

// Step 6: When the hardware pad is disconnected
function onPadDisconnected() {
  iframe.contentWindow.postMessage({ action: 'disconnectSignaturePad' }, '*')
}
Important notes
- Images cannot be overwritten directly. You must send
clearSignatureImageorclearInitialsImagebefore setting a new image. - The pad must be connected first. Send
connectSignaturePadbefore sending any image. Sending an image without connecting first will result in ahardwareNotConnectederror. - Connection state persists in
sessionStorageacross page navigations within the signing session. If the signer navigates between pages in the signing flow, the pad remains connected. - Origin validation is enforced. Messages from domains not listed in your organization's
trustedIframeDomainsconfiguration will be rejected with anuntrustedOriginerror.
UI behavior
When connectSignaturePad is sent:
- The signature/initials drawing canvas is disabled (prevents mouse/touch input)
- An overlay appears indicating that an external signature pad has been detected
- The connection status persists across page refreshes within the session
When an external image is set:
- The image displays in place of the signature pad
- The signer can proceed with the signing flow normally
- Clearing the image restores the normal signature pad
Troubleshooting embedded signers
Sometimes things go wrong! That's ok, here are some common problems and steps to resolve them. If after reading this, you are still having issues, please contact support, and we can help sort it out.
The iframe is not allowing the page to be framed
- Are you framing a URL returned from
generateEtchSignURL? Only signing URLs returned fromgenerateEtchSignURLcan be framed. - Is your packet created with
isTest: false?- If so and the packet is for testing purposes, use
isTest: true. - If so and the packet is for production purposes, enable iframe embedding in your org settings.
- If so and the packet is for testing purposes, use
- Are you using your production API key?
- Make sure iframe embedding is enabled
- Is the failing parent URL included in your trusted domains? It's possible the URL rendering the
iframeis not in the list of allowed URLs. The scheme, subdomains (or*), domain, and port need to match. e.g.https://example.comandhttps://sign.example.comare different. - Is one or more of your signers set to
signerType: 'email'? Only signers withsignerType: 'embedded'will be able to be framed.
The generateEtchSignURL mutation returns null
- Is your user set up with
signerType: 'embedded'? Email signers will be sent an email when it is their turn to sign.- Set
signerTypeto embedded.
- Set
My packet does not have a DocumentGroup or Signers
- Is your packet in
draftmode? - The
generateEtchSignURLmutation requires a signerEid, and the simplest way to fetch that info is in the response of yourcreateEtchPacketcall. If you have a packet, but fetching the signer information returnsnull, your packet is indraftmode. The packet will need to be "sent", either by specifyingisDraft: falseon creation, or by callingsendEtchPacket.
Interactive Signing: Collect information during signing
Interactive Signing is a powerful new feature designed to streamline the signing process by allowing signers to provide or update necessary information during the signing process. This offers an experience similar to workflows but completely contained within the signing page to enhance the Etch e-sign process.
Real-Life Use Case
Imagine a scenario where a client needs to sign a contract but also needs to update their contact information. With Interactive Signing, the client can update their phone number and address while signing the contract, ensuring that all necessary information is collected and updated in one seamless process.
Enabling Interactive Signing
Interactive signing in the Anvil Dashboard is free for everyone. For API and programmatic access, you'll need the Product pack or Enterprise plan. To enable Interactive Signing when creating an Etch Packet, pass the allowUpdates boolean argument as true and specify any interactive fields you want associated with a signer in that signer's fields array along with the usual signature-related fields.
Example Setup:
const CREATE_ETCH_PACKET_QUERY = `
  mutation CreateEtchPacket(
    # These are the most relevant arguments, so we'll focus on them:
    $allowUpdates: Boolean,
    $files: [EtchFile!],
    $signers: [JSON!],
    $data: JSON,
    # ...
    # The rest of your arguments go here, for example:
    # $name: String,
    # $organizationEid: String,
  ) {
    createEtchPacket(
      allowUpdates: $allowUpdates,
      files: $files,
      signers: $signers,
      data: $data,
    ) {
      eid
      status
      documentGroup {
        eid
        status
        signers {
          eid
          routingOrder

          # New! This will fetch the user-entered payload
          payload
        }
      }
    }
  }
`

const variables = {
  allowUpdates: true, // Must be `true`
  files: [
    {
      id: 'sampleTemplate',
      castEid: '05xXsZko33JIO6aq5Pnr',
    },
  ],
  data: {
    // These payloads will be the initial base of the data used to fill the
    // PDFs in this packet, and the data from any Interactive Signing input
    // will be merged on top of this data whenever it's provided. The data
    // from these payloads will also be used as the initial value for any
    // Interactive Fields which happen to be mapped to them.
    payloads: {
      sampleTemplate: {
        data: {
          name: 'Robin Smith',
          shortText: 'Example Short Text',
          email: 'robin@example.com',
          date: '2024-07-24',
          ssn: '456454567',
          ein: '897654321',
        },
      },
    },
  },
  signers: [
    {
      id: 'signer1',
      name: 'Robin Smith',
      email: 'robin@example.com',
      fields: [
        // This is an Interactive Signing field declaration:
        {
          // This field will be shown in Signer1's Interactive Signing
          // experience with the initial value pre-filled to
          // `robin@example.com`. This is because one of the payloadMaps
          // points to a field for which their is data from the payloads
          // already. This allows you to pre-fill the data and give the
          // signer the option to update it if needed.
          kind: 'form', // Required: Indicates this is an Interactive Signing field
          label: 'Email', // Optional
          description: 'Please enter in your email address.', // Optional
          helpTip: 'You can change this later if you want.', // Optional

          // Required: An array of objects specifying what fields should be
          // filled using the data provided by the Signer to this Interactive Field.
          // - They can span across different files (if your packet has more
          //   than 1 file) and field aliases can be used in the "fieldId".
          // - The type of field rendered in the form to the Signer will be
          //   derived from the payload fields specified here.
          // - All targeted fields in the payload maps must be of the same type.
          payloadMaps: [
            {
              fileId: 'sampleTemplate',
              fieldId: 'email',
            },
            {
              fileId: 'sampleTemplate2',
              fieldId: 'emailAddress',
            },
          ],
        },
        {
          kind: 'form', // Required
          label: 'Home Phone', // Optional
          options: {
            optional: true, // Allows the field to be optional when signing
            placeholder: '1-231-231-2312', // Optional
          },
          payloadMaps: [
            {
              fileId: 'sampleTemplate',
              fieldId: 'homePhone',
            },
          ],
        },
        {
          kind: 'form',
          label: 'Home Address',
          payloadMaps: [
            {
              fileId: 'sampleTemplate',
              fieldId: 'homeAddress',
            },
          ],
        },
        {
          // This field will NOT be shown in Signer1's Interactive Signing
          // experience because a value already exists in the data payload
          // that matches one of the payloadMap targets AND the
          // `ignoreWhenFilled` option is set to `true`.
          kind: 'form',
          label: 'Social Security Number',
          ignoreWhenFilled: true,
          payloadMaps: [
            {
              fileId: 'sampleTemplate',
              fieldId: 'ssn',
            },
          ],
        },
        // This is a standard "signature" field declaration:
        {
          fileId: 'sampleTemplate',
          fieldId: 'signature',
        },
        {
          fileId: 'sampleTemplate',
          fieldId: 'signatureInitial',
        },
      ],
    },
  ],
}

const response = await anvilClient.createEtchPacket({
  variables,
  mutation: CREATE_ETCH_PACKET_QUERY,
})
What happens next?
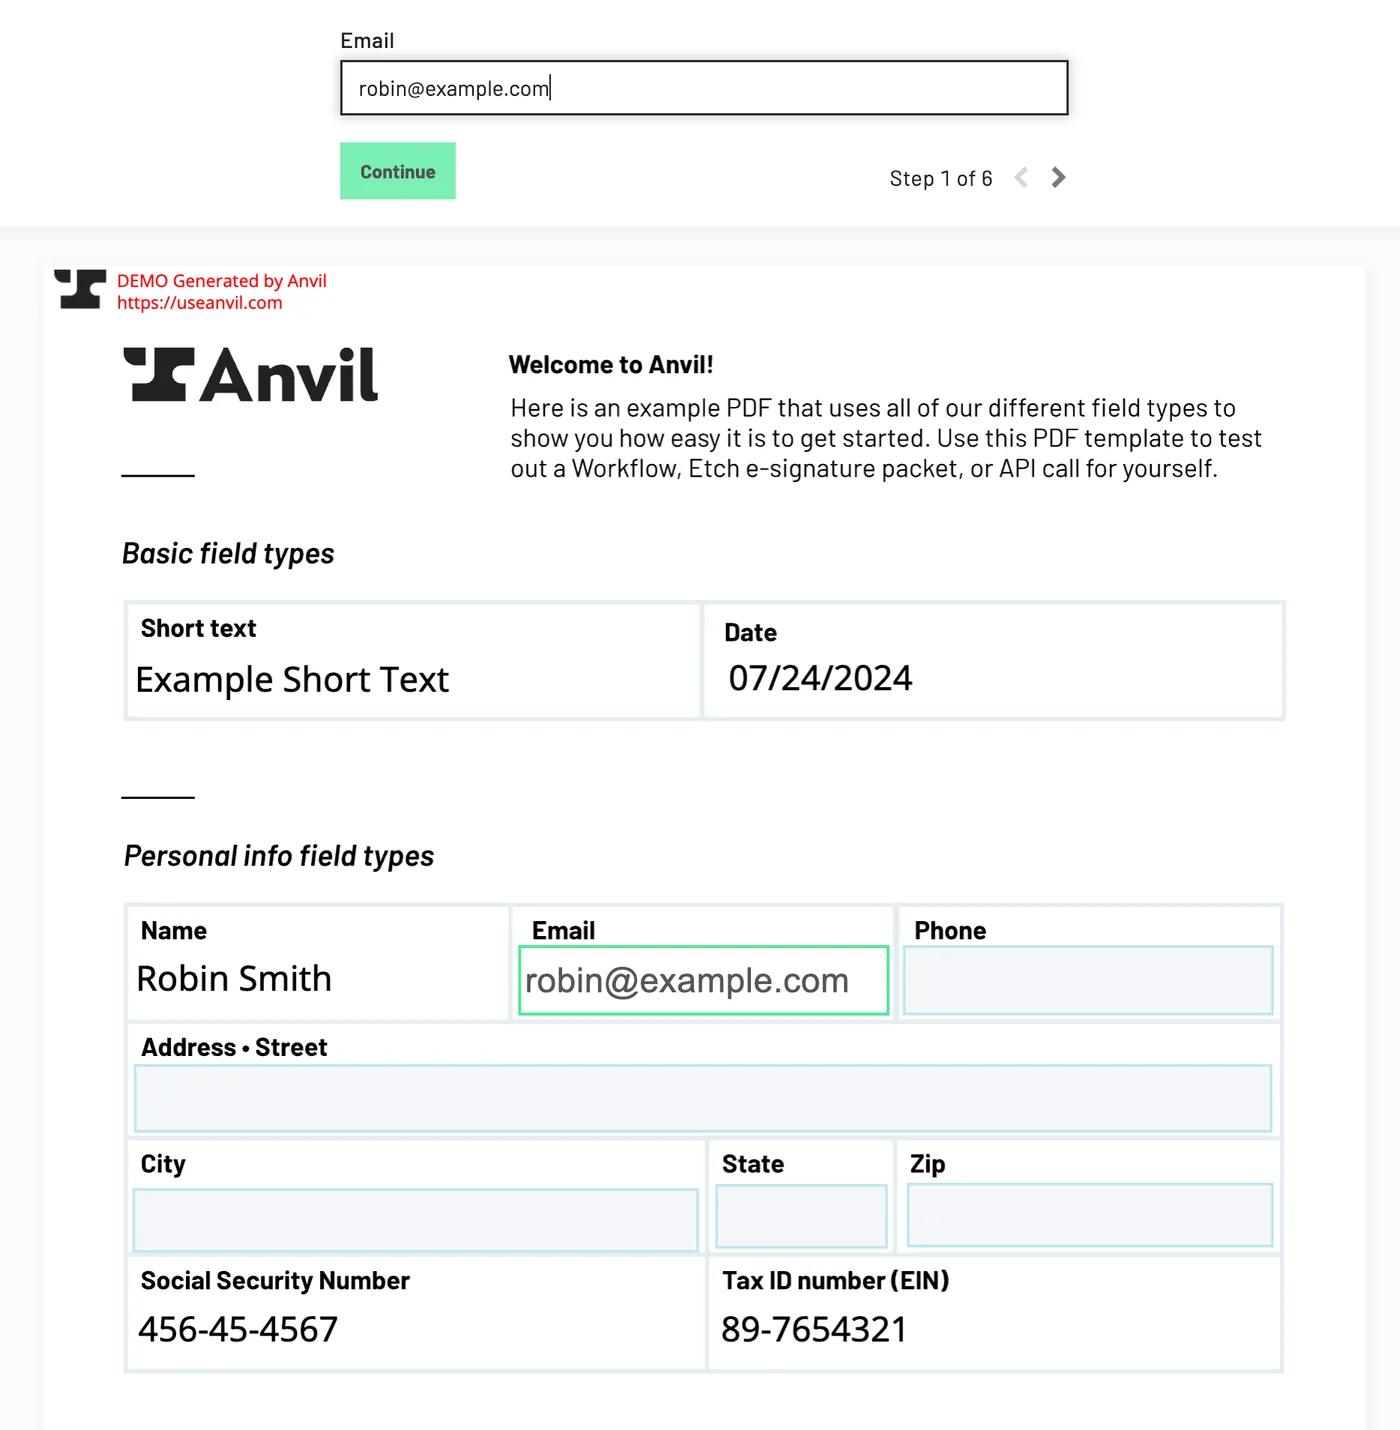
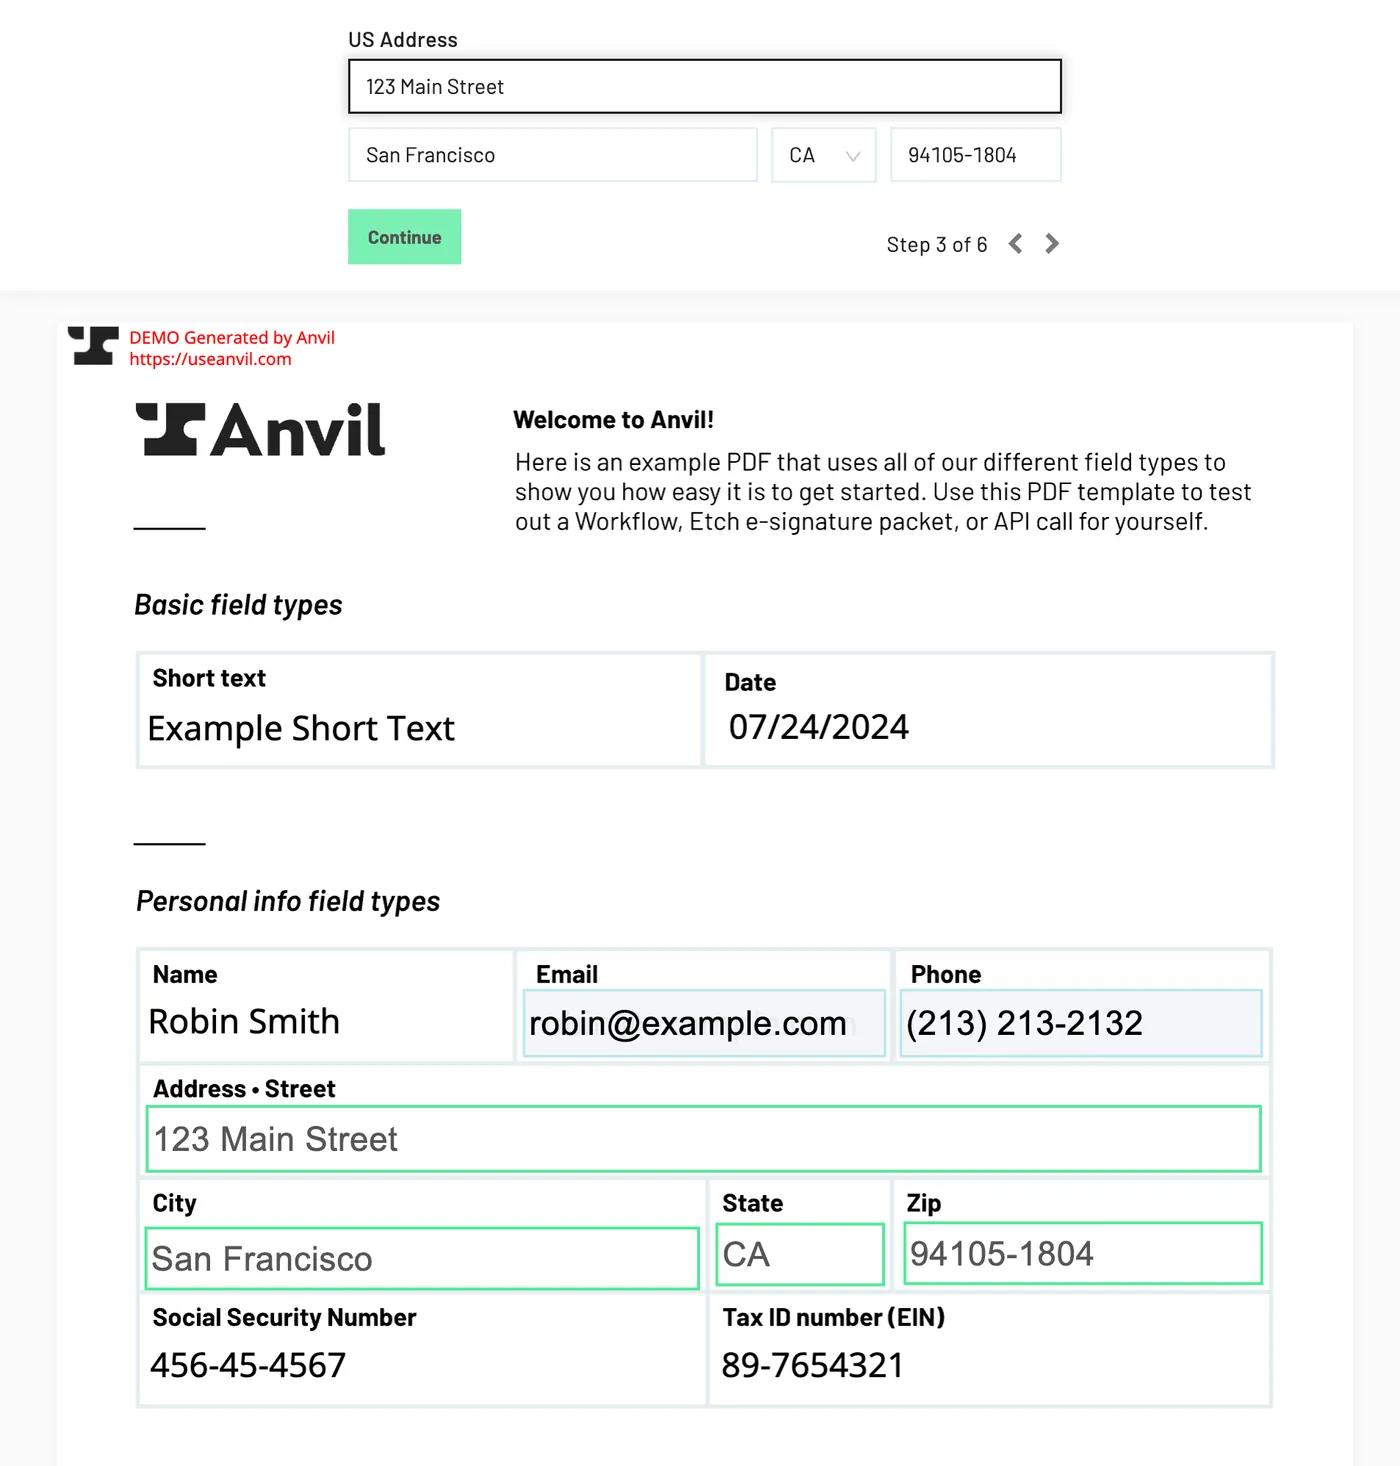
In the example above, the Document Group will initially be filled out with all the data from the data.payloads just as it would in a normal Etch Packet scenario. Then, when Signer1 goes to their signing page:
- The PDF will be rendered having been filled with whatever data we had by that time as per usual.
- The Signer will be asked to draw or type their signature, as they normally would.
- The Signer will be shown 3 fields:
- A field asking them to update their "Email". This field will be pre-filled with "robin@example.com" since that value was provided in the data payload.
- A field asking them to enter their "Phone". This field is optional and will not be required to filled in order to complete and sign the document.
- A field asking them for their "Home Address". This field is required
- The Signer will NOT be shown the "Social Security Number" field because there was already a value for that field from the data payload AND the
ignoreWhenFilledoption was set to `true.
Fetching a Signer's Collected Data
After signing, the data entered by the signer can be fetched in two ways:
- From Webhooks:
signerCompleteandetchPacketCompletewebhooks will contain the payload data.- In the
signerCompletewebhook call, the payload will have a newpayloadattribute. e.g.webhookRequest.data.payload - In the
etchPacketCompletewebhook call, each signer on the payload will have a newpayloadattribute. e.g.webhookRequest.data.signers[0].payload
- In the
- From GraphQL Queries: Use the
payloadresolver on theSignerobject to fetch the user-entered data.
Example GraphQL Query
const SIGNER_QUERY = `
  query signer($eid: String!) {
    signer(eid: $eid) {
      eid

      # New! This will fetch the user-entered payload
      payload
    }
  }
`
The payload format in all cases will mirror that of the createEtchPacket payload:
{
  sampleTemplate: {
    data: {
      email: "robin@example.com",
      phone: {
          "region": "US",
          "num": "12312312312"
      },
      homeAddress: {
        "zip": "94105-1804",
        "city": "San Francisco",
        "state": "CA",
        "country": "us",
        "street1": "123 Main Street",
        "street2": ""
      }
    }
  }
}
Progressive Signing: Updating data on documents between signers
For some use cases, you may need to add or update data on documents after someone has already signed. Anvil calls this "Progressive Signing". With a Progressive Signing-enabled packet, you can update the data on documents any time after the DocumentGroup has been created (status: 'sent'), after signers have signed (status: 'partial'), but before the EtchPacket is status: 'complete'.
Using progressive signing is a simple two-step process:
- Pass
allowUpdates: truetocreateEtchPacket - Provide an updated
payloadto theupdateEtchPacketmutation
That's it! Usage details are described below.
Etch Progressive Signing is available to all organizations when used with test packets (when isTest: true is set). To enable for production use, you'll need the Product pack or Enterprise plan.
Enabling Progressive Signing on your packet
To enable Progressive Signing for an Etch Packet, pass the top-level allowUpdates boolean argument as true when you create the packet with createEtchPacket.
Here's a two-signer example setting up a packet for Progressive Signing in JavaScript. Once created, this will be in sent status and will be in a state where signer1 can sign.
await anvilClient.createEtchPacket({
  variables: {
    allowUpdates: true, // Required to allow updates

    // Everything below is the same setup you use without `allowUpdates`
    name: 'Some Test',
    isDraft: false,
    isTest: true,

    files: [
      {
        id: 'sampleTemplate',
        castEid: pdfTemplateID,
      },
    ],

    data: {
      payloads: {
        sampleTemplate: {
          data: {
            myData: 'Lorem Ipsum',
            deleteThisField: 'Delete me later',
          },
        },
      },
    },

    signers: [
      {
        id: 'signer1',
        name: 'Sally Signer',
        email: 'sally@example.com',
        signerType: 'embedded',
        fields: [
          {
            fileId: 'sampleTemplate',
            fieldId: 'signatureField',
          },
        ],
      },
      {
        id: 'signer2',
        name: 'Johnny Signer',
        email: 'johnny@example.com',
        signerType: 'embedded',
        fields: [
          {
            fileId: 'sampleTemplate',
            fieldId: 'signatureField2',
          },
        ],
      },
    ],
  },
})
In plain GraphQL, the query would look like this:
mutation CreateEtchPacket(
  $allowUpdates: Boolean # New!
  $name: String
  $isDraft: Boolean
  $isTest: Boolean
  $files: [EtchFile!]
  $signers: [JSON!]
  $data: JSON
) {
  createEtchPacket(
    allowUpdates: $allowUpdates

    name: $name
    isDraft: $isDraft
    isTest: $isTest

    files: $files
    signers: $signers
    data: $data
  ) {
    eid
    status
    documentGroup {
      eid
      status
      files
      signers {
        eid
        routingOrder
      }
    }
  }
}
Updating the payload
Until the EtchPacket is complete, the data in documents can be changed by passing an updated top-level payload JSON object to the GraphQL updateEtchPacket mutation.
Our example above has two signers who sign sequentially, you will be able to update the payload at two points:
- Immediately after the EtchPacket is created, before any signers have signed.
- After
signer1has signed.
Once all signers have signed, the EtchPacket will have been completed and will no longer accept updates.
An example GraphQL query:
mutation UpdateEtchPacket(
  $eid: String!
  $name: String
  $payload: JSON
  # See below for usage notes
  $mergePayloads: Boolean
  $waitForDocumentGroupUpdate: Boolean
) {
  updateEtchPacket(
    eid: $eid
    name: $name
    payload: $payload
    mergePayloads: $mergePayloads
  ) {
    eid
    name
    isTest
    payload
  }
}
Usage in JavaScript looks like the following:
const UPDATE_ETCH_PACKET_QUERY = `
  mutation UpdateEtchPacket(
    $eid: String!
    $name: String
    $payload: JSON
    $mergePayloads: Boolean
  ) {
    updateEtchPacket(
      eid: $eid
      name: $name
      payload: $payload
      mergePayloads: $mergePayloads
    ) {
      eid
      name
      isTest
      payload
    }
  }
`

// When this returns, the documents will have been updated with your new data!
const response = await anvilClient.requestGraphQL({
  query: UPDATE_ETCH_PACKET_QUERY,
  variables: {
    eid: etchPacketEid,

    // See below for usage notes
    mergePayloads: true,

    payload: {
      payloads: {
        sampleTemplate: {
          data: {
            myData: 'Update! Lorem Ipsum', // Changed!
            newData: 'Added in update call', // Field newly filled
            deleteThisField: null, // Will remove data from this field
          },
        },
      },
    },
  },
})
By default, the provided payload will be considered a complete replacement for the previous payload, but if you would like to provide a partial payload object to be merged with the existing one, you can enable that behavior by setting the top-level mergePayloads boolean argument to true.
Pending signers
Sometimes you may not know at packet-creation-time if a signer should sign. For example, you may have a primary signer and potentially their spouse. The spouse may not always sign, you may not even know the spouse's name or email address at packet creation. You can handle this use case with "Pending Signers".
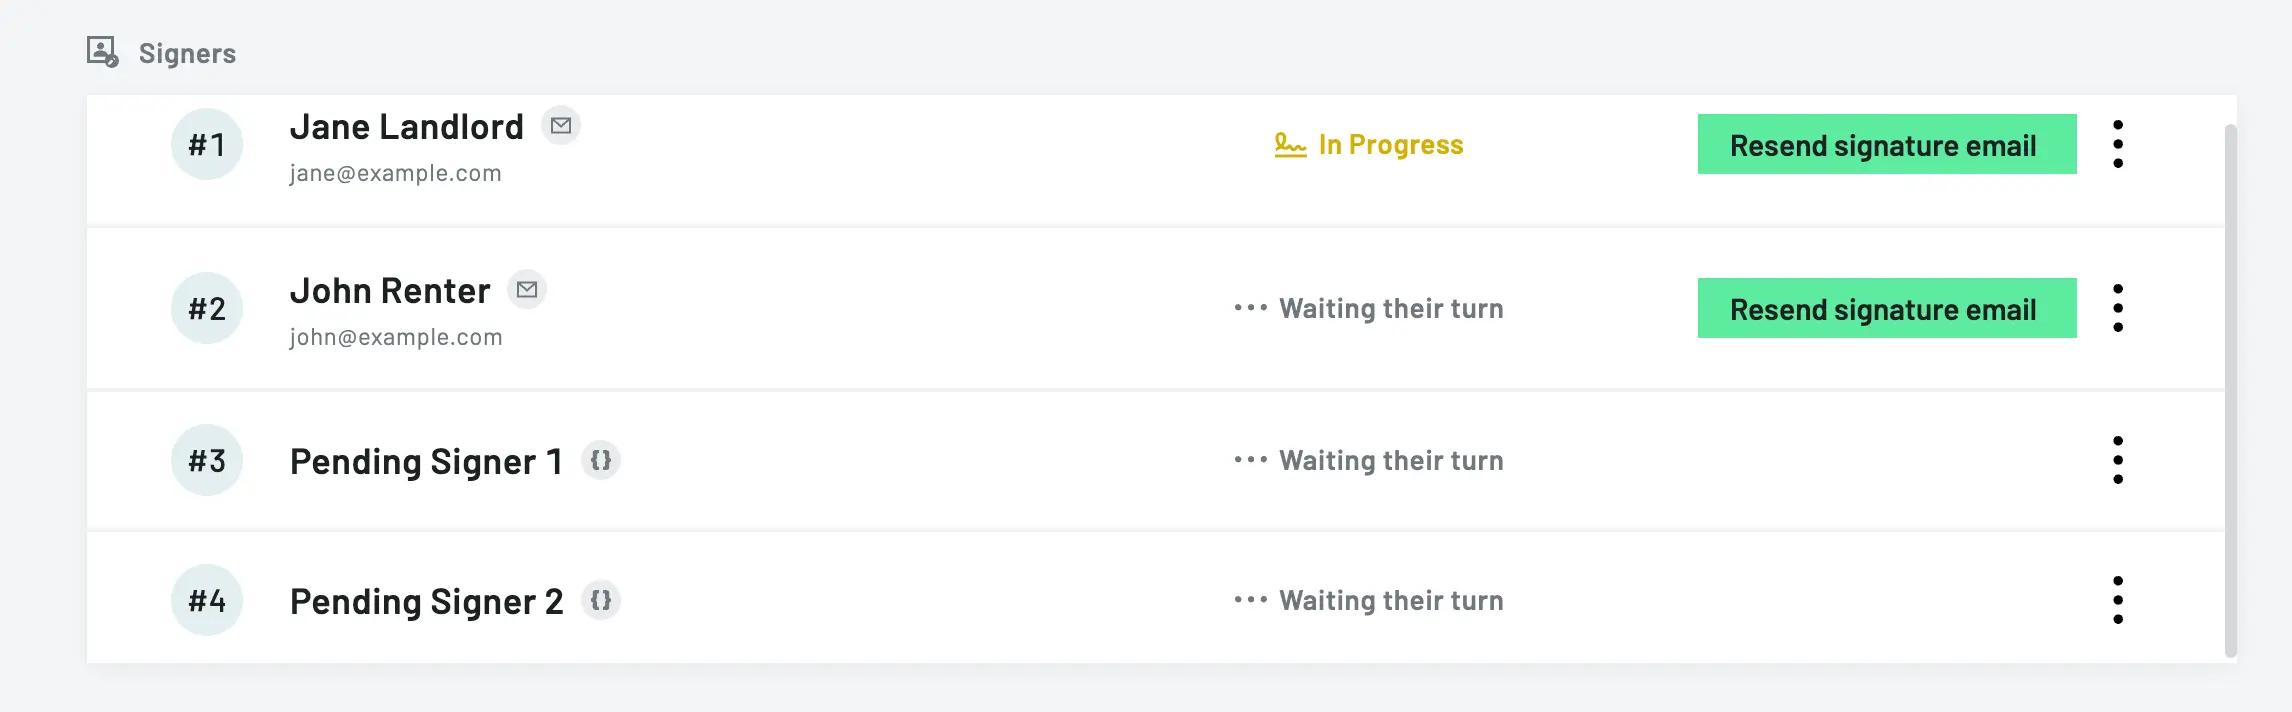
Pending Signers allow an EtchPacket to be created with one or more signers marked as pending for the time being. These pending signers can be "activated" via the updateSigner mutation.
Signers marked as pending are allowed to be created without any name or email properties, but they must have those properties populated and be activated by updateSigner by the time their signing round is encountered. If they are not activated by their signing round, they will be ignored and their data and signature will not appear on any documents. See pending signer skip behavior for deails on when signers are skipped.
Using pending signers
To create Pending Signers in Etch for an Etch Packet, you must do two things when calling the GraphQL createEtchPacket mutation:
- Pass the top-level
allowUpdatesboolean argument astrue. See the progressive signing docs for more info. - In the
signersarray argument, addisPending: trueto any of the Signer objects that you'd like to create aspending.
As mentioned above, pending signers can be created without name and email properties if you do not yet know them.
Here is an example of createEtchPacket variables with a pending spouse signer. Note that we specify the fields the pending signer will sign ahead of time:
{
  "allowUpdates": true, // Required for pending signers
  "files": [ ... ],
  "data": { ... },

  "signers": [
    {
      "id": "primarySigner",
      "name": "Sally Signer",
      "email": "sally@example.com",
      "routingOrder": 1,
      "signerType": "embedded",
      "fields": [
        {
          "fileId": "sampleTemplate",
          "fieldId": "signatureField"
        }
      ]
    },
    {
      "isPending": true, // New! No name or email required yet

      "id": "spouseSigner",
      "routingOrder": 1,
      "signerType": "embedded",
      "fields": [
        {
          "fileId": "sampleTemplate",
          "fieldId": "signatureField2"
        }
      ]
    }
  ]
}
In order to have pending signer become an active signer, you must make a call to the GraphQL updateSigner mutation:
- Pass the top-level
activateIfPendingboolean argument astruein order to activate this signer. - Ensure that the signer already has a valid
nameandemail, or provide those arguments to the mutation as well in order to update them on the signer.
The signer will then be activated and included in the signature collection flow like normal.
const UPDATE_SIGNER_QUERY = `
  mutation UpdateSigner(
    $eid: String!,
    $name: String,
    $email: String,
    $activateIfPending: Boolean,
  ) {
    updateSigner(
      eid: $eid
      name: $name
      email: $email
      activateIfPending: $activateIfPending
    ) {
      eid
      name
      email
    }
  }
`

// When this returns, the signer and all documents will have been updated
const response = await anvilClient.requestGraphQL({
  query: UPDATE_SIGNER_QUERY,
  variables: {
    eid: signerEid,
    name: newName,
    email: newEmail,
    activateIfPending: true,
  },
})
Pending signer skip behavior
Pending signers will be automatically skipped when pending signers are the only remaining signers within a routingOrder step. We currently make the assumption that pending signers are unnecessary when they are the only signers remaining within a routingOrder step. Here are a couple scenarios:
- Three signers all using
routingOrder: 1, Signer Three is pending- Signer One signs
- Signer Three will remain pending!
- Signer Two signs
- Signer Three will be automatically skipped
- The EtchPacket will be completed
- Signer One signs
- Four signers: Signer One has
routingOrder: 1, Signers Two and Three are pending withroutingOrder2and3, Signer Four hasroutingOrder: 4- Signer One signs
- Both pending signers will be automatically skipped!
- It will be Signer Four's turn to sign.
- Signer Four signs
- The EtchPacket will be completed
- Signer One signs
E-signature settings and experience
Configure how signers interact with and experience the signing process, including signature acceptance flow, information updates, and required fields.
Signature experience
Signature experiences are inferred into two categories: Signing and Non-signing signers, each category has two subtypes that are listed below.
Signature signing experiences
signBeforeReviewing- A signature or initial field must be assigned, configurable in the API call.signWhileReviewing- A signature or initial field must be assigned, configurable in the API call.
No signature signing experiences
formCompletionOnly- Inferred when there are only non-signing fields assigned to a signer. Cannot be manually set, Anvil automatically infers this type.acknowledgeOnly- Inferred when there are no fields assigned to a signer. Cannot be manually set, Anvil automatically infers this type.
Inferred experience override detection
If a signer has their signatureExperience set as signBeforeReviewing or signWhileReviewing but no signature or initial field is asigned, their signatureExperience will be overridden by the inferred signatureExperience. You can check the Anvil system inferred signing experience by inspecting the signatureExperience key on the signer in the GraphQL response payload. If a returned signer object does not match your assigned signatureExperience you can correct the signing experience by updating the assigned fields for the signer.
Control when signers accept their e-signatures during the signing process with the signatureExperience setting:
{
  ...
  signers: [{
    id: 'signerOne',
    name: 'Sally Signer',
    email: 'sally@example.com',
    signerType: 'embedded',
    signatureExperience: 'signWhileReviewing', // Other assignable option is 'signBeforeReviewing', if no signature field is assigned, this value will be overwritten with a non-signing experience type.
    ...
  }]
}
If there is a signature field assigned to a signer you can manually assign one of the following signatureExperiences
signWhileReviewing(default): Modern flow where signers accept their signature while reviewing documents. Automatically enablesacceptEachFieldfor field-by-field signature acceptance.signBeforeReviewing: Signer is presented with a signature pad or script version of their name before the documents are presented.
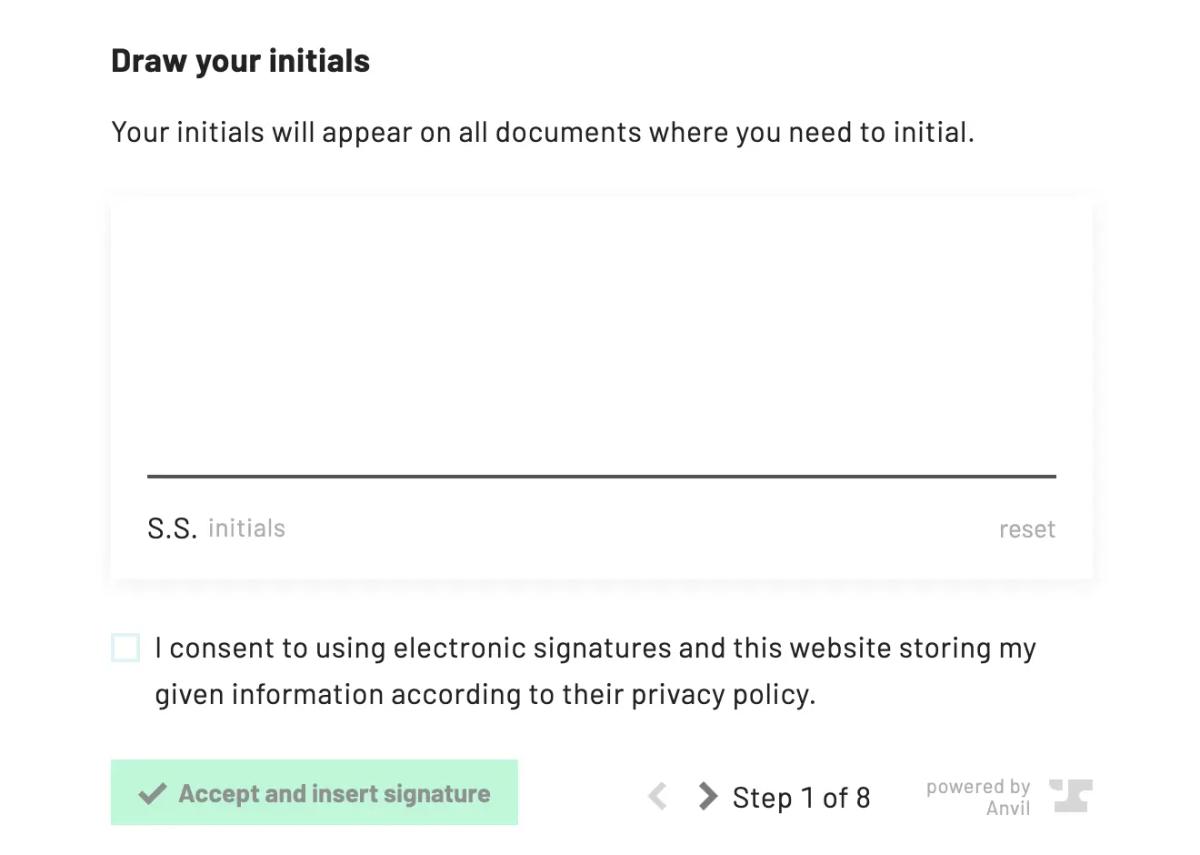
signBeforeReviewing: Traditional flow where signers accept their signature before reviewing documents.
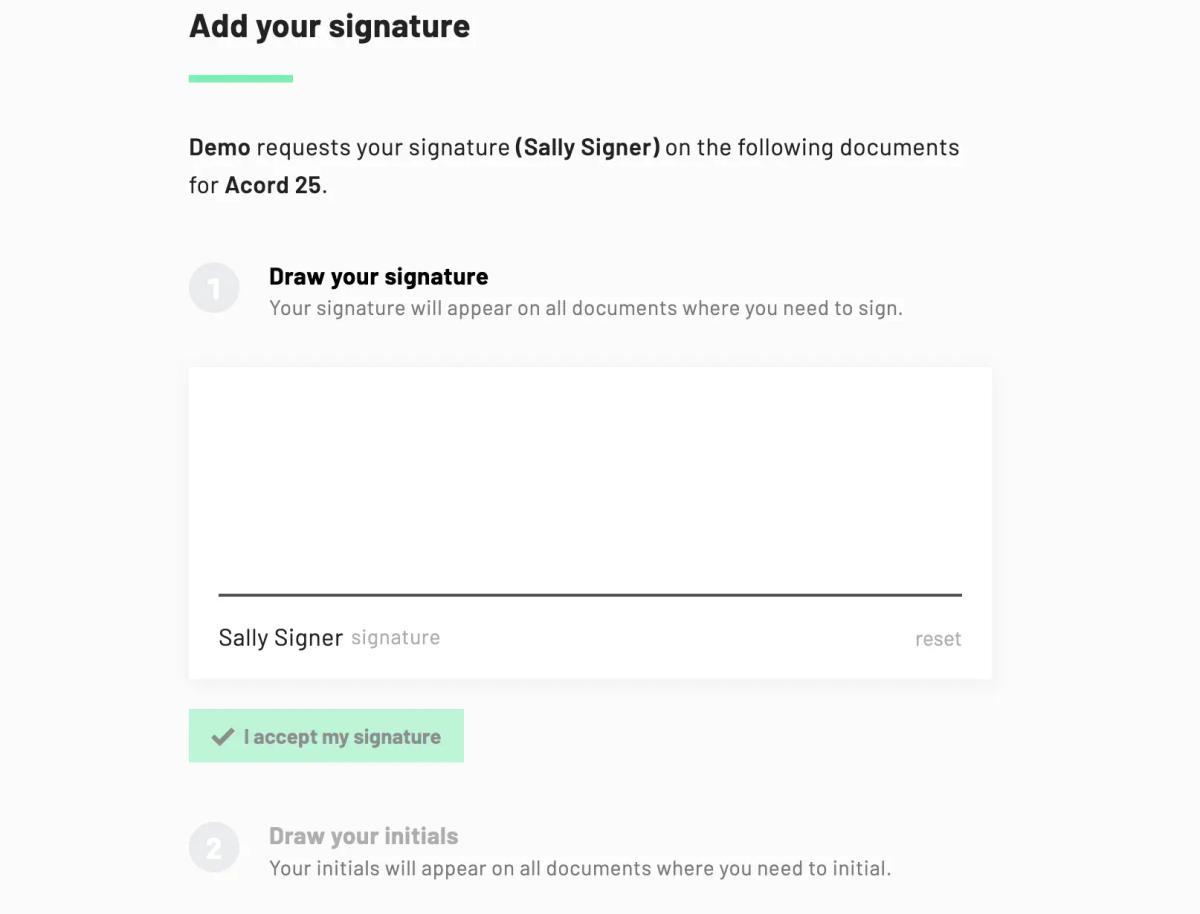
Note: When signWhileReviewing is selected, acceptEachField is required and automatically enabled.
Set defaults in e-signature settings (https://app.useanvil.com/org/<your-org-slug>/settings/etch-esign). These apply to all e-signature packets unless overridden at the signer level.
Updating signer names and emails
Signer names and emails can be updated after a signature packet has been sent. The name and email address can be updated for any signer who has not yet signed their documents.
For example, you may have two signers, the first has already signed, and you discover a typo in the second signer's name or email. You can update or "reassign" the second signer's information without requiring the first signer to sign again.
Updating signer information after sending the packet is handled via the updateSigner mutation:
updateSigner({
  eid: yourPacket.documentGroup.signers[index].eid,
  name: 'Sally Newname',
  email: 'sally@newname.com',
})
You can fetch the signer eid from the EtchPacket you receive from your createEtchPacket call:
createEtchPacket({
  name: "A New Etch Packet",
  isDraft: false,
  files: [ ... ],
  signers: [ ... ],
}) {
  eid
  documentGroup {
    eid
    status
    signers {
      eid
      name
      email
      status
      signatureExperience
    }
  }
}
When a signer's name or email is updated in this way, a few things will happen:
- Anvil will update the signer's name and email on all documents where the signer is attached to name and email fields. See the signer
fieldssection above for details on attaching signers to name and email fields. - The old and new signer name & email will be displayed in the packet's activity log.
- All outstanding signing URLs for the updated signer will be invalidated. For email signers, the signature email will need to be resent. For embedded signers, a new signing URL will need to be generated.
Allowing signers to update their own information
If you would like to allow signers to update their own information, you can set the allowNameChange and/or allowEmailChange boolean arguments to true when you create the packet. This will allow signers to update their own name and email address during the signing process.
createEtchPacket({
  name: "A New Etch Packet",
  isDraft: false,
  files: [ ... ],
  signers: [{
    name: "Sally Signer",
    email: "sally@example.com",
    ...
    // Allow signers to update their own name
    allowNameChange: true,
    // Allow signers to update their own email
    allowEmailChange: true,
  }],
}) {
  eid
  documentGroup {
    eid
    status
    signers {
      eid
      name
      email
      status
      signatureExperience
    }
  }
}
You can also set these options from your default Organization settings (https://app.useanvil.com/org/<your-org-slug>/settings/etch-esign) and they will apply to all Etch Packets created by your organization.
When the signer changes their name or email, a few things will happen:
- For only name changes, the existing signing URL will not be invalidated, but the change will be recorded in the packet's activity log.
- For any changes to the signer's email, the existing signing URL will be invalidated, the change will be recorded in the packet's activity log, and a new signing URL will be sent to the signer's new email address.
- All changes will trigger a
signerUpdateStatuswebhook event. See the signerUpdateStatus webhook section for more details.
Requiring signer information on load
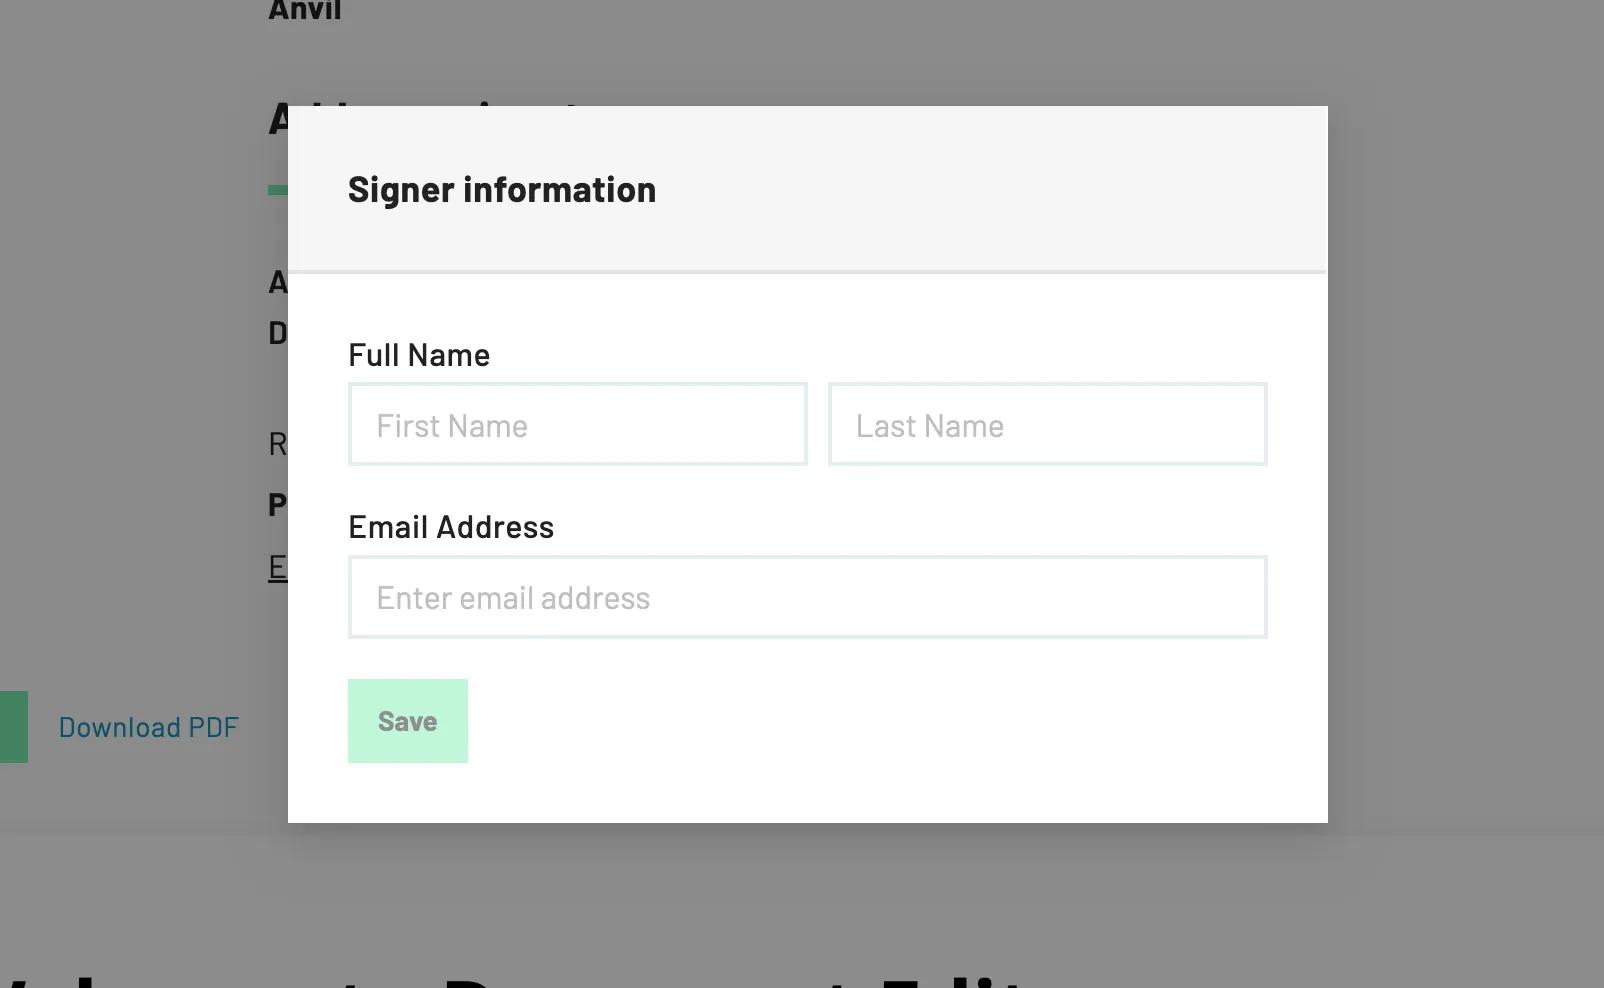
You can configure e-signature packets to require signers to input their name and/or email address immediately when they begin the signing process. This is useful when you want to ensure you have the most up-to-date contact information for your signers.
If you set requireNameOnLoad and/or requireEmailOnLoad to true for a signer, they will be required to input their legal name and/or email address immediately when they access the signing interface. A modal will be shown to the signer that they must fill out before proceeding with the signing process.
createEtchPacket({
  name: "A New Etch Packet",
  isDraft: false,
  files: [...],
  signers: [{
    name: "Sally Signer",
    email: "sally@example.com",
    ...
    // Require signer to input their name immediately
    requireNameOnLoad: true,
    // Require signer to input their email immediately
    requireEmailOnLoad: true,
  }],
}) {
  eid
  documentGroup {
    eid
    status
    signers {
      eid
      name
      email
      status
      signatureExperience
    }
  }
}
Note: requireEmailOnLoad is only supported for certain signer types (embedded, inline). It is not available for:
- Email signers (
signerType: "email") - In-person signers (
signerType: "in-person") - In-person inline signers (
signerType: "in-person-inline")
You can set these options as defaults for your organization in the e-signature settings (https://app.useanvil.com/org/<your-org-slug>/settings/etch-esign). These defaults will apply to all e-signature packets created by your organization unless overridden at the individual signer level.
When a signer is required to input their information on load:
- The modal will appear immediately when they access the signing interface
- The modal cannot be dismissed until the required information is provided
- The information provided will be used to update the signer's record
- The change will be recorded in the packet's activity log
Webhook notifications
Anvil can send POST requests to your servers when certain events happen. To receive these messages, please enable webhooks. Check out the e-signature webhook section for all supported actions.
If you plan on embedding e-signatures in an iframe, you may find iframe events as an alternative to using webhooks in some cases.
Packet-specific webhook URLs
Each packet can have its own webhook URL via the webhookURL variable on createEtchPacket.
{
  ...
  webhookURL: 'https://example.com/custom-webhook',
  files: [ ... ],
}
Your webhookURL will receive a POST request with data when some actions take place. See the per-object webhook URL docs for more info.
{
  action: 'signerComplete',
  token: '38Gp2vP47zdj2WbP1sWdkO2pA7ySmjBk', // from the webhook setup
  data: 'see the docs',
}
Downloading documents
When all parties have signed, you can download documents with the following endpoints. Authentication to these endpoints is handled in the same way as the GraphQL endpoint: with your API key. See the getting started guide for more information on authentication.
Best practice is to save the completed documents to your own object store when the last signer has finished. You can fetch and save either on the etchPacketComplete webhook notification, or in your route handler for a signer's redirectURL.
Downloading a zip with all documents
Fetch all completed documents in a zip file from the following URL:
GET https://app.useanvil.com/api/document-group/${documentGroupEid}.zip
There are a couple helpers you can use instead of constructing this URL:
- DocumentGroup has a
downloadZipURLresolver that will return the download URL. - Our API clients provide a
downloadDocuments(documentGroupEid)function to download the zip as a buffer or stream.
Downloading individual documents
Individual documents can be downloaded as well:
GET https://app.useanvil.com/api/document-group/${documentGroupEid}/${filename}
Instead of constructing this URL, you can use DocumentGroup's files property which returns a list of files, including the individual download URLs:
// documentGroup.files
;[
  {
    name: 'NDA',
    type: 'pdf',
    filename: 'nda.pdf',
    downloadURL:
      'https://app.useanvil.com/api/document-group/nA1jH49FVUWrrE60hMbi/nda.pdf',
  },
]
Postman download example
Have all signers signed? Try downloading your completed documents by using the code in our Postman example.
Handling signing errors
There are a couple errors that your users may encounter while attempting to sign documents. For example, your user may hit a signing URL with an expired or invalid token.
By default we will show an Anvil error page, but you can handle these errors in your system to provide a better experience. There are two ways we can notify you when this happens:
- Redirect to the URL you have set as
redirectURLon the signer - Post a message to the parent frame when the signing URL is embedded in an iframe
Along with each of these notifications, you will receive several pieces of information you can use to determine the signer and error info. See the sections about redirectURL and embedding for details on how this info will be formatted, and other data you may receive alongside these error attributes.
action:'signerError'Signing errors will always have this actionerrorType: One of the followingtokenExpired: The token specified has expired, or once was valid but no longer is.tokenInvalid: The token is not associated with this signer. Beware! Do not recover from this error. It indicates that someone attempted to use an incorrect, potentially nefarious tokennotFound: The signer EID was not found
error: The title of the errormessage: The message of the errorsignerEid: The AnvilSignerEID that was attempting to sign
Recovering from token errors
When a user encounters a token error, you can recover by issuing the user a new signing URL. Before you generate a new signing URL, please ensure a few things:
errorTypeis'tokenExpired'. The onlyerrorTypeyou should recover from istokenExpired!- The user who is attempting to sign is the user who should be signing (for example, you ensure they are logged in)
- The signer has not already finished signing (
signer.status != 'completed')
The method you use to generate the new signing URL depends on the Signer's signerType.
Email signers
If the signer is set up to sign by way of an email from Anvil, they will need a new email with a new signing URL from Anvil. Call the sendEtchPacket GraphQL mutation to send the signer a new email. You will specify etchPacketEid to which the signer is attached, not signerEid, and it will send an email to the first un-signed signer:
mutation sendEtchPacket($eid: String!) {
  sendEtchPacket(eid: $eid) {
    eid
    name
    status
  }
}
Then call it with etchPacketEid
etchPacket = sendEtchPacket({ variables: { eid: etchPacketEid } })
Embedded signers
For embedded signers, you can use generateEtchSignURL to generate a fresh URL and token for the user.
mutation generateEtchSignURL($signerEid: String!, $clientUserId: String!) {
  generateEtchSignURL(signerEid: $signerEid, clientUserId: $clientUserId)
}
Then call it like you would for a new signer:
newURL = generateEtchSignURL({ variables: { signerEid, clientUserId } })
And redirect the user to the new URL.
Fetching token metadata
You may want to know token expiry dates to preemptively handle upcoming token expirations. You can fetch validity and expiration information via the signerTokens resolver on the Signer GraphQL object. The most effective way to fetch this information is through an etchPacket:
query etchPacket($eid: String!) {
  etchPacket(eid: $eid) {
    eid
    name
    status
    documentGroup {
      eid
      status
      signers {
        eid
        status
        signerTokens {
          eid
          type
          validUntil
          valid
          invalidatedAt
          hasSigned
          signedAt
        }
      }
    }
  }
}