
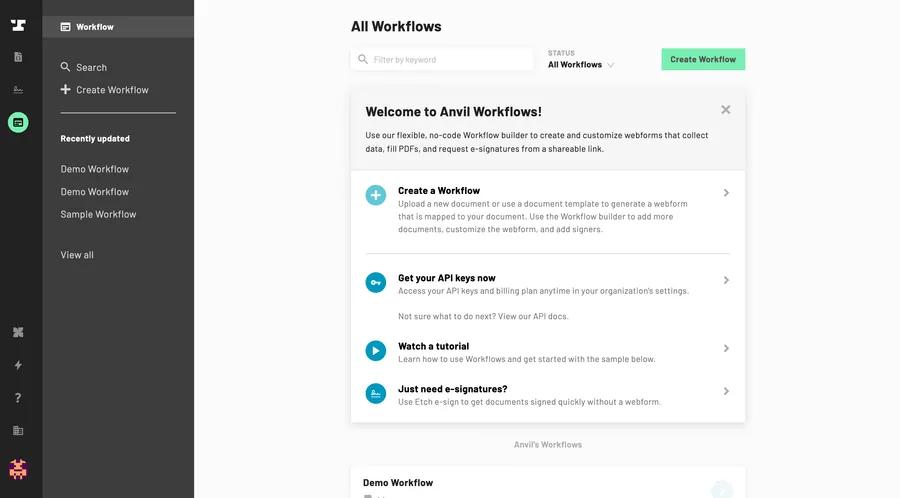
Your Workflow dashboard is where you get an overview of all of your Workflows as well as create new Workflows and manage existing Workflows.
- Workflows dashboard
- Individual Workflow dashboards
- Workflows navigation panel
- Create a new Workflow
- Manage an existing Workflow
Workflows dashboard
The Workflows dashboard gives you an overview of all of your existing Workflows. By default, your Workflows are organized alphabetically.
From this dashboard you can complete core actions like:
- Create a new Workflow
- Access individual Workflow dashboards
- Search and filter all existing Workflows and associated submissions
 The Workflow dashboard gives you an overview of all your Workflows.
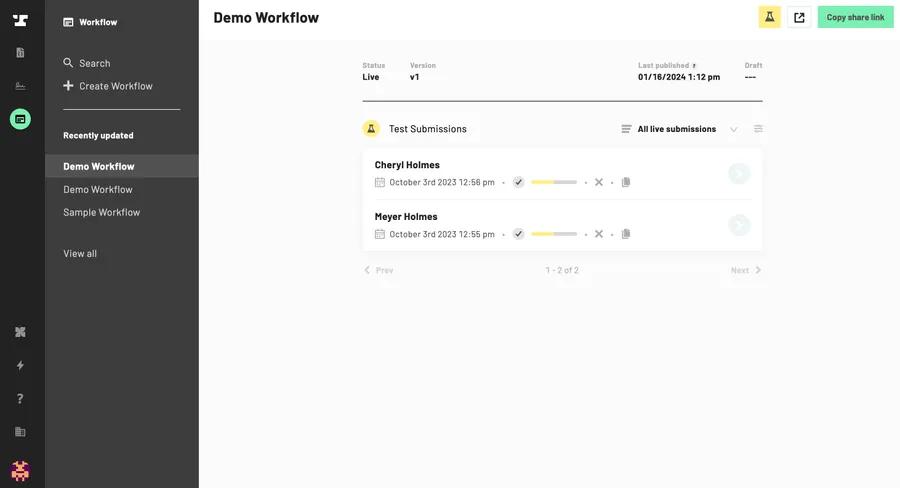
Individual Workflow dashboards
Individual Workflow dashboards can be accessed through the main Workflows dashboard by clicking on a specific Workflow.
From this dashboard, you can:
- Edit your Workflow
- Start new submissions (both test and live)
- View and manage submissions
 Individual Workflow dashboards allow you to edit and manage specific Workflows.
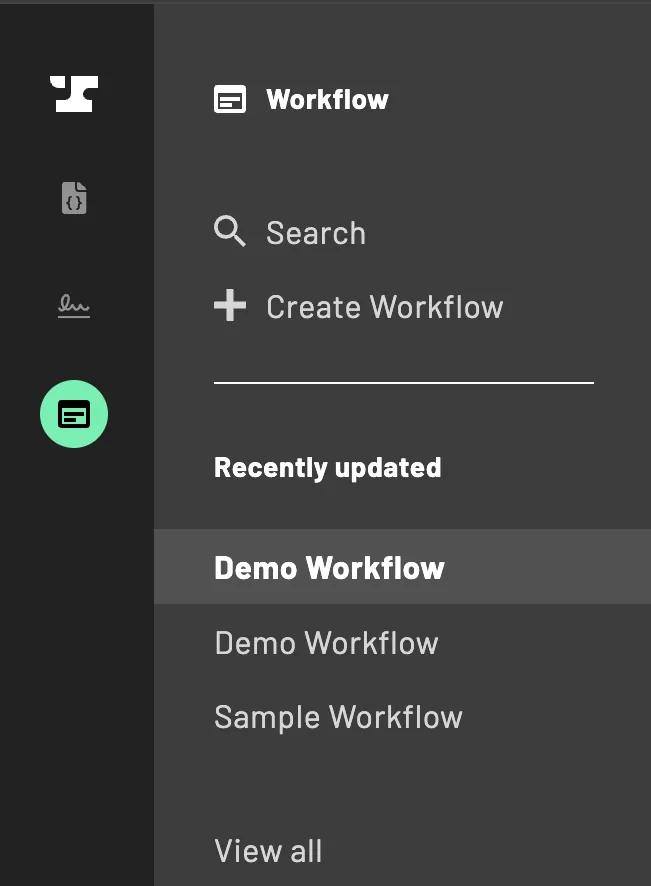
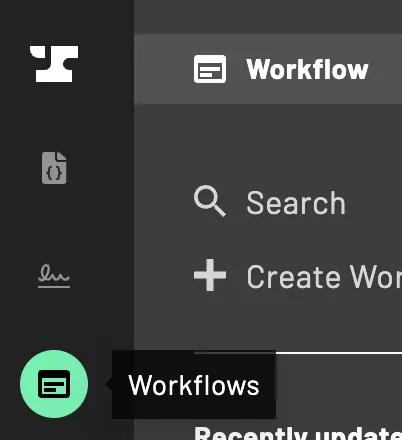
Workflows navigation panel
Regardless of whether you’re on the main Workflows dashboard or an individual Workflows’ dashboard, the navigation panel will always be visible.
The navigation panel allows you to complete quick actions like:
- Create a new Workflow
- Access your most recently updated Workflows
- Reset the Workflow dashboard
 The Workflow navigation bar allows you to complete quick actions.
Creating a new Workflow
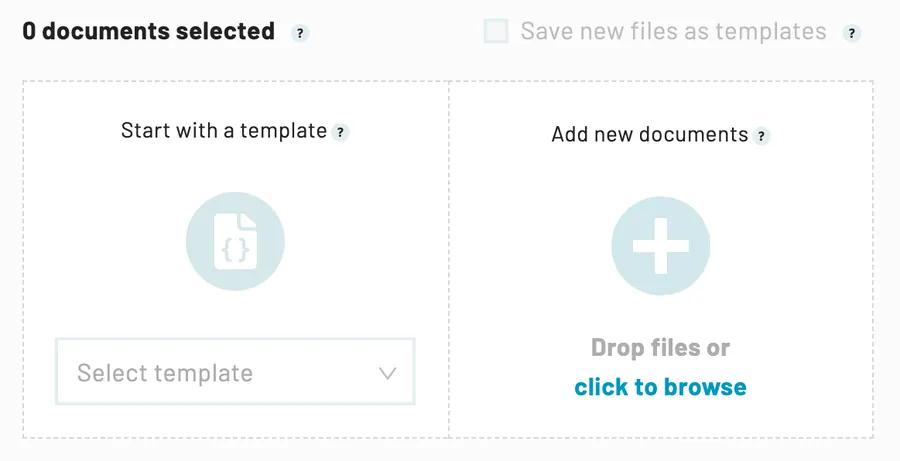
You can create Anvil Workflows with existing PDF templates, newly uploaded documents, a combination of existing templates and newly uploaded documents, or without a document altogether.
We strongly recommend starting with document templates and leveraging Anvil Document AI.
-
If you’ve already created a PDF template, we suggest using it to save yourself some time. Why reinvent the wheel if you don't have to?
-
If you prefer to start with newly uploaded documents, we recommend selecting the option
Save new files as templates.- Selecting this option will automatically save newly uploaded documents as a PDF template which you can reuse in future Workflows and Etch packets.
- Please note that
Save new files as templatesis only available for users who are editors or admins within the organization.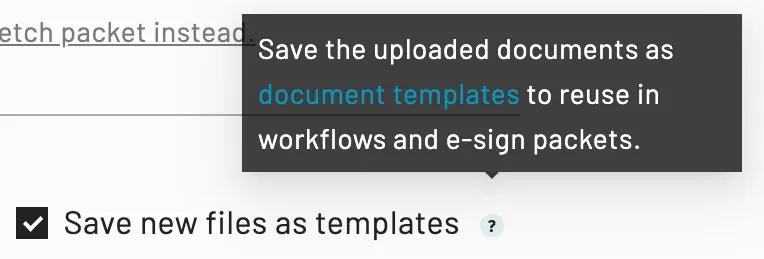
-
If you prefer to create a Webform without any associated documents, click
Start without documents.- Don’t worry, you can always add documents to your Workflow later.
To create a new Workflow:
- Click on the Workflows icon in the left side toolbar
- Select Create Workflow
- Choose the PDF(s) you want to create your Workflow with
- Start with a template: Use an existing PDF template that you’ve already formatted all the PDF fields for.
- Add a new document: Upload a new file from your device. You may need to configure your PDF fields.
- If you’re starting with multiple documents, confirm that the order of your documents is correct
- Reorder your documents by clicking a specific file and dragging and dropping it to its new position
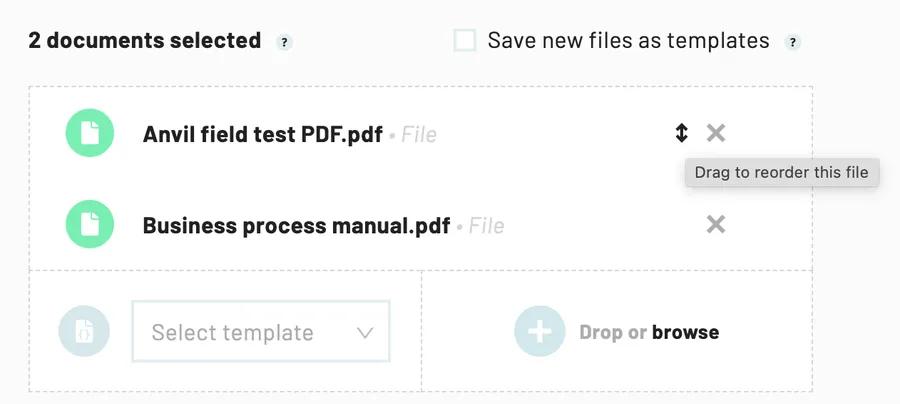
- Remove a document by clicking on the x icon next to the document name

- Reorder your documents by clicking a specific file and dragging and dropping it to its new position
- Click Start with documents
Note: For a more in depth guide on how to create Workflows, please see this article instead.
Manage an existing Workflow
Individual Workflow dashboards allow you to manage all facets of a Workflow. To start managing your Workflows:
- Click on the Workflows icon in the left side toolbar
- Locate your desired Workflow
- Select your Workow
You’ll be automatically redirected to your individual Workflows’ dashboard. From there you can edit your Workflow, start submissions, etc.
Back to Help Center