PDF templates
Before you get into PDF templates, make sure you check out our getting started guide.
A PDF template (called a Cast in the Anvil API) is a configured PDF with named, typed fields at defined locations on each page. You create a template once and fill it with different data as many times as you need — for a handful of documents or a hundred thousand.
Building a library of PDF templates lets you:
- Standardize documents across your platform — one template per document type ensures consistent field placement and formatting for every fill and signature request
- Support custom documents from your users — embed the template builder so each customer uploads and configures their own PDFs without your team's involvement
- Automate document workflows — templates integrate directly with PDF filling, e-signature packets, and Workflows
- Drive every document from one data model — map fields to your own schema so the same payload fills the right values on every template
Anvil supports two kinds of PDF templates, and both produce a Cast you can fill the same way:
- Standardized templates start from a fixed PDF you upload — a W-4, I-9, ACORD form, or anything with a set layout — and place named fields on top of the existing pages. Best when the document itself doesn't change.
- Dynamic templates are written from scratch in Anvil's Document Editor, with variables and conditional clauses that reflow to fit your data. Best for text-heavy contracts, agreements, and policies.
This guide covers standardized templates first — how to create them in the dashboard or programmatically over the API — then dynamic templates.
Standardized templates
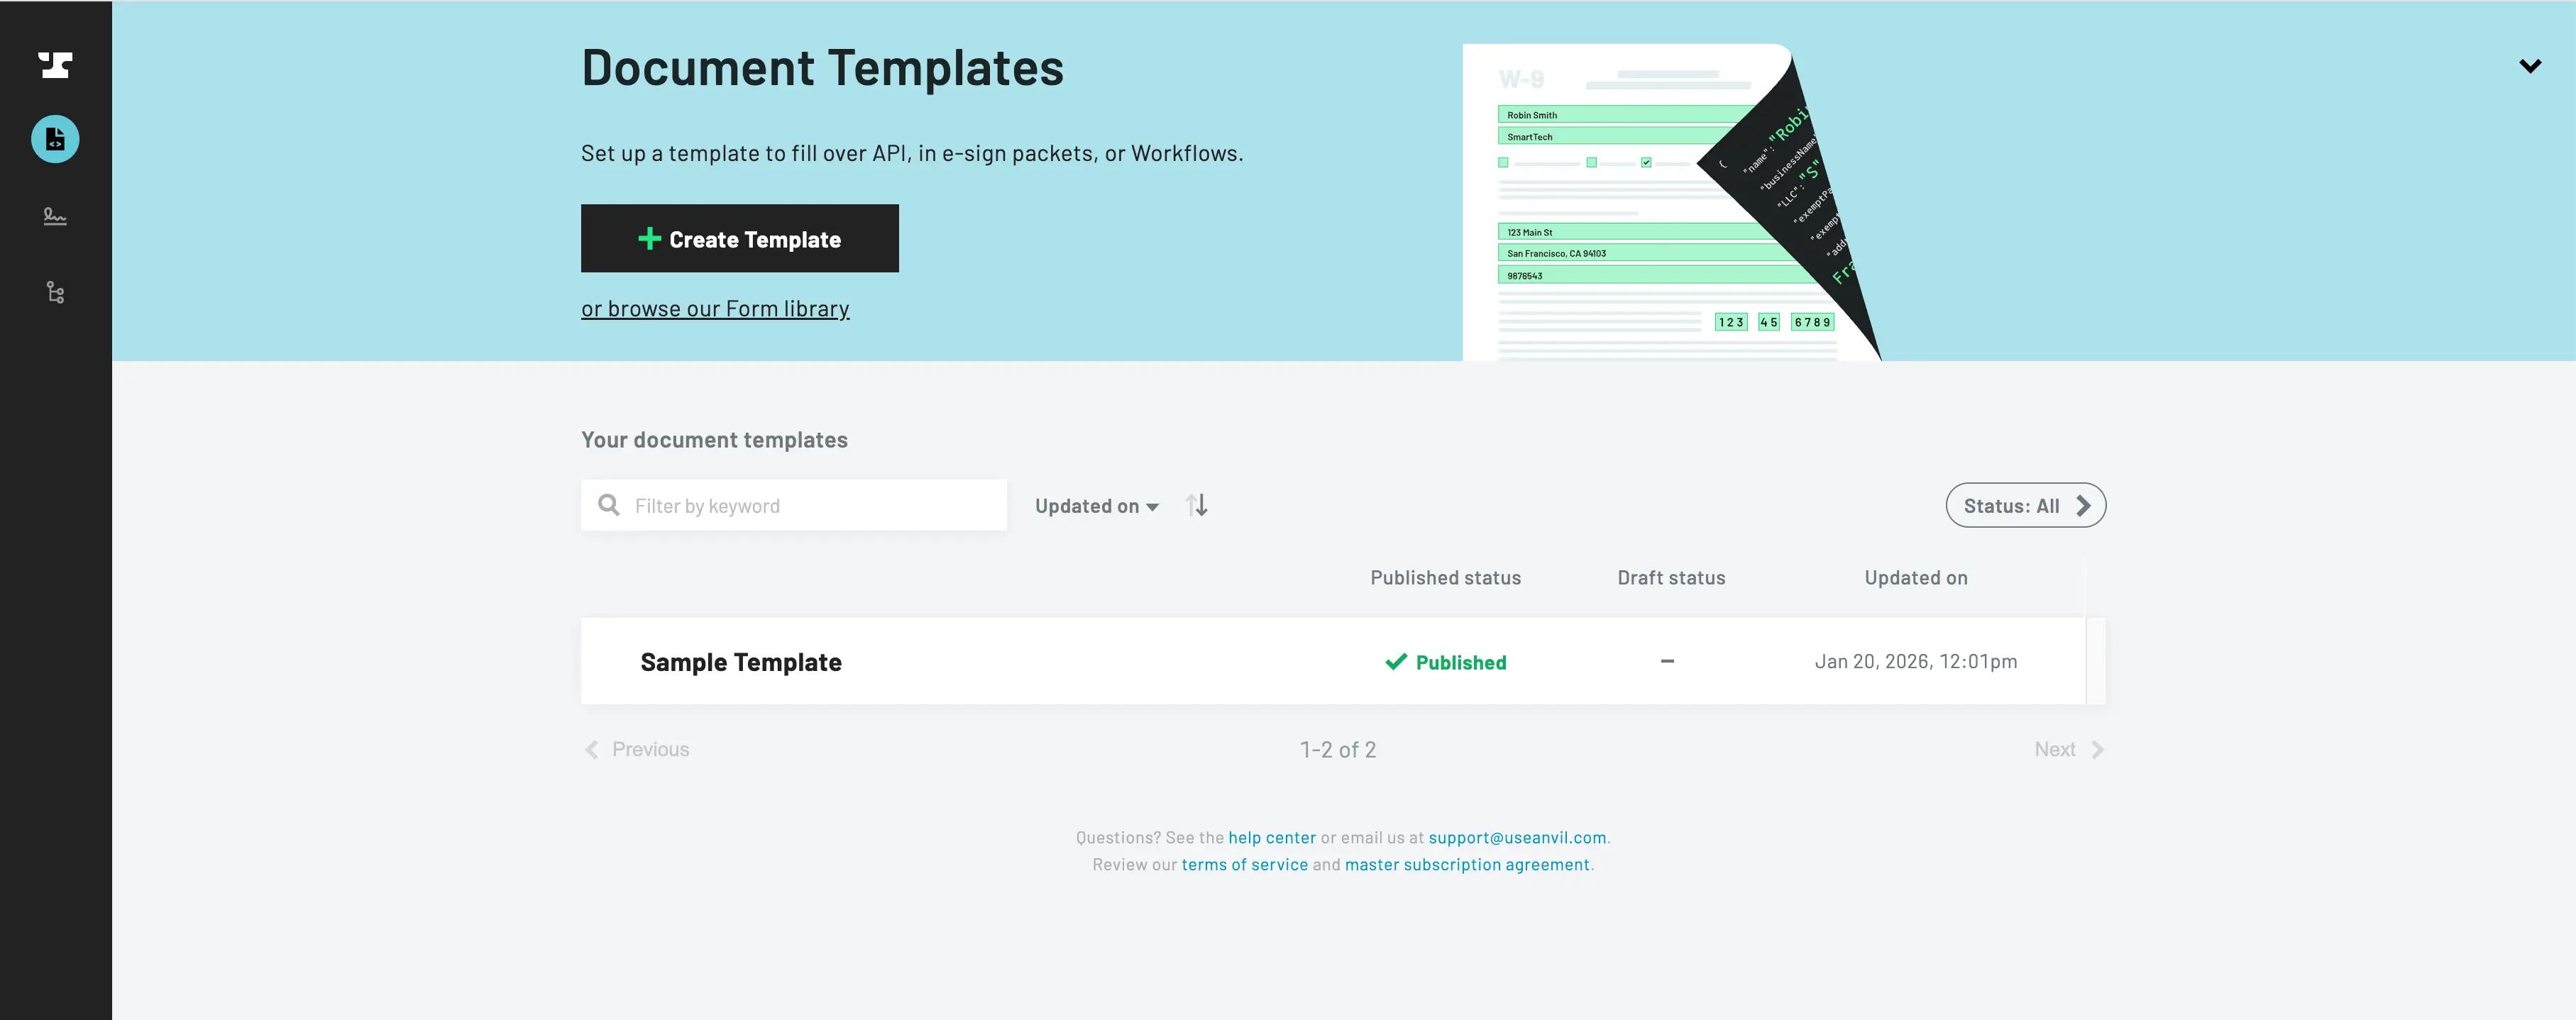
A PDF template holds the configuration for a single PDF file. It defines the location of fields on PDF pages, and the type of each field (e.g. date, phone number, etc.). The API allows you to fill the template as many times as you need with different data each time.
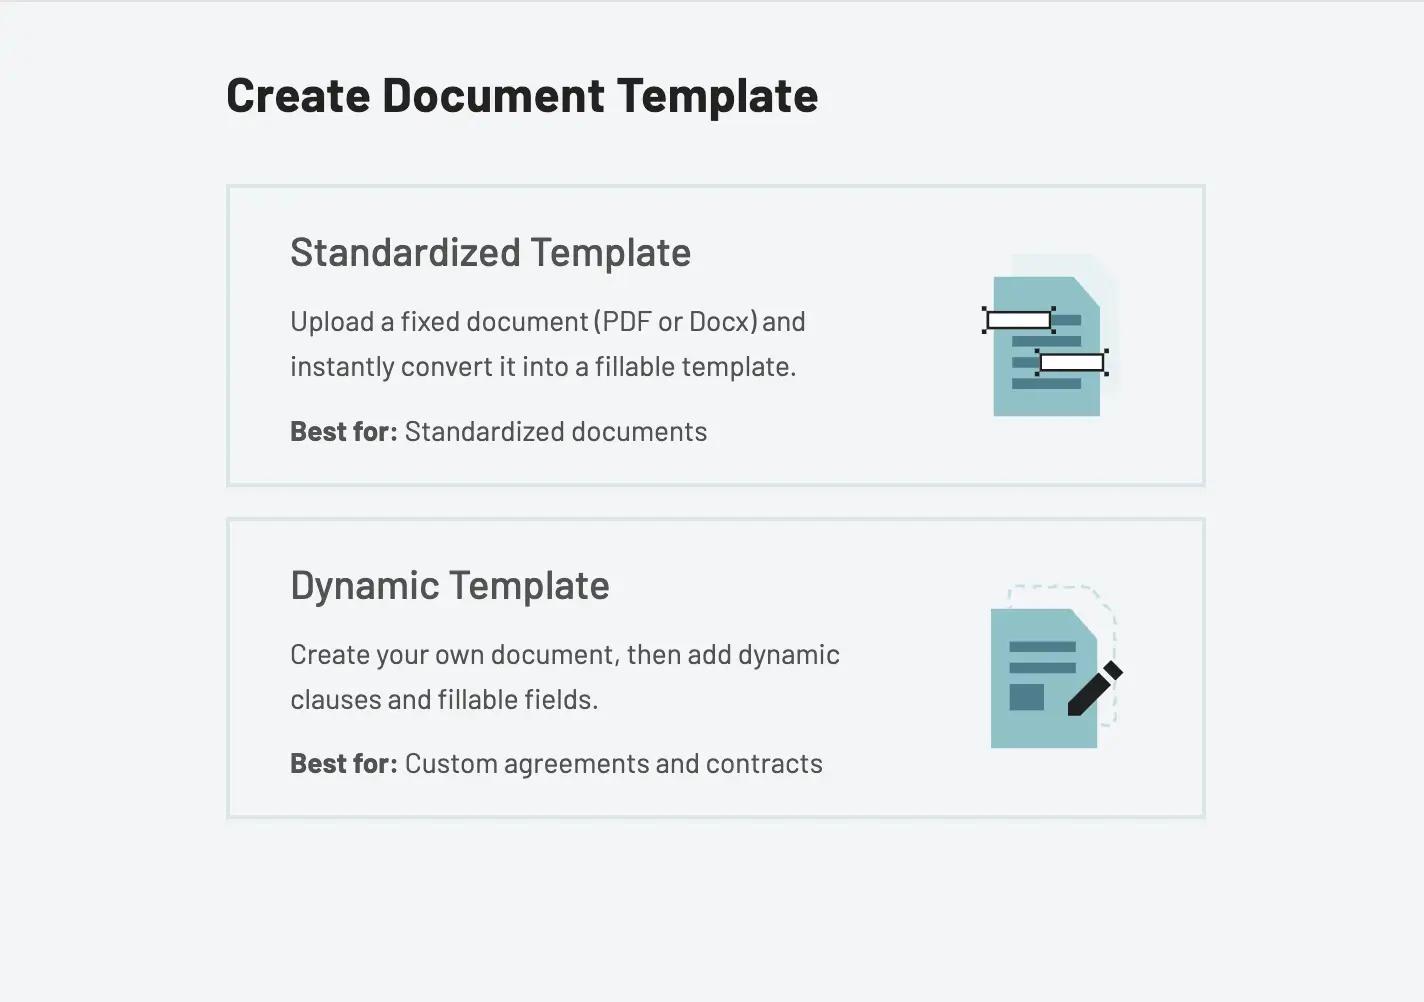
On your dashboard, click the + Create template item to upload a new PDF Template and on the next screen click "Standardized Template".
 Uploading a PDF Form
 Creating a Standardized Template
Prefer to build a document from scratch instead of uploading a fixed PDF? Skip ahead to Dynamic templates.
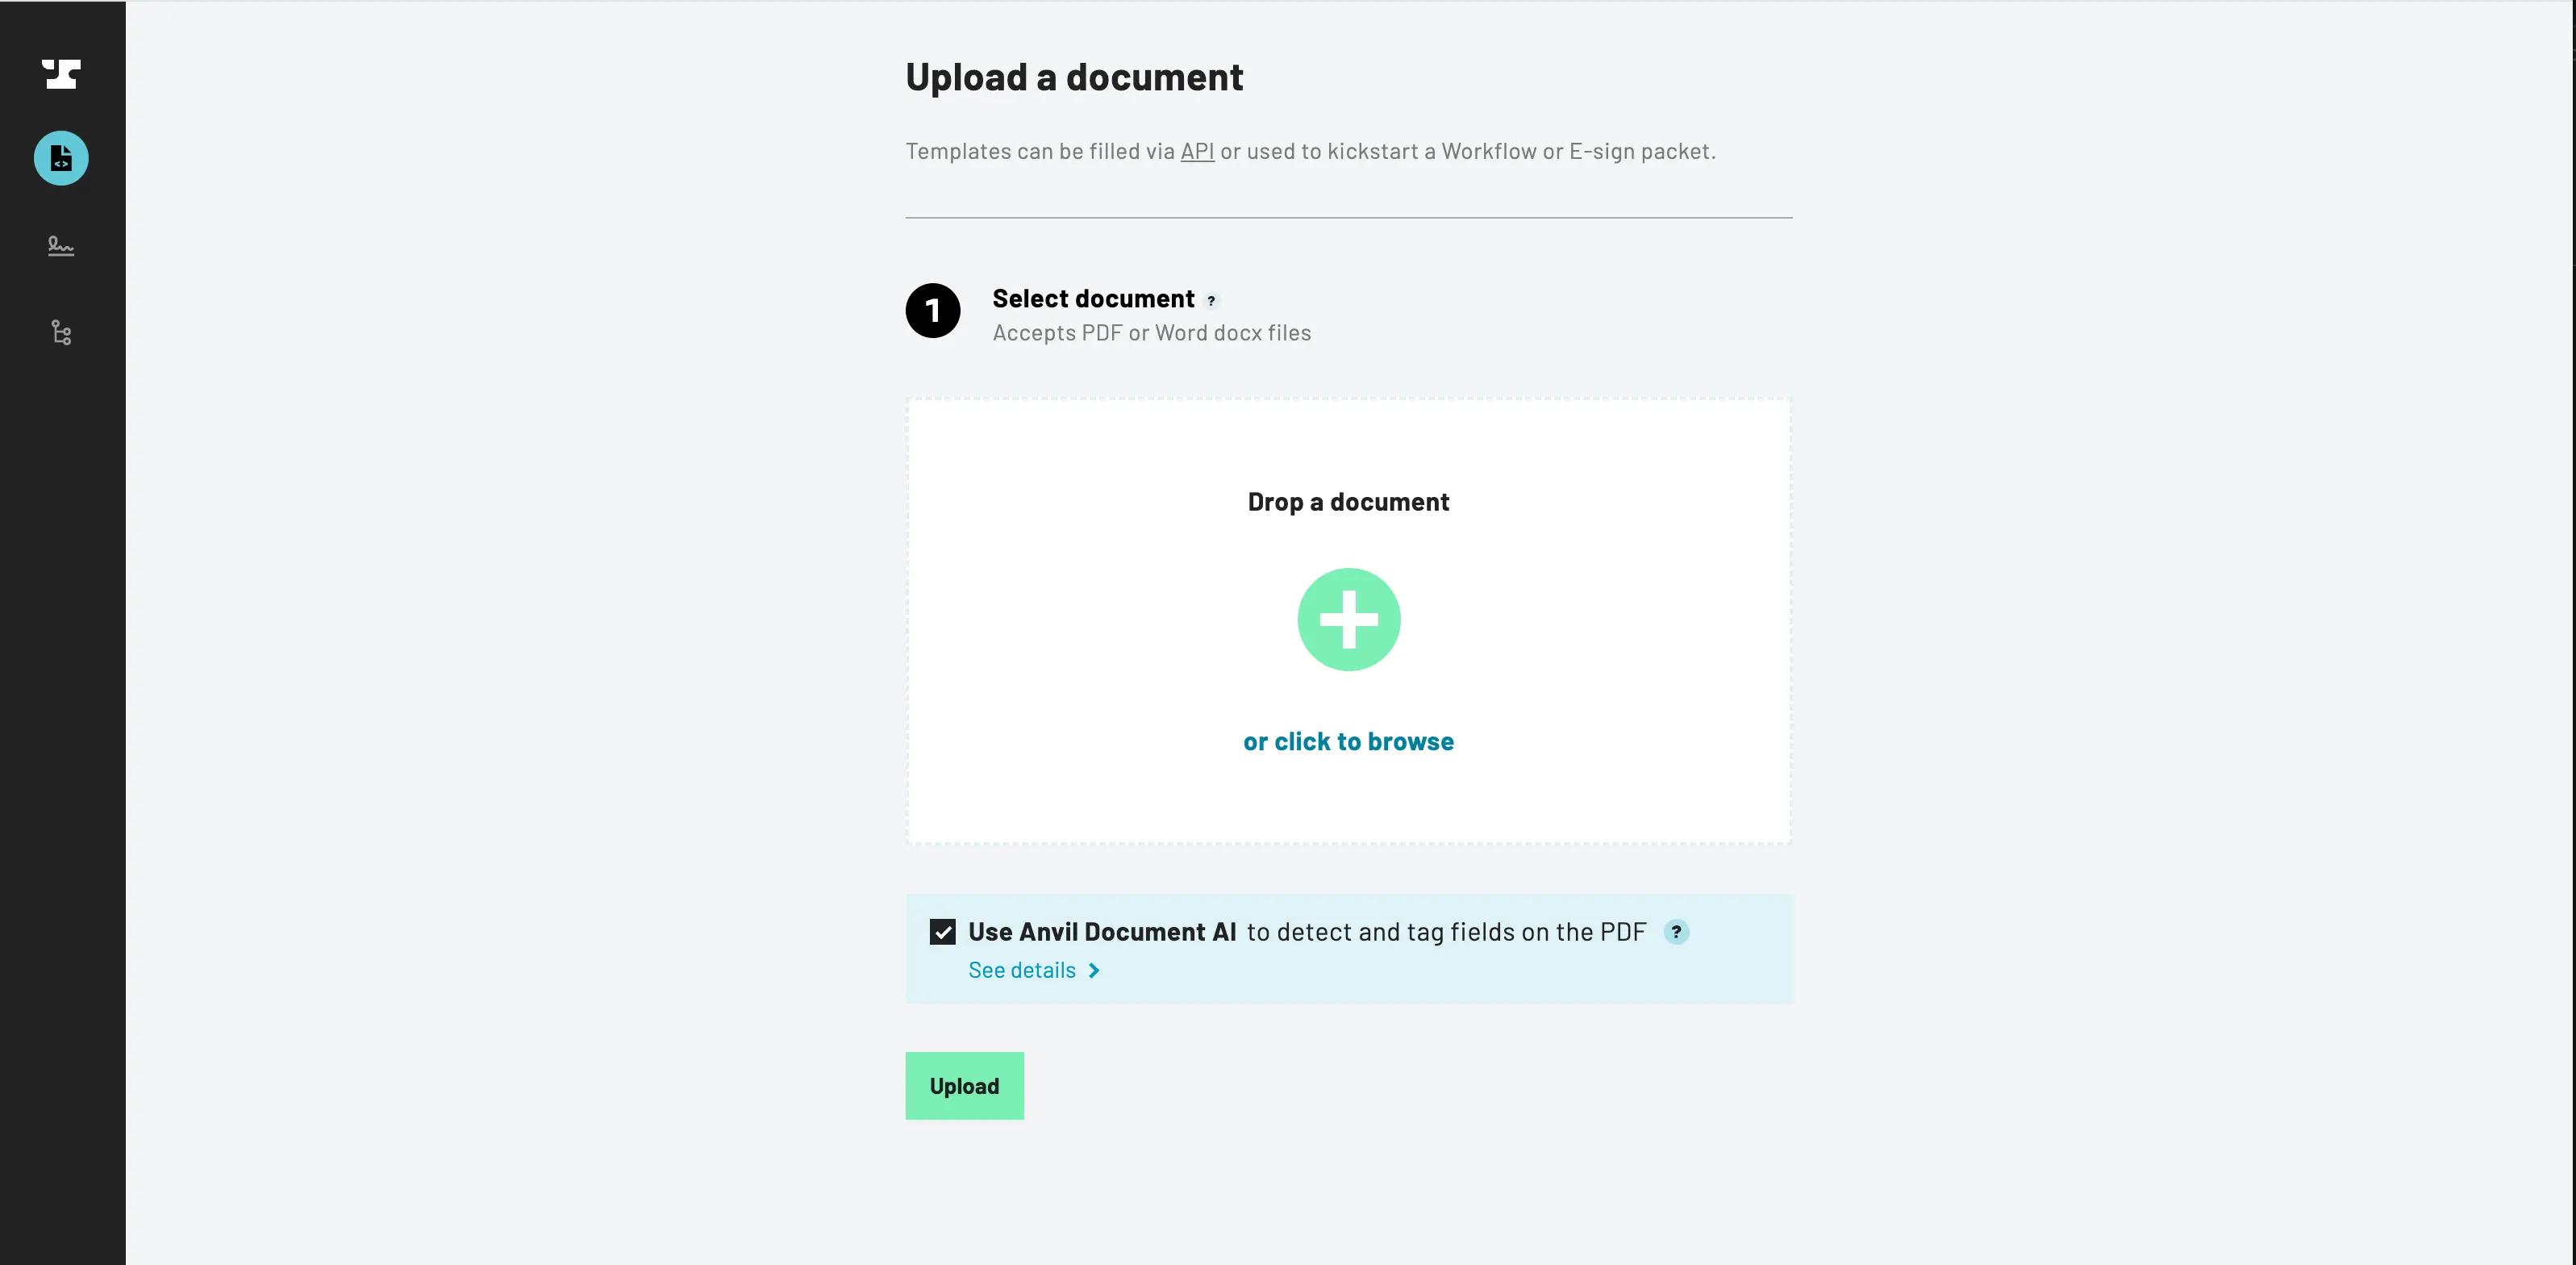
On this page, upload a template, such as a W4.
 Upload PDF Form Page
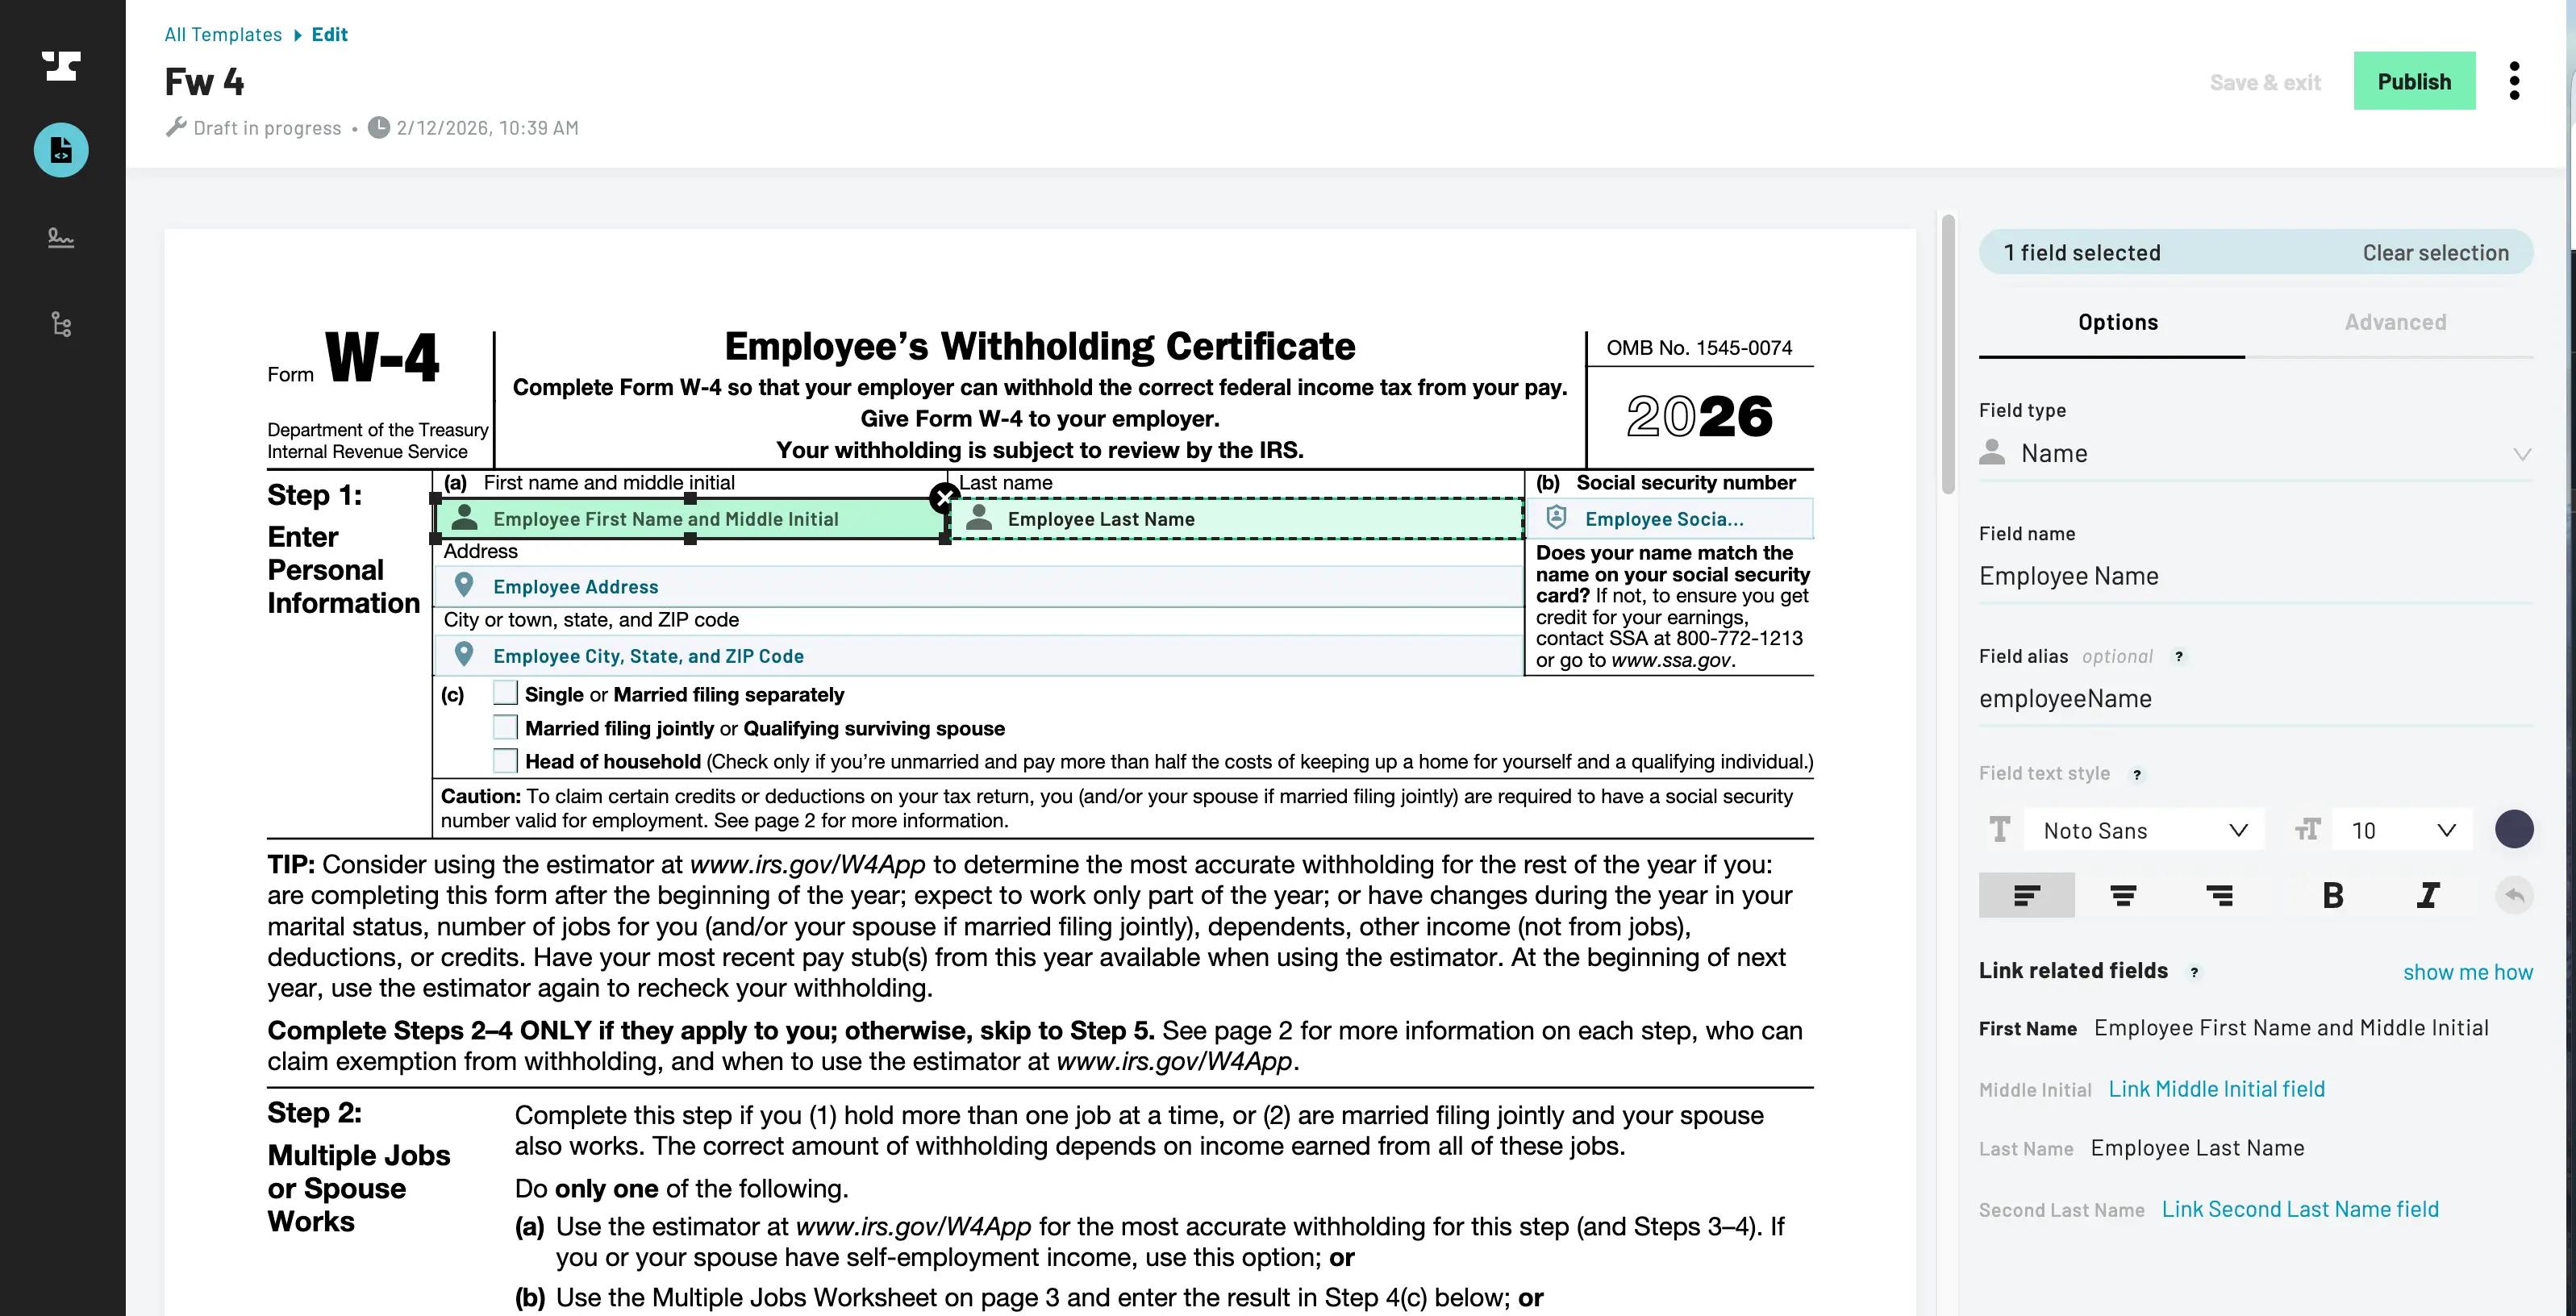
Once uploaded, Anvil attempts to find the fields for you. Use the field editor to draw new fields, change field types and names, or modify field locations. Picking the correct types makes filling the PDF easier; compound types (e.g. addresses, names, multiline fields) allow you to fill multiple fields with a single value, and many types (e.g. phone number, date, dollar, SSN) provide formatting for you.
 Editing a PDF Template
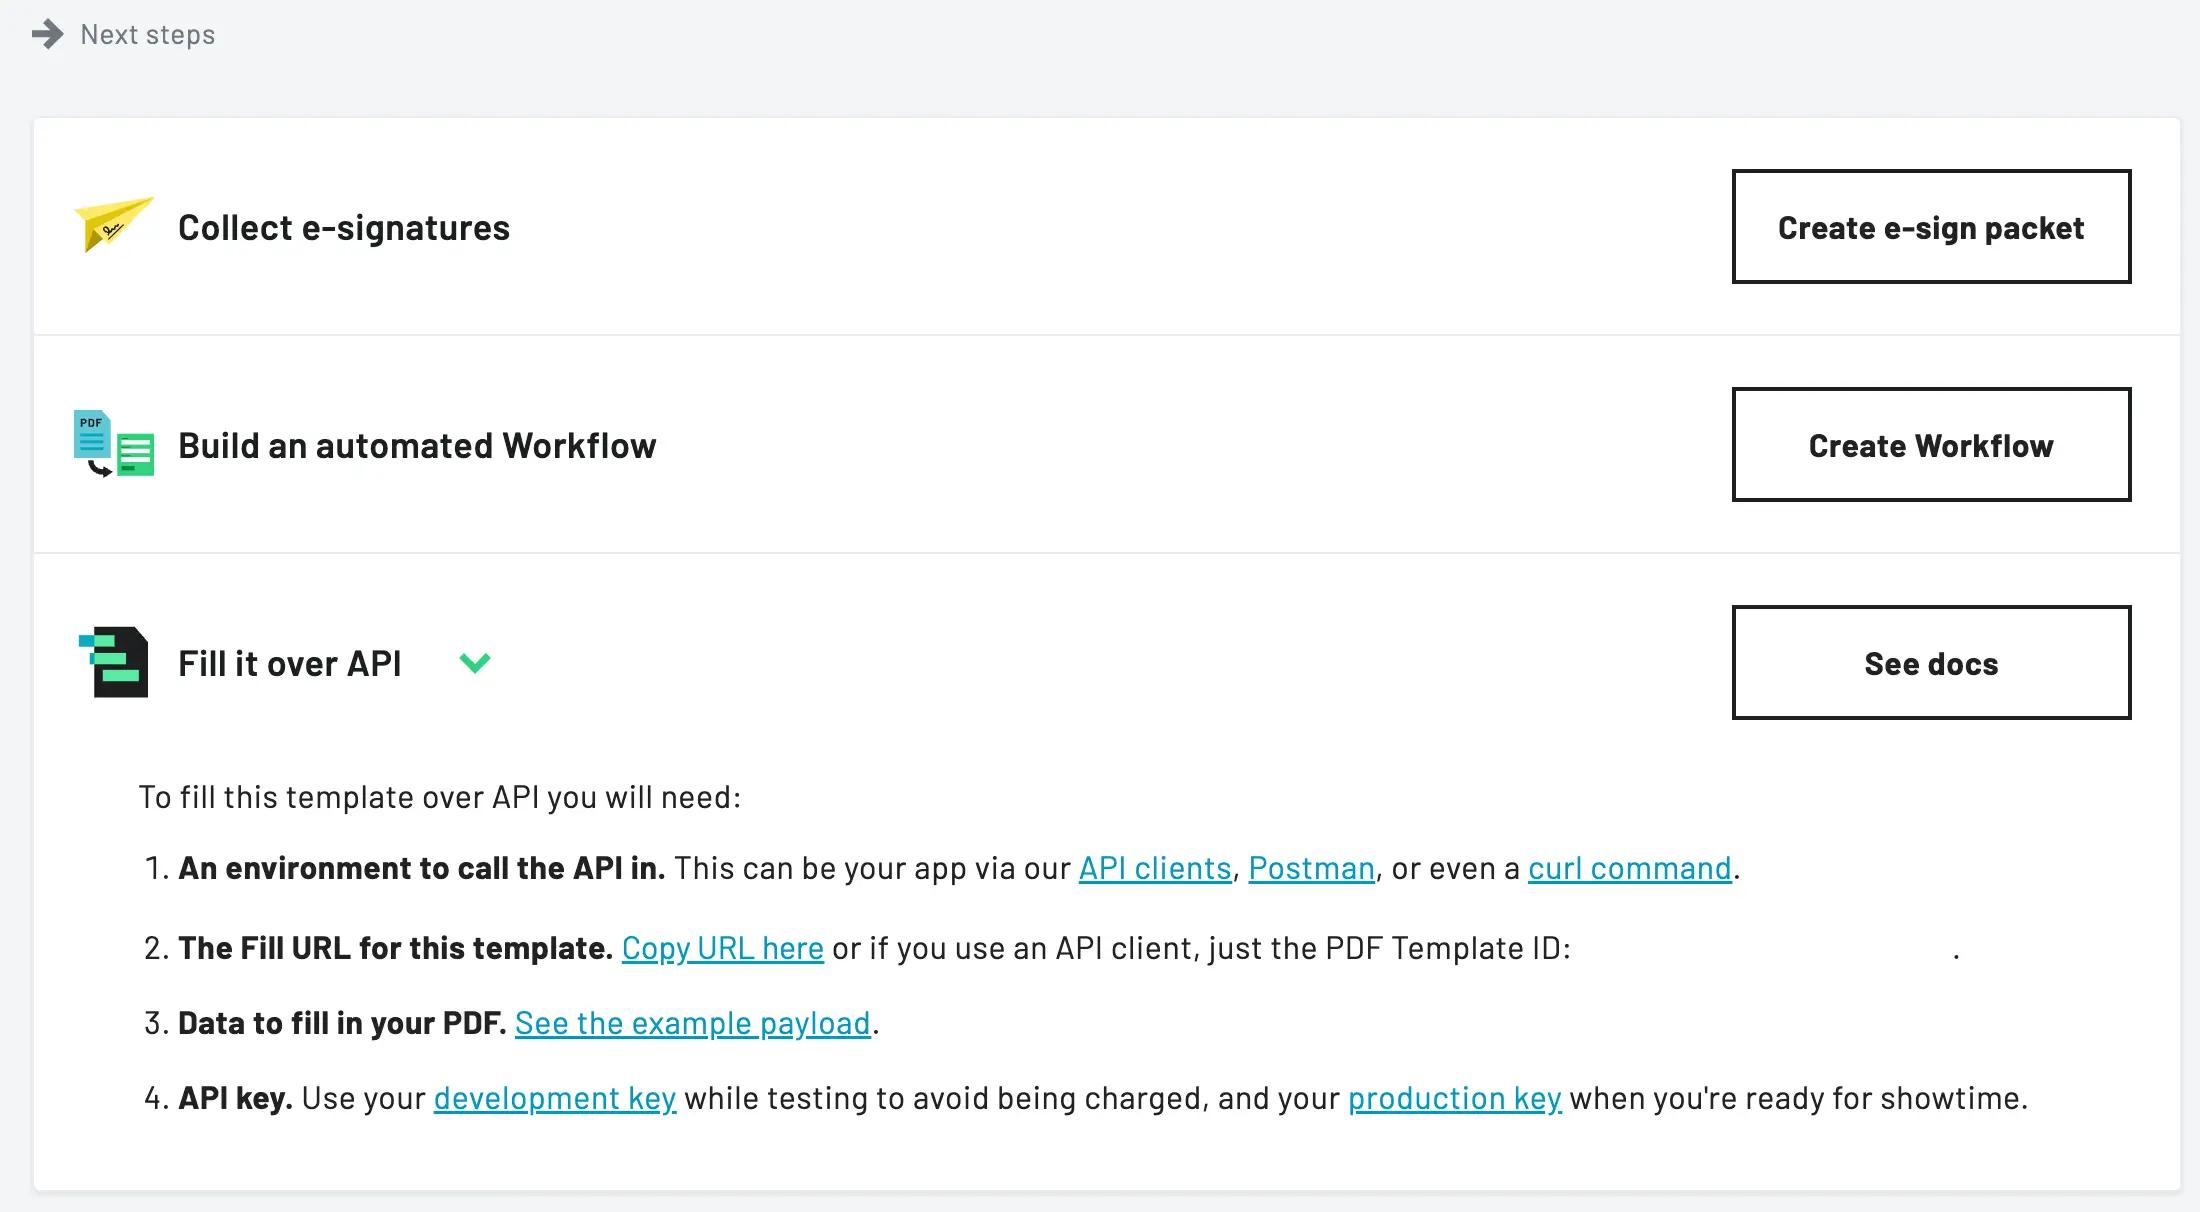
When you finish editing fields and publish the PDF, you are taken to the Document Template dashboard. From there, click on the template that you want to add data to. It shows everything you need to fill the template with the API, including an example payload to quickly get started.
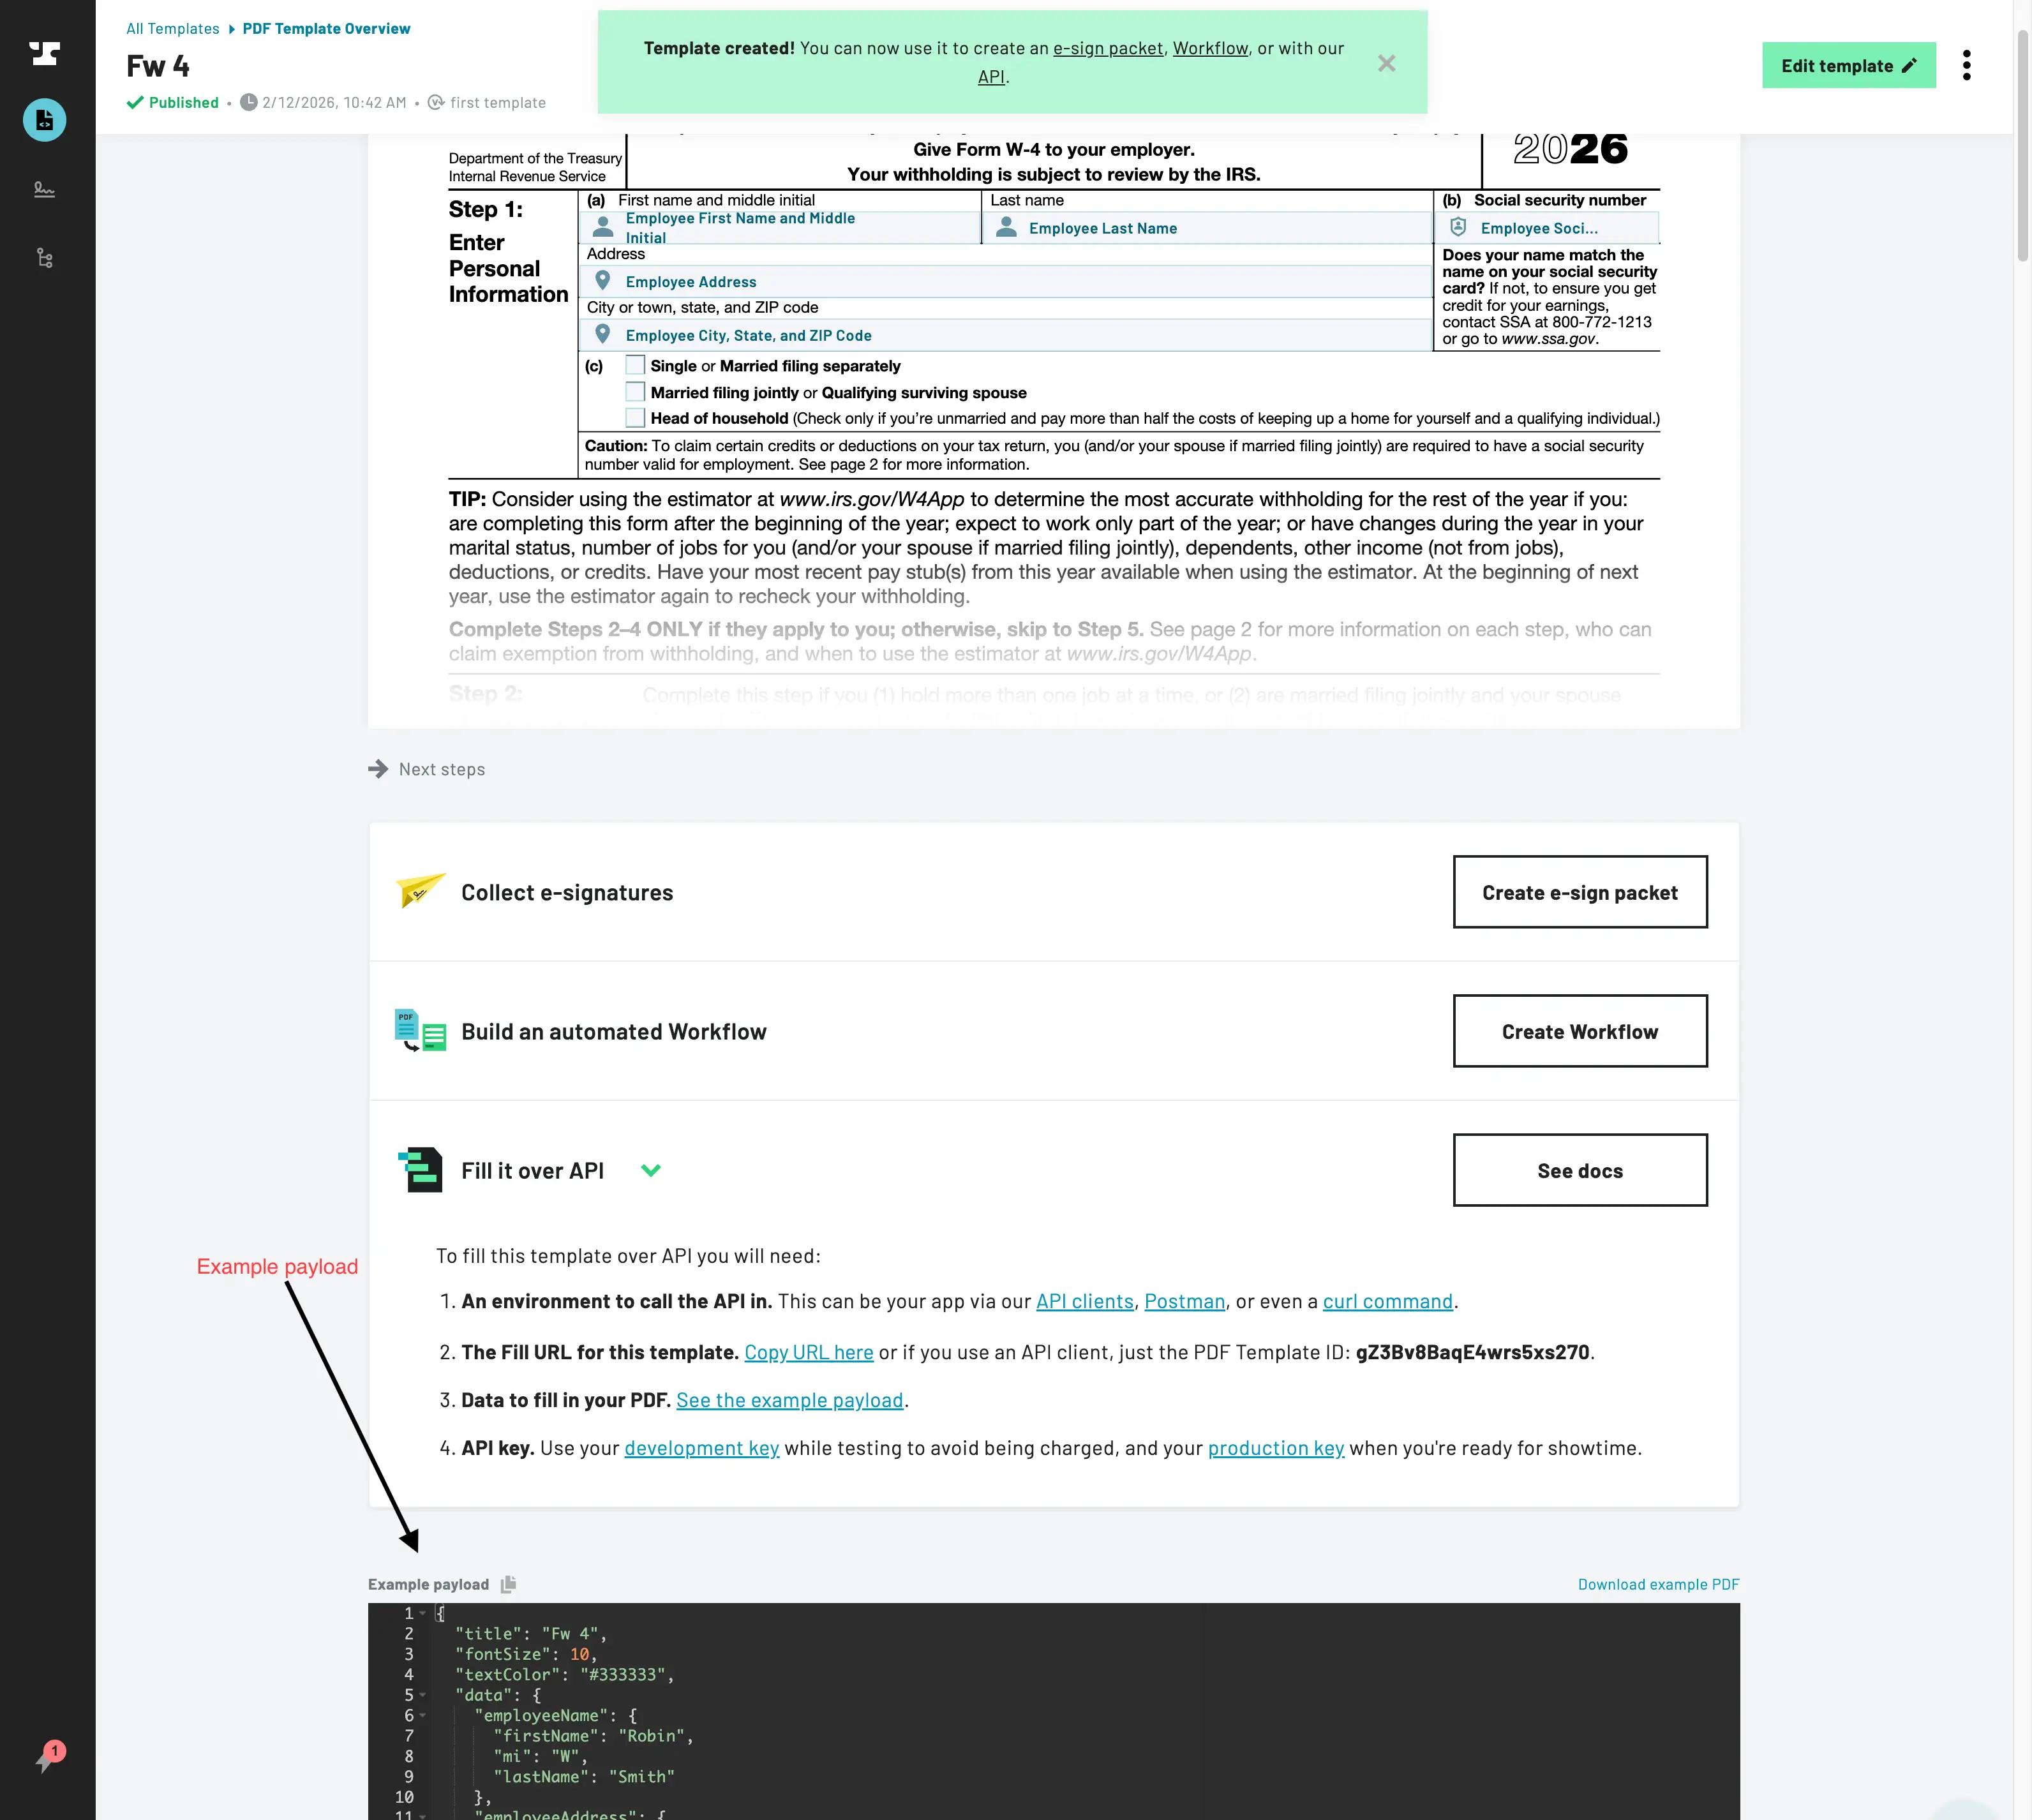 Viewing PDF Template API Info
Creating a template via API
You can also create PDF templates programmatically using the createCast GraphQL mutation. This is the approach used when your own users upload documents to your app — your server receives the file and forwards it to Anvil.
createCast returns a new Cast object. In subsequent steps you can generate an embeddable URL to let users edit the template, or begin filling it directly.
Here is a JavaScript example; the query and response are applicable in any language:
import fs from 'fs'
import Anvil from '@anvilco/anvil'

const anvilClient = new Anvil({ apiKey: ANVIL_API_TOKEN })

const createCastMutation = `
  mutation CreateCast(
    $organizationEid: String,
    $title: String,
    $file: Upload!,
    $isTemplate: Boolean,
    $detectFields: Boolean,
    $advancedDetectFields: Boolean,
    $detectBoxesAdvanced: Boolean,
  ) {
    createCast (
      organizationEid: $organizationEid,
      title: $title,
      file: $file,
      isTemplate: $isTemplate,
      detectFields: $detectFields,
      // Document AI arguments: you need the AI Pack or higher to use these
      // 1. Finds fields from boxes
      advancedDetectFields: $advancedDetectFields,
      // 2. Finds boxes on the document; if interactive fields (acroform fields)
      // are present, we use those instead of using Document AI to find boxes
      detectBoxesAdvanced: $detectBoxesAdvanced,
    ) {
      eid
      name
      title
      isTemplate
    }
  }
`

const fileBytes = fs.readFileSync('./any-pdf.pdf')
const buffer = Buffer.from(fileBytes)

// Upload the PDF and create a template
const { data: createCastResponse, errors } = await anvilClient.requestGraphQL({
  query: createCastMutation,
  variables: {
    // Anvil.prepareGraphQLFile() accepts a buffer, stream, or file object
    file: Anvil.prepareGraphQLFile(buffer, {
      // filename is required with a buffer or stream
      filename: 'Test Upload.pdf',
      mimetype: 'application/pdf',
    }),

    title: 'Test Upload',
    isTemplate: true,
    detectFields: true,
  },
})

if (errors) console.log(errors)

const newPDFTemplate = createCastResponse.data.createCast
console.log('createCast response', JSON.stringify(createCastResponse, null, 2))
Create a template from your own route handler
You can call createCast from your own upload route. Here's an example in JavaScript + express using multer to handle multipart uploads:
import express from 'express'
import multer from 'multer'

const upload = multer({ dest: 'uploads/' })
const app = express()

app.post('/upload', upload.single('anvilupload'), function (req, res, next) {
  // req.file has the user-uploaded file
  const file = Anvil.prepareGraphQLFile(req.file, {
    // filename is required with a buffer or stream
    filename: 'Test Upload.pdf',
    mimetype: 'application/pdf',
  })

  const {
    data: createCastResponse,
    errors
  } = await anvilClient.requestGraphQL({
    query: createCastQuery,
    variables: {
      file, // Pass the uploaded file to anvil
      title: 'Test Upload',
      isTemplate: true,
      detectFields: true,
    },
  })

  if (errors) console.log(errors)

  // Now you have a new PDF template!
  const newPDFTemplate = createCastResponse.data.createCast

  // generate an embed URL or whatever you'd like here...
})
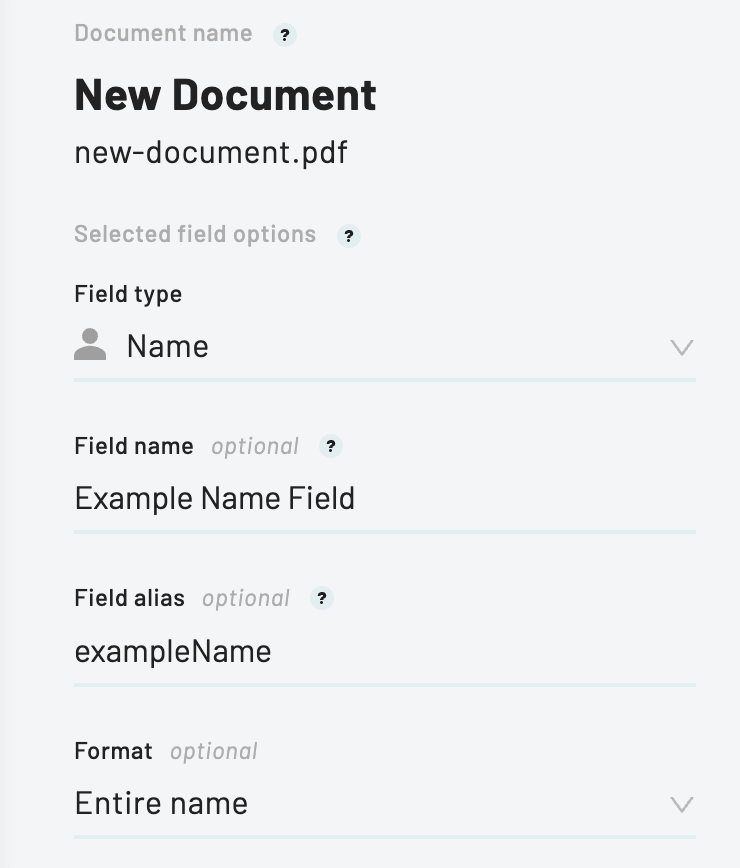
Field IDs and aliases
Each field on the PDF is referenced in the data with a unique ID. You can set your own IDs to make a PDF template easier to fill via the Field Alias field. Once done, hit publish to see the changes in the API
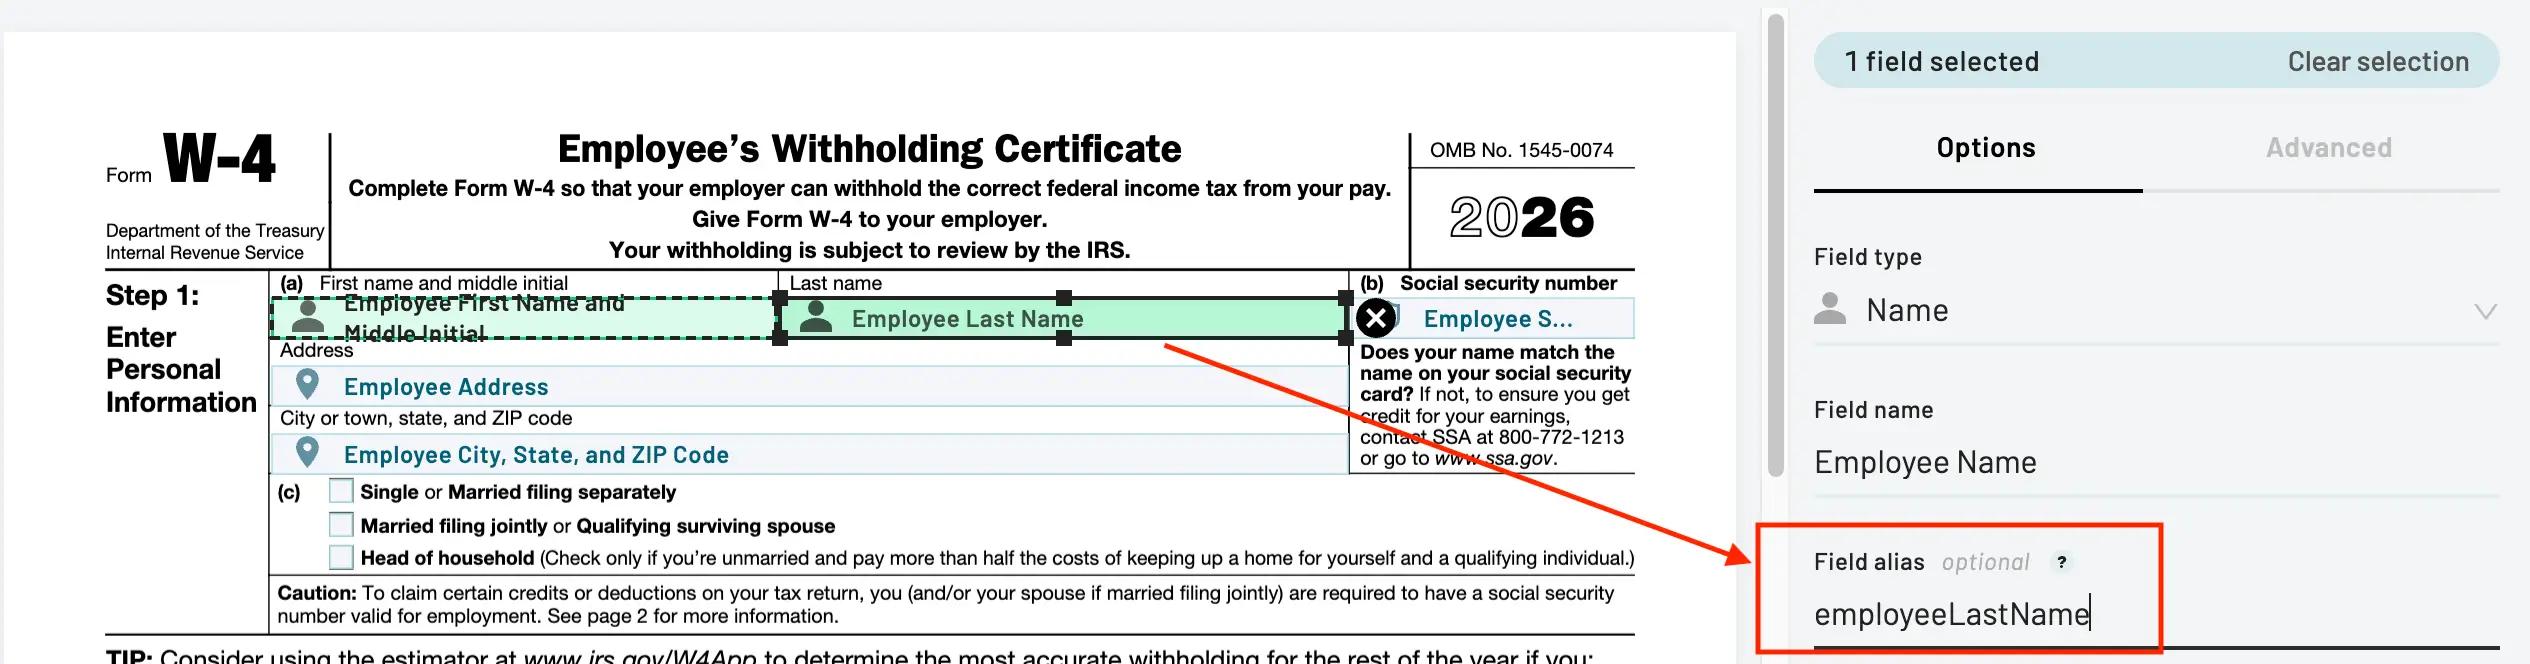 Setting a Field Alias in the PDF template builder
Once published, your new id will be reflected in the API:
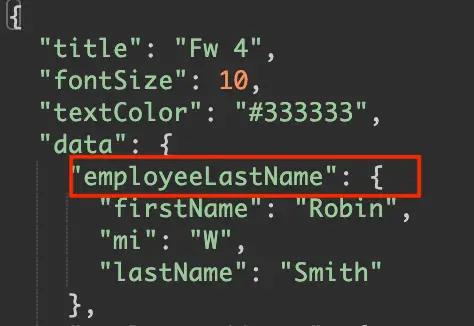 Field Alias reflected in the API
Combining fields
You may have a PDF that requires the same data to be placed in multiple fields on the PDF. For example, if someone's name was required to be placed at the bottom of each page.
You can combine fields by setting the Field Alias on each field to the same value. Then sending { name: "Robin Jones" } will fill any fields with the name field alias.
Field types
Each field has a type (e.g. phone, date, address, etc.). When you pass data to fill a PDF, the data will be formatted based on the type's rules before being inserted onto the PDF.
For many types, formatting rules can be chosen in the PDF template editor (e.g. dates, dollar, number, etc.).
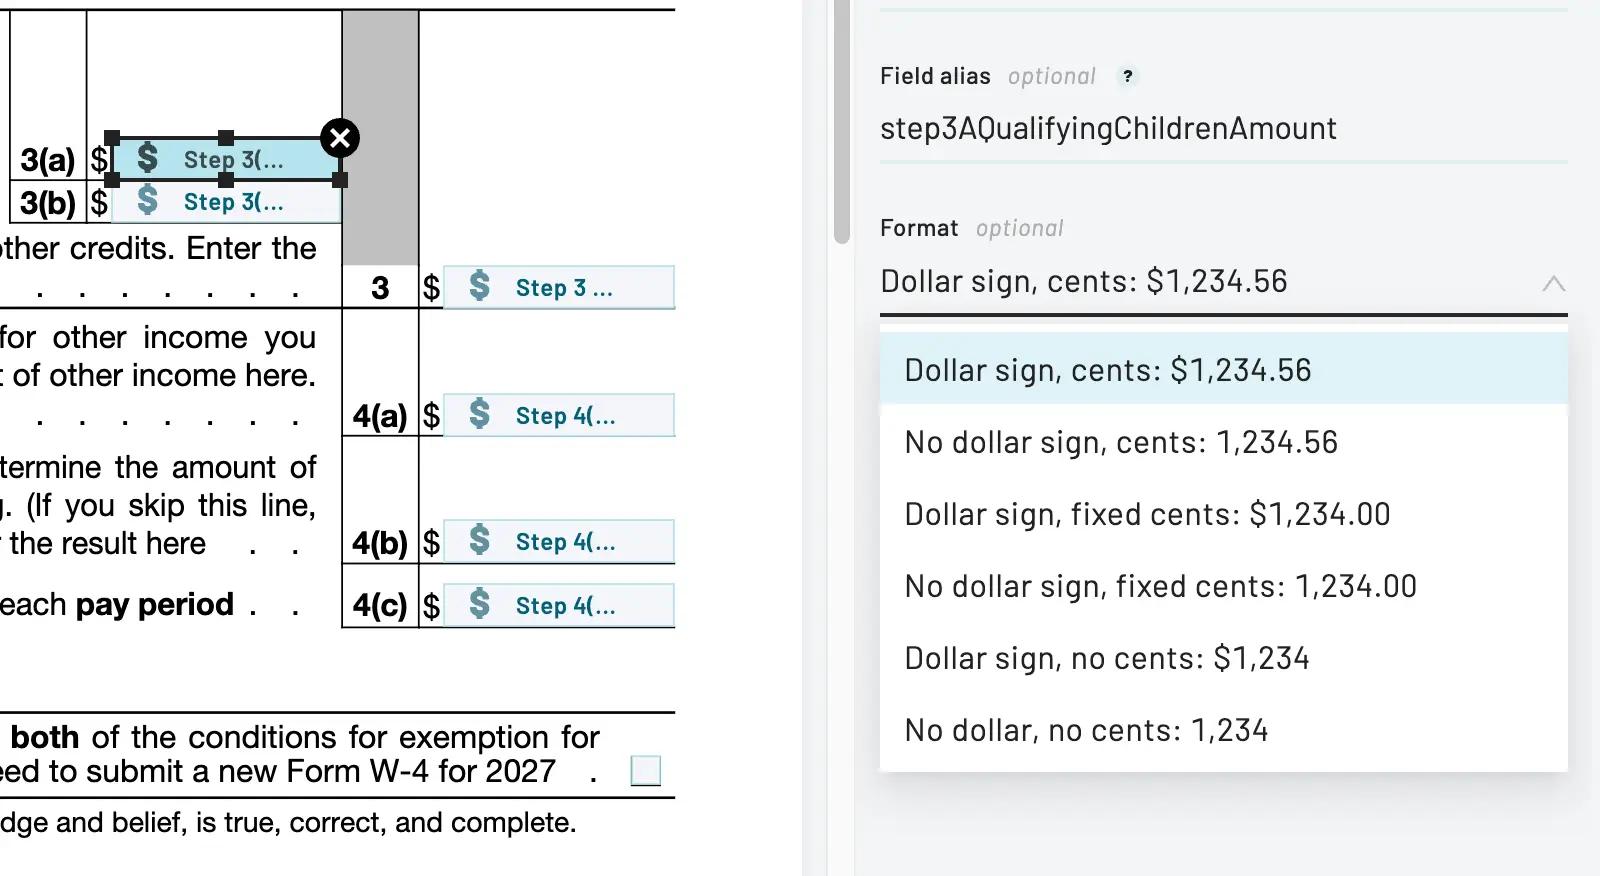 Specifying a field's format in the PDF template editor
Finding field types
To find API information, go to your dashboard and click on the template you want information on.
Document template dashboard
Scroll down to see the API information:
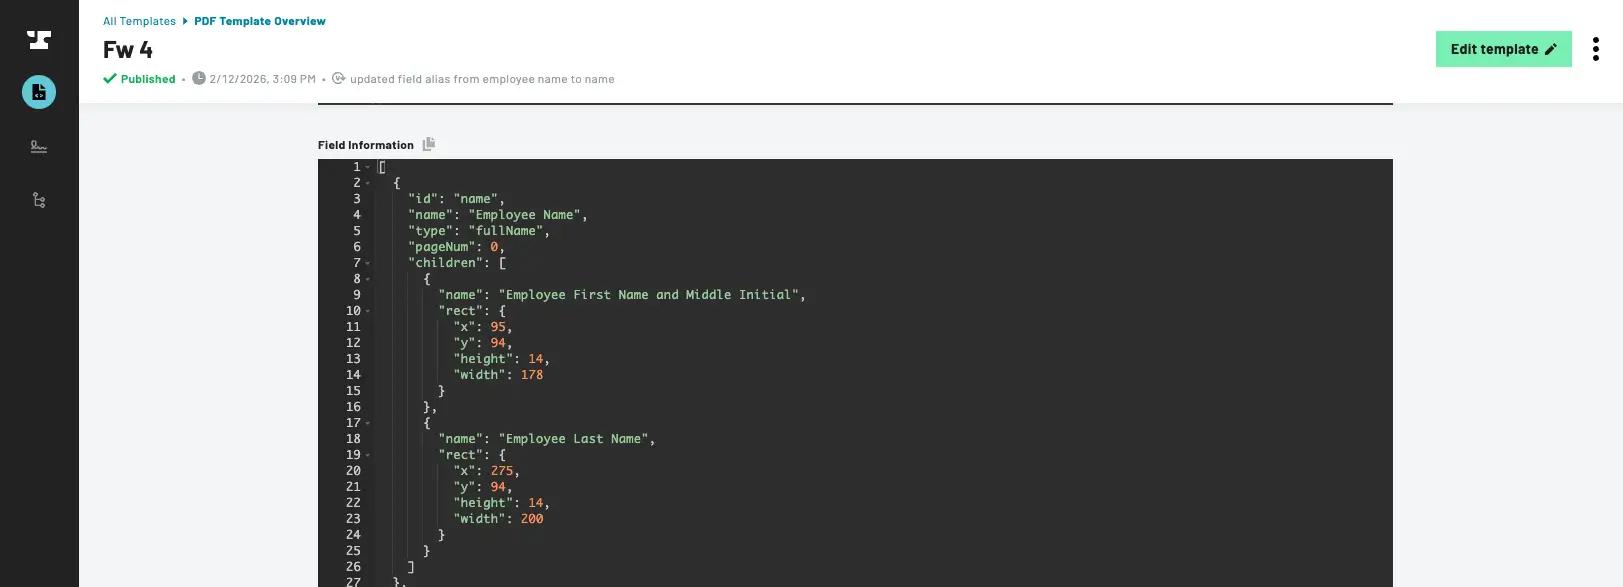 Field type information for a document template
All field types
This shows all field types and the format they need to be specified in the payload's data parameter.
// Strings
shortText: String
longText: String
email: String
ssn: String // in format '123121234'
ein: String // in format '921234567'
date: String // in format 'YYYY-MM-DD'

radioGroup: String // ID of the child field that should be selected

// Image fields accept a publicly accessible http URL of your image (max
// size: 10MB), or a 'data:' URL (max size of all data URLs in a payload: 100k). If an http image is too large or the URL is not a valid image, the
// image field will not be filled. The max request body size is 100k,
// requests with data URLs over 100k will respond with a 413 error code.
imageFile: String

// Bools
checkbox: Boolean

// Numbers
number: Number
dollar: Number
integer: Number
percent: Number // 0 to 100

// Complex types

// "Boxes Per Letter" in the UI. This will render each character
// in a separate field. e.g. [][][][] with 'Unicorn' input will
// render [U][n][i][c]
charList: String

// "Boxes Per Line" in the UI. It represents several boxes stacked
// into lines. Each newline or element in the array will be rendered
// into the subsequent box.
textWrap: String or Array of lines

// A fullName represents a group of boxes for
// firstName, middle initial, and lastName
fullName: Object {
  firstName: 'Bobby',
  mi: 'W',
  lastName: 'Jones'
}

usAddress: Object {
  street1: '123 Main St',
  street2: '#18', // (Optional) used when street2 field is drawn
  city: 'San Francisco',
  state: 'CA',
  zip: '94106',
  country: 'US' // (Optional) used when country field is drawn
}

phone: Object {
  num: '555113333',

  // Region information is optional, default is US. Currently
  // supported regions are US, MX, CA, GB and any related regions
  // using the +1 (US, CA, GU, etc.), +44 (GB, IM, GG, JE), or +52
  // country codes.
  //
  // If `baseRegion` and `region` match, it will display the number
  // as a local number, without country code information.
  //
  // e.g.
  // { num: '4355345345', region: 'US', baseRegion: 'US' } => '(435) 534-5345'
  // { num: '4355345345', region: 'US', baseRegion: 'MX' } => '+1 (435) 534-5345'
  // { num: '4355345345', region: 'MX', baseRegion: 'MX' } => '435 534 5345'
  // { num: '4355345345', region: 'MX', baseRegion: 'US' } => '+52 435 534 5345'
  region: 'US',
  baseRegion: 'US'

  // `phone` data can be supplied as a string for convenience.
  // `region` and `baseRegion` will be assumed to be `US`
}
Required fields
Coming soon — documentation for required fields in PDF templates is in progress.
Default field values
Coming soon — documentation for default field values in PDF templates is in progress.
Interactive fields
Interactive fields are the native form fields built into a PDF itself — known as AcroForm fields (or form field annotations) in the PDF specification. Unlike fields you place on top of a static document in the Anvil template builder, interactive fields live inside the PDF and are recognized by any standard PDF viewer.
Because they're part of the document, end-users can fill out the PDF directly — typing into text boxes, checking checkboxes, and selecting options right in their PDF reader, without needing Anvil's interface.
The PDF filling API can output interactive fields today — preserving the form fields a source PDF already has, or adding them where it doesn't.
Support for outputting interactive fields directly from PDF templates is coming soon.
Document AI and schema support
Anvil's Document AI reduces the manual work of tagging fields on uploaded PDFs. It runs at upload time as part of createCast and works in up to three stages:
Stage 1 — Box finding (detectBoxesAdvanced: true)
AI scans the document and draws boxes around every visible input field. This works on any PDF — including scanned documents and files created in Word or Google Docs that have no native form fields.
Stage 2 — Label and type finding (advancedDetectFields: true)
AI reads the label next to each found box and infers a field name and type (date, text, signature, etc.). This runs on top of box finding results and also improves detection on native PDF form fields.
Stage 3 — Schema mapping (requires aliasIds)
AI maps found fields to your schema. This is where you choose between two approaches:
BYO schema (recommended for integrations)
Provide an aliasIds object that maps your system's field keys to natural-language descriptions. After stages 1 and 2, the AI does a third pass: it matches found fields to your schema and sets your aliasId on any field it deems a match. Your downstream code gets predictable, stable keys regardless of what the PDF looks like.
This is the approach to use when you're building an integration where you know the fields your system expects — a client name, a date of birth, a signature — and want those mapped reliably across many different uploaded documents.
AI-generated schema
If you omit aliasIds, Anvil still runs box finding and label finding, generating field names automatically from the document. The resulting field IDs are AI-inferred and less predictable, but this is useful for exploring a new document type or letting Anvil do a first pass before manual review.
Using Anvil MCP
You can also create and fill PDF templates conversationally using the Anvil MCP server. The graphql_query tool can run any GraphQL mutation — including createCast — and the fill_pdf tool fills any template by EID. Once connected to an MCP-compatible AI client, you can prompt it to create templates, list your Cast library, or fill documents without writing API calls directly.
See the MCP docs for setup and the full tool reference.
Example: BYO schema with AI
The following createCast call enables all three stages. The aliasIds object defines the schema — key names are your system's field IDs, and description tells the AI how to recognize each one:
aliasIds can be an array of strings or an array of objects. Here's a full example using objects:
import fs from 'fs'
import Anvil from '@anvilco/anvil'

const anvilClient = new Anvil({ apiKey: ANVIL_API_TOKEN })

const createCastMutation = `
  mutation CreateCast(
    $title: String
    $file: Upload!
    $isTemplate: Boolean

    $aliasIds: JSON
    $detectBoxesAdvanced: Boolean
    $advancedDetectFields: Boolean
  ) {
    createCast (
      title: $title
      file: $file
      isTemplate: $isTemplate

      aliasIds: $aliasIds
      detectBoxesAdvanced: $detectBoxesAdvanced
      advancedDetectFields: $advancedDetectFields
    ) {
      eid
      name
      title
      isTemplate
    }
  }
`

const fileBytes = fs.readFileSync('./any-pdf.pdf')
const buffer = Buffer.from(fileBytes)

// Field aliases from your own system. AI will try to assign found fields
// to field information specified in this object
const aliasIds = {
  // The key is an aliasId you expect to find on the document
  customClientName: {
    // `description` describes to the LLM how to detect this particular field. Be concise but descriptive in your descriptions.
    description:
      'A name of a client. Client is often the recipient on agreements.',
  },
  customClientEmail: {
    description: 'An email of a client.',
  },
  customClientDob: {
    description: "A client's date of birth",

    // You can specify other field attributes you would like associated with
    // this field. It will use these attributes instead of AI generated
    // attributes when this field is found
    name: 'Client Date of Birth',
    type: 'date',
    format: 'MM/DD/YYYY',

    // All supported attributes that will be mapped into a found field:
    // "type"
    // "name"
    // "format"
    // "alignment"
    // "fontSize"
    // "fontWeight"
    // "fontFamily"
    // "textColor"
    // "textStyle"
  },
}

const { data: createCastResponse, errors } = await anvilClient.requestGraphQL({
  query: createCastMutation,
  variables: {
    // AI auto-labeling parameters
    detectBoxesAdvanced: true, // Use AI to find fields on unfillable PDFs
    advancedDetectFields: true, // Use AI to discover field labels and types

    // Field aliases from your own system. AI will try to assign found fields
    // to field information specified in this object
    aliasIds: aliasIds,

    // The rest are the same as previous examples.

    // Anvil.prepareGraphQLFile() accepts a buffer, stream, or file object
    file: Anvil.prepareGraphQLFile(buffer, {
      // filename is required with a buffer or stream
      filename: 'Test Upload.pdf',
      mimetype: 'application/pdf',
    }),

    title: 'Test Upload',
    isTemplate: true,
    detectFields: true,
  },
})
Once you have uploaded the Cast object, generate an embedded template builder URL with fields that have matching field aliases as those specified above.
Note that all specified aliases may not be used on every document, and all fields on a document may not be mapped to one of your aliases. The AI will only use aliases that it deems are matches. If matching does not work as you intend, adjust the aliasIds array and / or tweak your descriptions.
Text tags
Text tags are an alternative way to place fields on a standardized template. Instead of drawing fields in the editor, you write special tags directly into your document's text — in your word processor or document generator, before the PDF reaches Anvil. When Anvil processes the file, it detects the tags and converts them into configured fields at those positions. This is handy when you generate PDFs programmatically and want fields placed automatically, with no manual editing step.
Syntax
A text tag is wrapped in double curly braces, with up to five colon-separated arguments:
{{ fieldType : fieldName : fieldAlias : signerID : required }}
- Only
fieldTypeis required; the rest are optional. Skip an argument with consecutive colons — e.g.{{ signature ::: signer1 }}is type +signerID. fieldNameis the human-friendly label shown for the field in the template editor.- Each tag must fit on a single line; spaces inside the braces are ignored.
signerIDonly applies when the document is used in an Etch e-sign packet — it attaches the field to the signer with the matching ID.- The last argument is
requiredoroptional, defaulting torequired. (Signature and signer fields are always required; the flag is ignored on those.)
For example:
// Required short text field, filled with the `clientName` alias
{{ shortText : Full name : clientName }}

// Optional short text field, filled with the `middleName` alias
{{ shortText : Middle name : middleName :: optional }}

// Required date field, filled with the `signedDate` alias
{{ date : Date signed : signedDate }}

// Signature + signature date for signer1, attached when used in an Etch packet
{{ signature ::: signer1 }}
{{ signatureDate ::: signer1 }}
Supported field types
Text tags support the same field types you can create in the template editor.
Signature & signer fields (always required):
signature, initial, signatureDate, signerName, signerEmail
Data fields (required by default):
shortText, longText, textWrap, charList, number, integer, dollar, percent, date, email, phone, ssn, ein, fullName, usAddress, checkbox, radioGroup, imageFile
radioGroup caveat: a radio group is written as one tag per option, with each option's tags sharing the same group name. The individual options are nested into a single group automatically when the template is saved.
See Field types for how each type formats data, and the text tags tutorial for a full walkthrough.
Dynamic templates
Everything above describes standardized templates — fields placed on top of a fixed PDF you upload. Anvil also supports dynamic templates, which you write from scratch in the Document Editor: a rich text editor (think Google Docs) for documents whose content changes from one fill to the next.
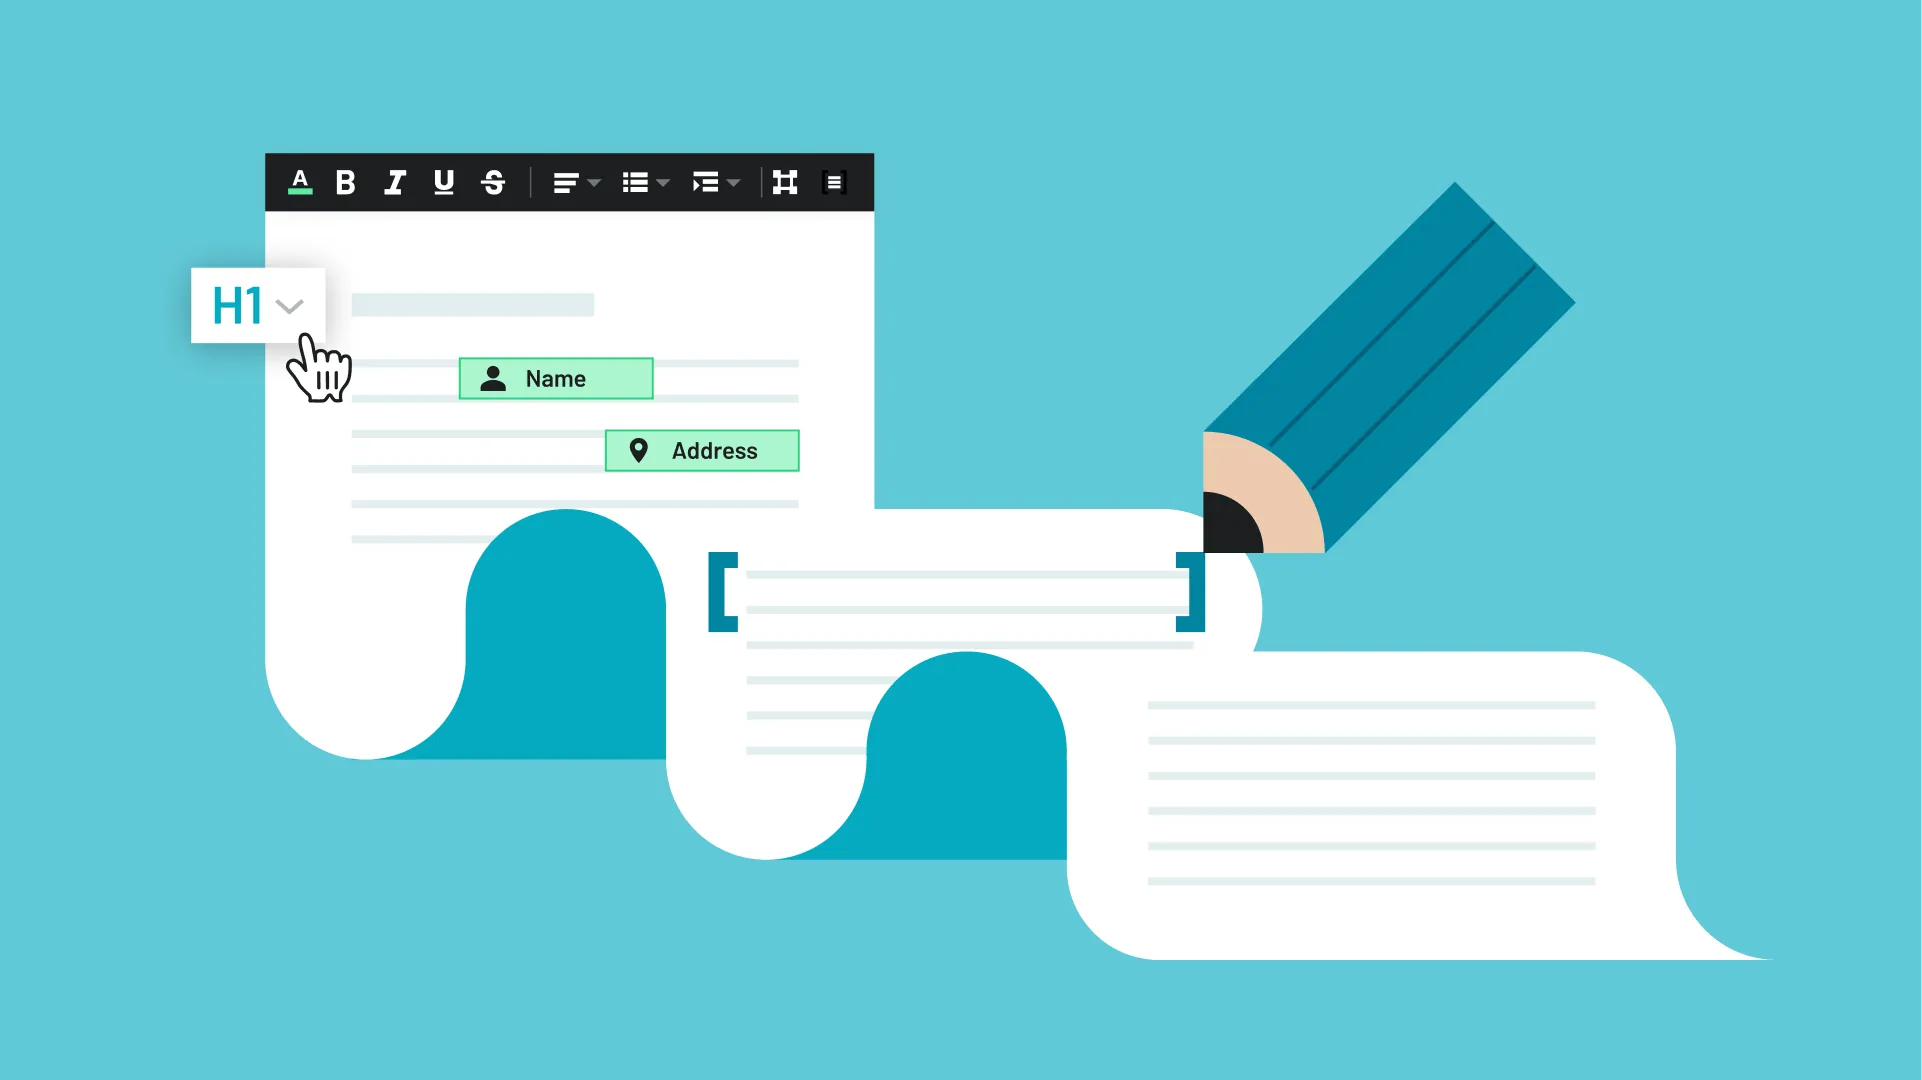 The Document Editor — write your document, drop in fields (green), and mark sections as clauses (the bracketed text)
Because the document is generated from your content rather than mapped onto fixed coordinates, pages flow to fit the data — no overlapping text or cut-off fields. That makes dynamic templates a good fit for text-heavy agreements, contracts, policies, and addendums, where the layout needs to adapt as the content changes.
A dynamic template is built from two main pieces:
- Fields — placeholders for any value (names, dates, dollar amounts, addresses, and so on). You fill them with data exactly like a standardized template's fields.
- Clauses — sections of text you can show or hide conditionally. Keep one template with every variation built in, instead of maintaining a separate document for each combination of terms.
Like a standardized template, a published dynamic template is a Cast with its own PDF template ID/Cast EID. Everything else in the Anvil API then works the same way — fill it with data, collect signatures, or drive it from a Workflow.
Note: Document AI — box finding, label detection, and schema mapping — runs when creating standardized templates only. It does not currently apply to dynamic templates, so you define variables and their field names yourself in the editor.
Creating a dynamic template
Dynamic templates are created in the dashboard rather than over the API. From the Document Templates section, click + Create template and choose the Document Editor option.
Creating a Dynamic Template
Inside the editor you write and format your document, then add the dynamic pieces:
- Write and format your content like any rich text document — headings, lists, bold and italic, alignment, and so on.
- Insert a field wherever a value should be filled in, and give it a field name. That name becomes the key you send in your fill
data. - Mark a section as a clause to make it conditional. Each clause can be set to always include, always exclude, or include based on a Webform field.
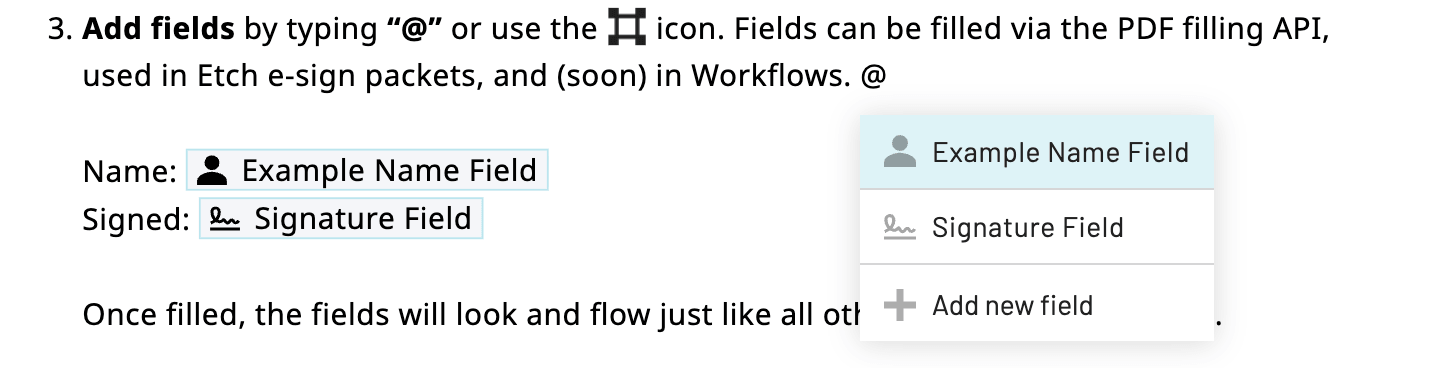 Inserting a field inline via the
 @ shortcut
 Inserting a field inline via the
 @ shortcut
 Each clause can be always on, always off, or driven conditionally by a Webform field
When the document is ready, publish it. As with standardized templates, publishing makes the latest version live for the API and generates an example payload you can fill from.
Filling and using a dynamic template
Once published, a dynamic template behaves like any other PDF template. Open it from the Document Templates dashboard to find its template ID, an example fill payload, and shortcuts to use it for e-signatures or in a Workflow.
 A published dynamic template can be filled over API, sent for e-signatures, or used in a Workflow
- Fill it with data — send your variable values to the PDF filling API just as you would for a standardized template. Keys in
datamatch the variable field names you set in the editor. - Collect e-signatures — reference the template when creating an Etch e-sign packet.
- Automate it in a Workflow — drive variables and clauses from Webform answers or upstream steps in a Workflow.
Field aliases and clauses
Like standardized templates, dynamic templates support field aliases: give a field your own ID so the key you send in data matches your data model instead of an auto-generated one.
Clauses can take an alias too. Select a clause in the Document Editor and assign an alias just as you would a field. A clause alias behaves like a boolean — pass true to include the clause in the output or false to leave it out. This lets you toggle conditional sections straight from your fill payload, without wiring each one to a Webform field.
POST https://app.useanvil.com/api/v1/fill/{pdfTemplateID}.pdf
{
  "data": {
    // A regular field alias
    "clientName": "Robin Jones",

    // A clause alias — toggles the whole section on
    "includeArbitrationClause": true
    // or to exclude the clause
    "includeArbitrationClause": false
  }
}
For a deeper walkthrough of building dynamic templates in the dashboard, see the Document Editor overview and the Set up dynamic templates guide.
Maintaining a PDF library
As your set of templates grows from a handful of forms into a library, a few habits keep it consistent and easy to fill from a single codebase. The same habits apply whether you curate a fixed set of your own document types or accept templates your users upload — though customer-uploaded libraries lean hardest on consistent field naming and schema mapping, since you don't control the documents coming in.
- Standardize field names across documents. Set field aliases that match your own data model — e.g.
client.name,client.email— instead of the auto-generated IDs. The same key then fills the right field on every template, so one payload from your database can drive many documents. When you create templates over the API, Document AI can map fields to your schema automatically. - Treat publishing as versioning. Every edit is saved to a draft and goes live when you publish a new version, while older versions stay available. You can fill against unpublished changes with
versionNumber=-1to test before publishing. Updating a template only affects future fills — existing Workflows and e-sign packets keep pointing at the version they were built with, so rebuild downstream to roll out changes. - Update the source PDF in place. When a form changes, replace the underlying PDF on the existing template rather than starting over. Your fields and aliases are preserved, so your integration keeps working without code changes.
Let Anvil build your library for you
Turning hundreds of blank forms into structured, schema-mapped templates is often the real bottleneck — not the filling itself. Anvil's team can do that work for you: detecting fields, standardizing names across forms, and mapping everything to one canonical schema so a single API request fills the correct boxes on every document.
Learn more about the PDF Library service and forward-deployed PDF engineering, or read our guide to creating a PDF template library.
Object shapes
CastField
An object specifying the configuration of a field in a Cast/PDF:
id: (string) required An ID with which to reference this field in its PDF. Must be unique within the PDF itself.
type: (string) required The type of field. E.g. "signature".
format: (string) The special format, if any, of the field.
name: (string) The human-friendly name of the field.
pageNum: (integer) required The page number in the document where this field is located. Starts at 0.
rect: (Rectangle) required The rectangular area/location of the field on its page.
fontFamily: (FontFamily) The font family to use when filling out this field.
fontSize: (FontSize) The font size to be used when filling out this field.
fontWeight: (FontWeight) The font weight to use when filling out this field.
textColor: (TextColor) The text color to be used when filling out this field.
alignment: (FontAlignment) The text alignment for the field.
CastReference
An object for referencing an existing PDF template when creating Etch e-sign packets.
castEid: (string) required The EID of an existing Cast to be used.
id: (string) required An ID with which to refer to this file in other objects.
title: (string) The title of the document to be used.
filename: (string) A file name that will override the template's intrinsic file name.
fontFamily: (FontFamily) The font family for fields in this file.
fontSize: (FontSize) Default font size for fields in this file.
fontWeight: (FontWeight) The font weight for fields in this file.
textColor: (TextColor) Default text color for fields in this file.
alignment: (FontAlignment) The text alignment for fields in this file.
Using your template
Once your template is created and configured — whether it's standardized or dynamic — you can put it to work:
- Fill it with data — use the PDF filling API to send JSON data and receive a completed PDF
- Collect e-signatures — reference the template when creating an Etch e-sign packet
- Embed the builder — let your users create and edit templates with the embedded template builder